
Changing your bike seat might seem like a daunting task if you’re dealing with discomfort during rides or an old, worn-out saddle that’s seen better days. Whether you’re upgrading to a more ergonomic model for long-distance cycling or simply replacing a damaged one, knowing how to change bike seat can save you time and money. The good news is, this is a straightforward DIY project that most cyclists can handle in under 30 minutes with basic tools—start by loosening the seat clamp bolt for a quick release of the old seat.
In this comprehensive guide, we’ll go beyond the basics to cover everything you need to successfully swap out your bike seat. You’ll learn about the tools required, step-by-step instructions tailored for different bike types, safety tips to avoid common pitfalls, and even advanced adjustments for optimal fit. By the end, you’ll have the confidence to perform the change yourself, ensuring a more comfortable and efficient ride without needing a bike shop visit.
What You’ll Need to Change Your Bike Seat

Before diving into the process, gather the right tools and materials to make how to change bike seat as smooth as possible. Most bikes use a standard seat post and clamp system, but variations exist for mountain bikes, road bikes, or those with quick-release mechanisms. Having everything on hand prevents frustrating trips to the hardware store mid-project.
Here’s a handy table outlining the essentials:
| Item | Quantity | Specifications |
|---|---|---|
| Allen wrench set (hex keys) | 1 set | Sizes 4mm, 5mm, and 6mm for most seat clamps; metric for precision |
| Adjustable wrench or torque wrench | 1 | For tightening bolts without stripping; torque wrench ideal for 5-8 Nm on carbon frames |
| New bike seat (saddle) | 1 | Compatible with your bike’s seat post (e.g., 27.2mm diameter); consider width based on sit bone measurement |
| Bike grease or anti-seize compound | Small tube | Prevents corrosion on metal parts; optional but recommended for threaded posts |
| Clean rag or microfiber cloth | 1-2 | For wiping down the seat post and frame |
| Bike stand (optional) | 1 | Upside-down bike holder for stability; use a wall or friend if unavailable |
| Screwdriver (flathead or Phillips) | 1 | For rare cases with older bikes or accessories like seat covers |
These items are affordable and widely available at bike shops or online retailers like REI or Amazon. If your bike has a dropper post or integrated seat post, you might need specialized tools—check your bike’s manual for specifics.
Preparing to Change Your Bike Seat
Proper preparation is key to a successful seat change and helps avoid damaging your bike’s frame or the new saddle. Start by working in a well-lit, flat area like a garage or driveway, ideally with your bike elevated for easier access. This not only makes the job safer but also reduces strain on your back.
Safety Considerations
Warning: Always wear gloves to protect your hands from sharp edges on tools or rusty bolts. If your bike has electronic components (like a dropper post), disconnect the battery first to prevent shorts. For carbon fiber frames, use a torque wrench to avoid over-tightening, which can crack the material—stick to manufacturer-recommended torque settings, usually 5-6 Nm for seat clamps.
Initial Preparation Steps
- Clean the bike: Wipe down the seat post area with a rag to remove dirt, sweat, or grime that could affect the new seat’s fit.
- Measure for compatibility: Note your current seat post diameter (common sizes: 27.2mm for road bikes, 30.9mm or 31.6mm for mountain bikes) and rail type (round or oval). Your new seat should match to ensure stability.
- Inspect for wear: Check the old seat post for bends or corrosion. If damaged, replace the post too—it’s a common oversight that leads to wobbly rides.
Taking 5-10 minutes for these steps can prevent issues down the line, especially if you’re new to bike maintenance.
Step-by-Step Guide to Changing Your Bike Seat
Now for the main event: the actual process of how to change bike seat. This guide assumes a standard threaded or clamp-style seat post, which covers 90% of bikes. For bikes with quick-release levers (like some hybrids), the process is even simpler—just flip the lever and slide off. We’ll break it into clear phases, with estimated times for each. Total time: 15-30 minutes.
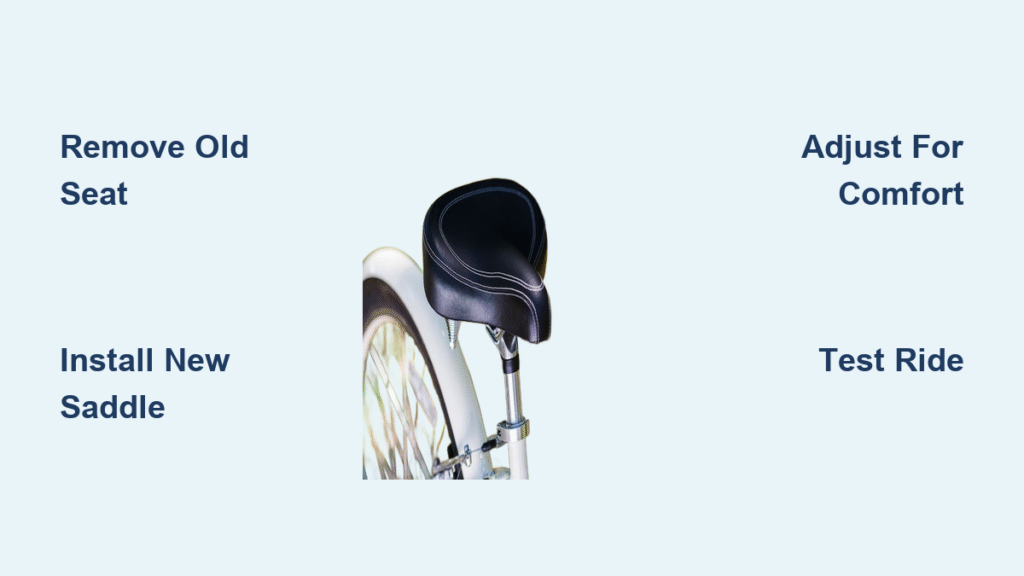
Phase 1: Removing the Old Seat
This is the easiest part and usually takes just 2-5 minutes. Position your bike securely, either on a stand or flipped upside down with the handlebars padded to avoid scratches.
- Locate the seat clamp: It’s typically under the saddle, where the seat post meets the frame. Look for a bolt on the side or top of the clamp.
- Loosen the clamp bolt: Use the appropriate Allen wrench (usually 5mm) to turn counterclockwise. If it’s a quick-release, simply open the lever. Apply steady pressure—don’t force it if it’s seized; a drop of penetrating oil like WD-40 can help.
- Slide out the seat post: Once loose, lift the saddle straight up and off the post. If it’s stuck due to rust, gently wiggle it while pulling. Important: Mark the post height with tape before removal to reinstall at the same position for consistent pedaling.
If the bolt is stripped, stop here and consider professional help to avoid frame damage.
Phase 2: Preparing the New Seat
Spend 3-5 minutes here to ensure a proper fit. A mismatched seat can cause discomfort or instability.
- Inspect the new seat: Check the rails (the metal strips under the saddle) for straightness. Apply a thin layer of bike grease to the rails where they contact the clamp—this reduces friction and prevents creaking.
- Align the seat: For most bikes, the nose of the seat should point forward, parallel to the handlebars. On mountain bikes, a slight rear tilt (1-2 degrees) is common for off-road comfort.
- Slide onto the post: Insert the seat post into the frame tube, matching your marked height. If it’s a new post, ensure it’s inserted at least 5-7 cm into the frame for safety.
Phase 3: Installing and Securing the New Seat
This phase takes 5-10 minutes and is where precision matters for a secure, vibration-free ride.
- Position the saddle: Center it on the post so your sit bones are supported evenly—use a sit bone measurement tool from a bike shop if unsure (aim for a seat 10-20mm wider than your sit bones).
- Tighten the clamp: Insert the Allen wrench and turn clockwise. For clamp-style, tighten to snug (about 5-6 Nm). For binder bolts (under the frame), use a torque wrench if available.
- Check alignment: Sit on the bike and rock it side-to-side. The seat should feel stable without play. Adjust fore-aft position so the “knee over pedal spindle” rule applies: When pedaling, your forward knee should align with the pedal axle at 3 o’clock position.
Pro Tip: After tightening, ride a short test loop (as detailed below) and re-check tightness, as vibrations can loosen things.
Handling Variations and Complications

– Dropper posts: These require removing the entire post assembly. Consult your model’s manual (e.g., for Fox or RockShox) and use specific tools like a cassette lockring remover if needed.
– Integrated seats (e.g., carbon road bikes): These might need rail clamps or adapters—double-check compatibility to avoid voiding warranties.
– If it doesn’t fit: Measure twice; if the post diameter is off by even 0.2mm, it won’t slide in. Shim kits are available for minor mismatches.
Testing and Adjusting Your New Bike Seat
Once installed, don’t just hop on for a long ride—test thoroughly to ensure safety and comfort. This post-installation phase takes 5-10 minutes initially, plus a short test ride.
- Visual and manual check: Ensure the seat is level using a smartphone app or carpenter’s level on the saddle. Tighten any loose bolts.
- Short test ride: Pedal around your driveway or a flat block at low speed. Check for wobbling, numbness, or hot spots. Adjust height (pedal at bottom of stroke should have a 30-35 degree knee bend) or tilt as needed.
- Fine-tuning: If discomfort persists, loosen the clamp and shift the seat forward/back 5mm at a time. For advanced setups, use a bike fit app or visit a shop for professional analysis.
Troubleshooting Common Issues:
– Seat slips down: Tighten more or check for grease buildup—clean and reapply anti-seize.
– Rails bend: Indicates over-tightening; loosen and use a torque wrench next time.
– Uneven pressure: Reposition based on your riding style (upright for commuters, aggressive for racers).
Regular adjustments every 50-100 miles will keep your setup optimal as your body adapts.
Pro Tips for Bike Seat Replacement

To elevate your bike seat change from basic to pro-level, here are 5-7 expert tips drawn from cycling mechanics and long-time riders:
- Measure your sit bones first: Visit a bike shop for a free fitting or use a DIY cardboard method—cutouts under your shorts reveal pressure points for the perfect saddle width.
- Choose the right material: Gel or leather for comfort on long rides; carbon fiber for lightweight racing. Avoid cheap foam seats that compress quickly.
- Common mistake to avoid: Ignoring fore-aft adjustment, which can lead to knee pain. Use the “ball of foot on pedal” test for balance.
- Optimize for your bike type: Mountain bikes benefit from wider, cushioned seats; road bikes need narrow, aerodynamic ones to reduce drag.
- Seasonal maintenance: Re-grease rails every 6 months to prevent squeaks, especially in wet climates.
- Upgrade while you’re at it: Consider a seat post with setback for better reach or a suspension post for rough terrain.
- Eco-tip: Donate or recycle your old seat—many bike co-ops accept them for refurbishing projects.
These tweaks can extend your saddle’s life and enhance performance, potentially shaving minutes off your ride times.
When to Seek Professional Help
While how to change bike seat is DIY-friendly for most, some situations call for a pro. If your bike is high-end (e.g., $2,000+ carbon frame) or you’re dealing with custom geometry, a shop visit ensures no damage.
- Signs you need help: Stripped bolts, integrated electronic posts, or persistent instability after DIY attempts. Also, if you’re experiencing chronic pain, it might indicate a full bike fit issue.
- What to look for in a service provider: Certified mechanics (e.g., from the United Bicycle Institute) with good reviews on Yelp or BikeForums. Ask about experience with your bike brand (Trek, Specialized, etc.).
- Typical cost ranges: $20-50 for a basic seat swap; $100+ for full fitting. Labor is often 15-30 minutes.
- Warranty considerations: DIY changes rarely void warranties, but improper torque can. Keep receipts for the new seat, as most (like from Selle Italia) offer 2-5 year coverage.
Don’t hesitate—local shops often provide quick, affordable service.
FAQ
Q: How long does it take to change a bike seat?
A: For most standard bikes, the entire process takes 15-30 minutes. Beginners might add 10 minutes for measurements and adjustments. Quick-release systems can be done in under 5 minutes.
Q: Do I need special tools to change my bike seat?
A: Basic Allen wrenches suffice for 80% of bikes, but a torque wrench is recommended for carbon frames to prevent damage. No advanced tools are needed unless it’s a dropper post.
Q: Can I change the seat on any type of bike?
A: Yes, but methods vary. Road and hybrid bikes use simple clamps; mountain bikes with droppers require more steps. Always check your model’s manual for specifics.
Q: What if my new seat doesn’t fit the old post?
A: Measure the post diameter first (use calipers for accuracy). If mismatched, buy an adapter shim or a compatible seat—common sizes are 27.2mm, 30.9mm, or 31.6mm.
Q: How do I know if my bike seat height is correct after changing it?
A: Aim for a 30-35 degree knee bend at the bottom of the pedal stroke. Use a plumb line from your knee to check alignment over the pedal spindle. Test ride and adjust in 5mm increments.
Q: Is it okay to ride immediately after changing the seat?
A: Do a short 5-10 minute test ride first to check stability. Full rides are fine once adjusted, but monitor for discomfort in the first few outings as your body adapts.
Q: Can changing the bike seat improve my riding comfort?
A: Absolutely— a proper saddle reduces pressure on soft tissues and aligns your hips correctly. Many riders report less numbness and better power transfer after a good swap.
Q: What should I do with my old bike seat?
A: Clean it and donate to a community bike program, sell on eBay, or recycle the foam and rails. Avoid landfills—upcycling keeps cycling sustainable.
Enjoy Your Comfortable Ride with the New Seat
You’ve now mastered how to change bike seat with our detailed guide, from gathering tools to fine-tuning for the perfect fit. Here’s a quick recap of the key solutions:
– Essential tools and materials for a hassle-free swap
– Preparation steps and safety checks to protect your bike
– Step-by-step removal, installation, and testing phases
– Pro tips and troubleshooting for long-term success
Following these instructions ensures a secure, comfortable upgrade that enhances every pedal stroke. Whether you’re commuting or conquering trails, your new seat will make a world of difference—take that test ride today and feel the improvement!
Have you changed your bike seat recently? Share your tips or challenges in the comments below to help fellow cyclists. If discomfort lingers, consult a pro for personalized advice. Happy riding!
(Word count: 1,652)


