
If you’ve ever taken off your bike seat for cleaning, adjustments, or repairs, only to find yourself staring at the seat post rails wondering how to get it back on properly, you’re not alone. This frustrating moment can sideline your rides and leave you second-guessing your DIY skills. The good news is that learning how to put bike seat back on rails is a straightforward process that most cyclists can handle at home with the right tools and steps. In fact, a quick fix often involves simply aligning the seat’s rails with the clamp and tightening it securely—taking just a few minutes if everything is in good shape.
In this comprehensive guide, we’ll go beyond that basic quick fix to cover everything you need to know for a hassle-free reinstallation. Whether you’re dealing with a standard road bike, mountain bike, or even an e-bike, we’ll walk you through preparation, detailed step-by-step instructions, common pitfalls, and post-install tips to ensure your seat feels stable and comfortable. By the end, you’ll have the confidence to tackle this yourself, saving time and money while getting back on the road or trail faster. Let’s dive in and get your bike seat back where it belongs.
What You’ll Need to Put Bike Seat Back on Rails
Before you start, gathering the right tools and materials is key to a smooth process. This prevents mid-job frustrations like stripping screws or uneven alignment. Most of what you’ll need is basic bike maintenance gear, but we’ll specify quantities and details for clarity. If you’re missing anything, a quick trip to a local bike shop or online retailer should sort it out.
Here’s a handy table of essentials:
| Item | Quantity | Specifications |
|---|---|---|
| Allen wrench set (hex keys) | 1 set | Sizes 4mm, 5mm, and 6mm for most seat clamps; get metric for precision |
| Torque wrench (optional but recommended) | 1 | Adjustable to 5-6 Nm for proper tightening without damage |
| Bike grease or anti-seize lubricant | Small tube | Waterproof formula to prevent corrosion on rails and clamp |
| Clean rag or microfiber cloth | 1-2 | Lint-free for wiping down rails and post |
| Seat post clamp (if damaged) | 1 | Match your bike’s frame size (e.g., 31.8mm or 35mm diameter); quick-release or bolt-on style |
| Screwdriver (flathead or Phillips) | 1 | For older bikes with non-Allen clamps |
Pro Tip: If your bike has a carbon fiber seat post or frame, use a torque wrench religiously—overtightening can crack the material. These items should cost under $50 total if you need to buy them.
Preparing to Install Your Bike Seat on the Rails
Proper preparation sets the stage for success and avoids safety issues like a wobbly seat that could lead to accidents during a ride. Start by working in a well-lit, stable area like a garage or bike stand to keep your bike upright. This makes aligning the rails much easier and reduces the chance of scratches on your frame.
Safety Considerations
Warning: Always wear gloves if handling greasy parts to avoid slips, and ensure your bike is stable—use a repair stand or lean it against a wall. If your bike has been in storage, check for rust or damage on the rails, as this could compromise the reinstall. Disconnect any electronic components (like e-bike batteries) if applicable to prevent accidental activation.
Initial Inspection and Cleaning
Before attempting to put bike seat back on rails, inspect everything:
– Remove any old tape or debris from the seat rails and post.
– Wipe down the seat post and rails with a clean rag dampened with isopropyl alcohol to remove dirt or old grease. This ensures a secure fit.
– Check the seat clamp for wear—if it’s bent or stripped, replace it immediately to avoid future loosening.
– Measure your desired seat height beforehand using a tape measure from the center of the bottom bracket to the top of the saddle (aim for 70-80% of your inseam for comfort).
This prep phase should take about 10-15 minutes and prevents common issues like slippage. If you’re unsure about measurements, reference your bike’s manual or an online inseam calculator for accuracy.
Step-by-Step Process to Put Bike Seat Back on Rails

Now comes the main event: the installation itself. We’ll break this into logical phases to make it digestible, whether you’re a beginner or experienced cyclist. The entire process typically takes 15-30 minutes, depending on your bike type. Use numbered steps for clarity, and remember to go slow—rushing can lead to misalignment.
Phase 1: Aligning the Seat Rails with the Post
This phase focuses on positioning, ensuring the seat faces forward and sits at the right height for ergonomics.
Determining Seat Position
- Slide the seat post into the frame tube to your pre-measured height. Mark the post with tape if needed for reference.
- Loosen the seat clamp bolts using the appropriate Allen wrench (usually 5mm)—turn counterclockwise until the clamp opens enough to accept the rails.
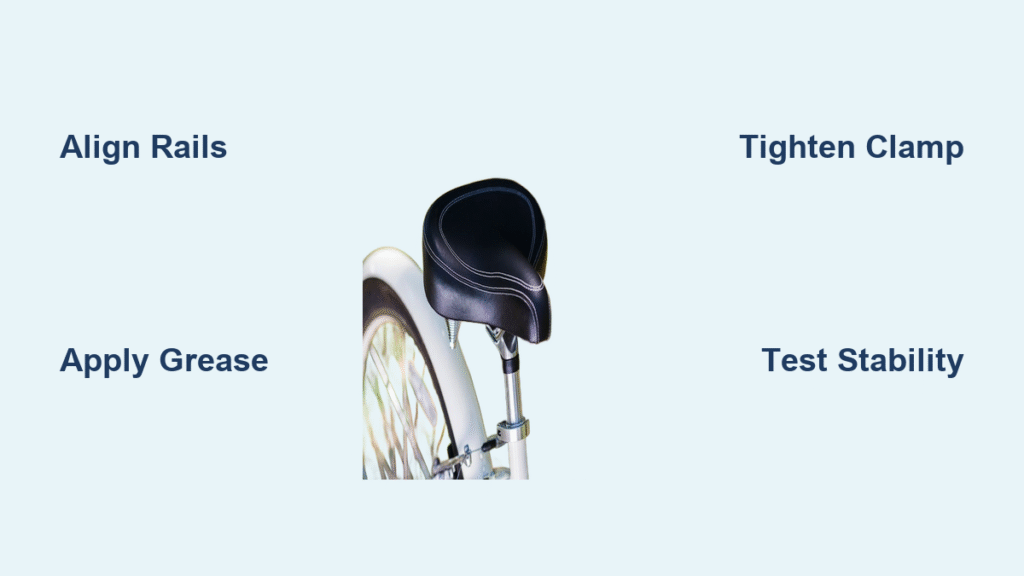
- Position the seat so its rails (the two parallel metal tubes under the saddle) slide into the open clamp. Align them parallel to the bike’s frame for a straight ride.
Important: For forward-facing seats, ensure the nose of the saddle points toward the handlebars. If your bike has a micro-adjust seat post, fine-tune the fore-aft position now (typically 5-10cm from the nose to the bar drop line).
Applying Lubricant
- Apply a thin layer of bike grease to the rails and clamp contact points. This reduces friction and prevents seizing over time—avoid overdoing it to prevent dirt buildup.
If the rails don’t slide in easily, gently rock the seat side-to-side while pushing down. For stubborn cases, a drop of penetrating oil can help, but wipe excess afterward.
Phase 2: Securing the Clamp and Tightening
With alignment set, it’s time to lock everything in place. This is where many cyclists go wrong by under- or over-tightening.
Tightening the Bolts
- Close the clamp around the rails snugly but not fully tight—hand-tighten first to check alignment.
- Insert the Allen wrench into the bolt(s) and turn clockwise. For single-bolt clamps, aim for even pressure; for two-bolt styles, alternate tightening to avoid warping.
- Use a torque wrench if available: Tighten to 5-6 Nm (about hand-tight plus a quarter turn). Without one, tighten until firm but check by trying to wiggle the seat—it should have no play.
Warning: Overtightening can strip threads or damage carbon parts. If your seat post is aluminum or steel, it’s more forgiving, but always recheck after a test ride.
Adjusting for Comfort
- Sit on the bike and rock side-to-side to test stability. Readjust height or angle if needed by loosening the bolts slightly, repositioning, and retightening.
- For bikes with tilt-adjustable clamps, use a small Allen key to set the saddle angle (level is ideal for most road bikes; slight rear tilt for mountain bikes).
Phase 3: Final Checks Before Riding
Don’t skip this—it’s crucial for safety.
1. Ensure all bolts are secure and the seat doesn’t slide forward/backward under pressure.
2. Clean up any excess grease with a rag.
Post-Completion Testing and Troubleshooting

Once installed, test your work to confirm everything’s solid. Take a short 5-10 minute ride on flat ground, standing up and sitting down periodically to simulate real use. The seat should stay put without creaking or shifting. If it feels off, stop immediately and revisit the tightening phase.
Common Troubleshooting Issues
- Seat slips during ride: Likely under-tightened—loosen, clean, regrease, and torque to spec. If persistent, replace the clamp.
- Uneven alignment: Double-check rail insertion; rails must be fully seated in the clamp groove.
- Wobbling side-to-side: Indicates poor rail parallelism—loosen and realign, ensuring the clamp bites evenly.
- Height too high/low: Recheck measurements; small adjustments (1-2cm) can make a big difference in pedaling efficiency.
- Creaking noises: Apply more grease or inspect for burrs on rails—file lightly if needed, but consult a pro for major damage.
If these don’t resolve it, the issue might be frame compatibility—older bikes sometimes need adapters. Always err on the side of caution; a loose seat can cause falls.
Pro Tips for Putting Bike Seat Back on Rails
To elevate your bike maintenance game and avoid repeat issues, here are some expert insights:
– Mark your settings: Use a marker or tape on the post to note exact height and fore-aft position for future removals—saves time on adjustments.
– Choose the right clamp type: Quick-release clamps are faster for frequent tweaks, while bolt-on are more secure for rough terrain.
– Avoid common mistakes: Never force rails into a tight clamp, as this can bend them. Also, don’t ignore wear—inspect rails annually for grooves or corrosion.
– Optimize for your ride: For long-distance road biking, position the seat slightly higher; mountain bikers might prefer lower for control. Test with a professional bike fit if possible.
– Upgrade wisely: If reinstalling often, consider a dropper post for easier adjustments without full removal.
– Weather-proof it: After installation, apply a protectant spray to rails to combat rust in wet climates.
– Tool investment: A good multi-tool with built-in torque bits pays off for trail-side fixes.
These tips can extend your seat’s lifespan and improve ride comfort significantly.
When to Seek Professional Help

While how to put bike seat back on rails is DIY-friendly, some situations call for a bike mechanic:
– Signs you need help: Persistent slipping despite multiple attempts, visible frame damage, or if your bike is high-end (e.g., carbon fiber with integrated posts) where precision is critical.
– What to look for in a provider: Certified technicians at a local shop with good reviews on sites like Yelp. Ask if they use digital torque tools for accuracy.
– Typical costs: $20-50 for a basic seat install/adjustment; more if parts are needed. Factor in free checks if under warranty.
– Warranty notes: Tampering with clamps might void warranties on premium saddles (e.g., from brands like Specialized or Selle Italia)—check your manual first.
If in doubt, a pro visit ensures safety and can include a full tune-up.
FAQ
Q: Why is my bike seat not staying on the rails after reinstallation?
A: This is often due to insufficient tightening or lack of lubrication. Start by cleaning the rails thoroughly, applying fresh grease, and torquing bolts to 5-6 Nm. If it still slips, the clamp might be worn—replace it with one matching your post diameter (measure with calipers for accuracy). Test on a short ride to confirm.
Q: Can I put a bike seat back on rails without tools?
A: For quick-release clamps, yes—it’s as simple as flipping the lever to open/close. But for bolt-on styles (common on modern bikes), you’ll need an Allen wrench. Skipping tools risks improper security, so invest in basics if you’re a frequent tinkerer.
Q: How do I know the correct height when putting the bike seat back on rails?
A: Use the LeMond method: Measure your inseam (floor to crotch) and multiply by 0.883 for road bikes, or 0.8 for mountain bikes—this gives the distance from bottom bracket center to saddle top. Adjust in 5mm increments and test pedal stroke for knee bend (about 30 degrees at bottom).
Q: What if the rails are bent or damaged?
A: Straighten minor bends with pliers, but if severely damaged, replace the seat entirely—rails are integral to the saddle. Inspect for cracks, as riding on compromised rails is unsafe and could lead to failure mid-ride.
Q: Is there a difference for e-bikes when reinstalling the seat?
A: Yes, e-bikes often have heavier frames and integrated batteries, so use a torque wrench to avoid stressing components. Also, ensure the seat doesn’t interfere with the motor housing—consult your model’s manual (e.g., for Rad Power or Trek e-bikes).
Q: How often should I remove and reinstall my bike seat?
A: Only as needed, like for cleaning every 3-6 months or post-crash checks. Frequent removal wears the clamp, so minimize it unless adjusting for different riders.
Q: Can I use WD-40 as lubricant for the rails?
A: No—WD-40 is a solvent that attracts dirt and dries out. Opt for bike-specific grease like Park Tool PolyLube instead, which stays put and protects against corrosion.
Enjoy Your Comfortable Ride Again
With this guide, reinstalling your bike seat has never been easier—follow these steps, and you’ll avoid the hassle of a loose or misaligned saddle that ruins your outings.
- Essential tools and prep for a secure fit
- Detailed phases from alignment to tightening
- Testing and pro tips for long-term reliability
Don’t let a simple seat issue keep you off the bike. Grab your Allen wrench, apply some grease, and get back to pedaling with confidence. Your rides will feel smoother and safer right away.
Have you successfully put your bike seat back on rails using these steps? Share your tips or any challenges in the comments below to help fellow cyclists!


