Cycling is an empowering activity that promotes fitness and adventure, but nothing derails the fun faster than an uncomfortable bike seat pressing on sensitive areas. If you’re a woman dealing with numbness, soreness, or chafing during rides, you’re not alone—many female cyclists face these issues due to anatomical differences like wider sit bones and softer pelvic tissues. The good news? You can make your bike seat more comfortable for women with simple adjustments and upgrades, starting with a quick fix like adding a gel cover for immediate padding and pressure relief.
In this comprehensive guide, we’ll go beyond that basic solution to explore multiple ways to achieve long-lasting comfort, from selecting the right saddle to fine-tuning your bike fit. Whether you’re a beginner or seasoned rider, you’ll find actionable steps tailored to women’s needs, backed by expert advice from cycling organizations like the League of American Bicyclists. By the end, you’ll have the confidence to customize your setup and enjoy pain-free rides that keep you pedaling longer and stronger.
What You’ll Need to Make Your Bike Seat More Comfortable for Women
Before diving into adjustments, gather the right tools and materials to ensure a smooth process. Women’s bike seats often require wider designs or cutouts to reduce perineal pressure, so focus on items that address these specifics. Most of these are affordable and available at bike shops or online retailers like REI or Amazon.
Here’s a table outlining essential items:
| Item | Quantity | Specifications |
|---|---|---|
| Allen wrench set | 1 set | Sizes 2mm-6mm for seat adjustments; multi-tool versions save space |
| Measuring tape or sit bone width tool | 1 | Flexible tape or cardboard cutout method for accurate measurements |
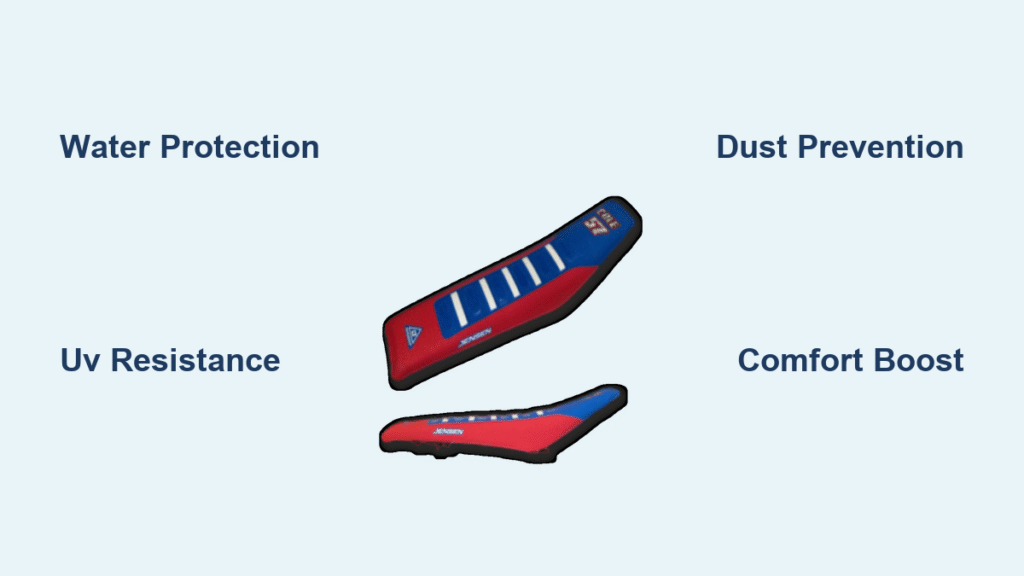
| Women’s-specific bike saddle | 1 (optional upgrade) | Width 140-160mm, with cutout or pressure-relief channel; brands like Specialized or Bontrager recommended |
| Gel seat cover or padded cushion | 1 | Universal fit with anti-slip base; thickness 1-2cm for added cushioning |
| Bike seat post shims or angle adjusters | 1-2 | For tilting the saddle 1-5 degrees; aluminum or plastic |
| Cleaning supplies | As needed | Mild soap, microfiber cloth, and lubricant for post-adjustment maintenance |
| Bike repair stand (optional) | 1 | Portable model for easier access; not essential but helpful for solo work |
These items should cost under $100 for basics, with a new saddle adding $50-150. Always check compatibility with your bike model—mountain bikes may need more durable options than road bikes.
Preparing for Bike Seat Adjustments and Safety Considerations
Proper preparation sets the stage for success and prevents injuries like strains from improper posture. Start by assessing your current setup: Ride for 10-15 minutes and note pain points, such as pressure under the sit bones (the bony parts of your pelvis) or numbness in the groin area. Women often experience more discomfort due to a shorter torso and wider pelvis, so prioritize measurements over guesswork.
Safety first: Wear gloves to avoid pinching fingers with tools, and work in a well-lit, stable area—use a bike stand if possible to avoid tipping. If you’re adjusting on a carbon fiber frame, be gentle to prevent cracks; consult your bike’s manual for torque specs (typically 5-7 Nm for seat bolts). Hydrate and stretch before test rides to mimic real conditions. Warning: If you have pre-existing conditions like sciatica or pelvic floor issues, consult a doctor before major changes, as improper saddle height can exacerbate them.
Clean your current seat thoroughly with soap and water to remove sweat and grime, which can worsen irritation. Measure your sit bone width by sitting on corrugated cardboard in a cycling position (knees bent at 30 degrees) and marking the indentations—aim for a saddle at least 20mm wider than this measurement for women. This prep takes about 20-30 minutes and ensures your adjustments are personalized.
Step-by-Step Guide to Improving Bike Seat Comfort for Women

Transforming your bike seat into a comfortable ally involves a phased approach: assessment, modification, and testing. We’ll break it down into logical phases with detailed steps. Expect the full process to take 1-2 hours initially, plus short test rides.
Phase 1: Assess and Measure for the Perfect Fit
Getting the right fit is crucial since most stock seats are designed for average male anatomy, leading to discomfort for women.
-
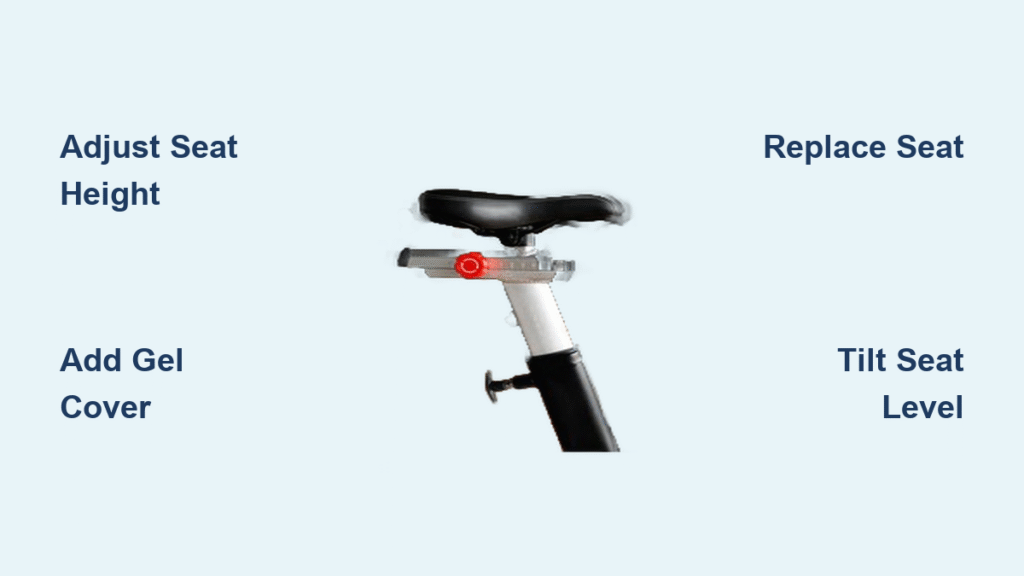
Position your bike securely: Flip it upside down or use a stand. Loosen the seat post clamp with an Allen wrench (usually 5mm) and slide the seat to a neutral height—your leg should be almost fully extended at the pedal’s bottom with a slight bend (25-35 degrees).
-
Measure sit bone width: As mentioned in preparation, sit on cardboard or use a professional tool from a bike shop. For women, target 130-155mm spacing; if your current saddle is narrower, it’s likely the culprit.
-
Evaluate saddle shape and tilt: Check for a flat or upward tilt, which can cause sliding and pressure. Women benefit from saddles with a slight rearward curve or cutout to relieve soft tissue compression.
This phase helps identify if a simple adjustment suffices or if an upgrade is needed. Time: 15-20 minutes.
Phase 2: Apply Quick Modifications and Upgrades
Now, implement changes from basic padding to full replacement. Start simple to test effectiveness.
Quick Fix: Add Padding with a Gel Cover
For immediate relief without buying a new saddle:
-
Select and fit the cover: Choose a women’s-specific gel cover with ventilation holes. Stretch it over your existing seat, ensuring it aligns evenly—avoid bunching that could create pressure points.
-
Secure and test tilt: Use the cover’s straps if available, then adjust the saddle angle by loosening the underside bolts (4mm Allen) and tilting forward 2-5 degrees to shift weight to the sit bones.
-
Reinstall and initial ride: Tighten bolts to spec (5 Nm), then take a 5-minute spin. Adjust as needed for even weight distribution.
This method reduces vibration and adds cushioning, ideal for casual rides. Many women report 50% less discomfort right away, per cycling forums like BikeRadar.
Upgrade Option: Install a Women’s-Specific Saddle
If padding isn’t enough, swap to a better design—research shows cutout saddles reduce numbness by up to 80% for female riders (source: Journal of Science and Cycling).
-
Remove the old saddle: Loosen the seat post clamp and rail clamps (two 5mm bolts under the saddle). Slide off carefully.
-
Attach the new saddle: Align the new saddle’s rails with the clamps, centering it over the frame’s top tube. For women, opt for models like the Fizik Vento Argo (140mm width, $100) with a central relief channel.
-
Adjust height and fore-aft position: Raise the post so your knee aligns with the pedal spindle when cranked forward at 3 o’clock. Slide forward/back until your pelvis is level—use a plumb line from your kneecap to the pedal.
-
Fine-tune angle: Tilt slightly nose-down (1-3 degrees) to prevent perineal pressure. Torque bolts evenly.
Time: 30-45 minutes. Test on a short, flat ride to confirm no hot spots.
Phase 3: Fine-Tune Position and Accessories
Ergonomics matter—poor positioning can undo even the best saddle.
-
Adjust handlebar reach: If leaning too far forward causes seat rocking, raise bars 1-2cm or add stem spacers for a more upright women’s posture.
-
Incorporate chamois shorts: Pair your setup with padded cycling shorts (e.g., Pearl Izumi women’s line) to further cushion sensitive areas.
-
Add bar tape or grips if needed: For overall comfort, wrap handlebars with gel tape to reduce hand fatigue, which indirectly affects seat pressure.
This phase ensures holistic comfort. Total time for all phases: Under 2 hours.
Post-Completion Testing and Troubleshooting

After adjustments, test thoroughly to verify improvements. Start with a 10-20 minute ride on varied terrain, noting any persistent pain. Use a journal to track sensations—aim for even pressure distribution without numbness after 30 minutes.
If issues persist, troubleshoot common snags:
– Saddle too high/low: Recheck leg extension; too high causes rocking, too low strains knees.
– Uneven tilt: Use a level app on your phone—over-tilting forward can cause hand numbness.
– Material slippage: Apply a dab of seat post grease if the post slides.
– For electric bikes: Ensure the saddle supports added weight without sagging.
Revisit Phase 2 if needed. If discomfort lingers after two test rides, consider a professional bike fit (more on that below). Regular checks every 50-100 miles maintain your setup.
Pro Tips for Maximum Comfort on Women’s Bike Rides

To elevate your experience beyond basics, incorporate these expert strategies. Drawing from insights by the Women’s Cycling Network, these tips optimize for female physiology.
- Prioritize cutout or channeled saddles: Models with a groove (e.g., Selle Italia Diva) minimize blood flow restriction—avoid overly soft seats that cause “hot spots” from sinking too deep.
- Layer strategically: Use moisture-wicking chamois cream (like Assos) under shorts to prevent chafing, especially on longer rides over 1 hour.
- Schedule regular maintenance: Clean and inspect your saddle monthly; rotate between two saddles if you ride frequently to prevent wear.
- Consider bike type specifics: For hybrids or commuters, add suspension seat posts; road bikes benefit from carbon rails for lighter weight and vibration dampening.
- Track your progress: Use apps like Strava to log rides and correlate comfort with adjustments—women often need 10-20% more rearward positioning than men.
- Avoid common mistakes: Don’t ignore core strength—weak glutes can shift weight unevenly; incorporate yoga or planks twice weekly.
- Optimize for body changes: Pregnant or menopausal riders may need wider, softer options; test seasonally.
These tweaks can extend comfortable ride times by 2x, making cycling more enjoyable.
When to Seek Professional Help for Bike Seat Comfort
While DIY adjustments work for most, some situations call for experts. Signs include persistent pain despite changes, bike-specific issues (e.g., custom frames), or if you’re investing in a high-end setup.
Look for certified bike fitters through the International Bike Fitting Institute—seek those with women’s cycling experience. They use tools like pressure mapping for $100-250 sessions. Costs vary: Basic shop fits $50-100, full Retül analysis $200+. Check warranties—many saddles have 1-2 year guarantees; professional work preserves them. If numbness suggests nerve issues, see a sports medicine specialist first.
FAQ
Q: Why do women often find bike seats uncomfortable?
A: Anatomical differences play a key role—women typically have wider sit bones (130-155mm vs. men’s 110-140mm) and more soft tissue in the pelvic area, leading to pressure on nerves and blood vessels. Narrow, firm stock seats exacerbate this, causing numbness or soreness. Studies from the British Journal of Sports Medicine confirm that women-specific designs with cutouts reduce these issues by distributing weight better.
Q: How do I measure my sit bone width accurately at home?
A: Sit on a piece of cardboard or foil in your cycling position (on a firm chair with knees bent). Mark the dents left by your sit bones, then measure the distance between centers. Add 20-30mm for saddle width. For precision, visit a shop with a gel pad tool—it’s free at many places.
Q: What’s the best bike seat for women beginners?
A: Start with the Specialized Power Mimic Comp—it’s 155mm wide with a central cutout, gel padding, and costs around $130. It’s versatile for road or hybrid bikes and praised in reviews for reducing perineal pressure without sacrificing pedaling efficiency.
Q: Can I make my bike seat more comfortable without buying a new one?
A: Yes, add a gel cover or foam pad for $15-30, which provides instant cushioning. Combine with tilting the nose down 2-3 degrees and wearing padded shorts. This quick combo often suffices for casual riders, but test for slippage on longer trips.
Q: How long does it take to break in a new saddle?
A: Expect 100-200 miles (2-4 weeks of regular riding) for the material to mold to your shape. Start with short 20-minute rides and gradually increase. Leather saddles take longer but last years; synthetic ones adapt faster.
Q: Are there health risks from an uncomfortable bike seat?
A: Prolonged pressure can lead to numbness, urinary issues, or even nerve damage like pudendal neuralgia. Important: If you experience ongoing genital pain or dysfunction, stop riding and consult a doctor. Proper fit prevents 90% of these risks, per the American College of Sports Medicine.
Q: How often should I adjust my bike seat for comfort?
A: Check monthly or after any bike changes (e.g., new tires affecting posture). Women’s bodies fluctuate with cycles, so reassess quarterly. A quick 5-minute height/tilt check keeps things optimal.
Alternative Solutions for Bike Seat Comfort
If saddle adjustments don’t fully resolve discomfort, consider these options. Gel covers are quick but temporary; full replacements offer durability.
| Solution | Pros | Cons | Best For |
|---|---|---|---|
| Gel Seat Cover | Affordable ($20), easy install, immediate padding | Can shift during rides, adds bulk/weight (200g) | Budget-conscious casual riders on short trips |
| Women’s-Specific Saddle (e.g., Bontrager Aeolus) | Custom fit reduces pressure long-term, lightweight (250g) | Higher cost ($100+), requires tools for install | Serious cyclists on 1+ hour rides |
| Suspension Seat Post | Absorbs vibrations, no saddle change needed | More expensive ($50-150), may alter bike geometry | Rough terrain or commuters with back issues |
| Professional Bike Fit Service | Personalized, addresses whole posture | Time-intensive (1 hour), costs $100-250 | Frequent riders with persistent pain |
Choose based on your riding style—start with a cover if unsure.
Enjoy a More Comfortable Ride
With this guide, you’ve got everything to make your bike seat more comfortable for women, from quick gel cover fixes to full saddle upgrades and pro tips for ongoing tweaks:
– Accurate sit bone measurements for the ideal fit
– Step-by-step installation and adjustment phases
– Testing methods and alternatives for stubborn issues
Following these steps empowers you to conquer discomfort and focus on the joy of cycling. Your body deserves a setup that supports it—start with one phase today, and soon you’ll be riding farther without a second thought to soreness.
Have you made your bike seat more comfortable? Share your favorite tip or results in the comments below to inspire other women cyclists! If this helped, bookmark it for your next tune-up.