
Riding your bike with a wobbly or loose seat can be incredibly frustrating—it’s uncomfortable, unsafe, and can even lead to back pain or slips during your ride. If you’re dealing with a bike seat that’s slipping down or shifting side to side, you’re not alone; this is a common issue for cyclists of all levels. The good news is that learning how to tighten bike seat components is a straightforward DIY fix that takes just 10-15 minutes with the right tools, giving you immediate stability and comfort on your next outing.
In this comprehensive guide, we’ll go beyond the basics to cover everything you need to know about how to tighten bike seat properly, including tools, preparation, detailed steps for different bike types, and troubleshooting tips. Whether you’re a beginner or a seasoned rider, we’ll walk you through multiple methods—from simple adjustments to more advanced tweaks—ensuring you can secure your seat confidently. By the end, you’ll have a rock-solid setup that enhances your riding experience and prevents future issues.
Tools and Materials Needed for Tightening Bike Seat
Before diving into the process, gathering the right tools ensures a smooth and efficient job. Most of what you’ll need is basic and inexpensive, often already in a cyclist’s toolkit. For how to tighten bike seat tasks, focus on items that handle the seat post clamp, bolt, or quick-release mechanism common on modern bikes.
Here’s a handy table outlining the essentials:
| Item | Quantity | Specifications |
|---|---|---|
| Allen wrench (hex key) set | 1 set | Sizes 4mm, 5mm, and 6mm for most seat post clamps; get a foldable multi-tool for portability |
| Adjustable wrench or torque wrench | 1 | For fine-tuning bolts; aim for 5-10 Nm torque to avoid over-tightening |
| Bike grease or lubricant | 1 small tube | Anti-seize compound to prevent corrosion on metal parts |
| Clean rag or microfiber cloth | 1-2 | For wiping down the seat post and frame |
| Optional: Seat post shim | 1 (if needed) | Thin metal or plastic sleeve for mismatched post diameters (e.g., 27.2mm to 31.8mm) |
| Optional: Replacement bolt or quick-release lever | 1 | If your current one is stripped or damaged; match your bike’s specs |
These items are available at bike shops or online retailers like REI or Amazon. Total cost for a basic kit? Under $20 if you don’t already own them. Remember, using the correct size Allen wrench prevents stripping bolts, a common mistake that can complicate how to tighten bike seat efforts.
Preparing to Tighten Your Bike Seat
Proper preparation is key to safely and effectively learning how to tighten bike seat without damaging your bike. Start by flipping your bike upside down or using a bike stand for easy access—this prevents scratches and gives you a stable workspace. Safety first: Wear gloves to protect your hands from sharp edges, and work in a well-lit area to spot any wear or damage.
Safety Considerations
Warning: Always remove any pressure from the seat before adjustments to avoid pinching fingers or destabilizing the bike. If your bike has electronic components (like on e-bikes), disconnect the battery to prevent accidental activation. Check for rust or cracks on the seat post and frame; if present, consult a professional, as forcing a tighten could lead to failure during a ride.
Initial Inspection
Before tightening, inspect the seat post for dirt buildup or slippage marks, which can indicate why it’s loose. Clean the post and the frame’s seat tube with a rag and mild soap solution, then dry thoroughly. Apply a thin layer of bike grease to the post for smooth insertion and to reduce future corrosion—especially important for aluminum or carbon fiber frames. This step alone can solve minor looseness without further adjustment. If your seat uses a quick-release lever (common on road bikes), ensure it’s not bent; for bolted clamps (typical on mountain bikes), verify the bolt isn’t stripped.
Preparation time: About 5 minutes. This phase sets the foundation for a secure fit and helps you identify if the issue is deeper, like a worn clamp.
Step-by-Step Guide to Tightening Bike Seat

Now for the main event: the actual process of how to tighten bike seat. We’ll break it into phases for clarity, covering both quick-release and bolted systems. These steps apply to most adult bikes, but variations exist for kids’ bikes or folders (e.g., Brompton)—adjust as needed. Total time: 10-20 minutes.
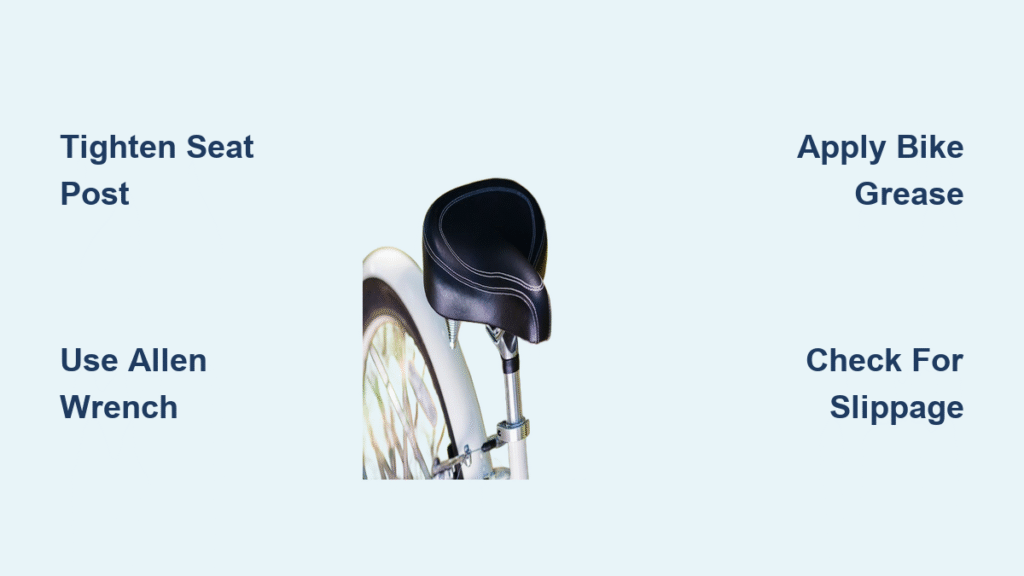
Phase 1: Removing the Loose Seat
Start by loosening the current setup to assess and reposition.
- For quick-release levers: Flip the lever to the open position (perpendicular to the seat post). Pull up on the seat to remove it fully. If it’s stuck, wiggle gently while lifting—avoid forcing it, as this could bend the post.
- For bolted clamps: Insert the appropriate Allen wrench into the clamp bolt (usually on the side of the seat tube). Turn counterclockwise to loosen (about 2-3 full turns). Slide the seat post out.
- Clean the seat post again if needed, and check the height marking on the post—ensure it’s at your preferred riding height (typically, the seat should allow a slight bend in your knee at the bottom of the pedal stroke).
Tip: Measure the post insertion depth (at least 3-4 inches into the frame for stability) to maintain balance. If the post is too short, you may need a longer replacement.
Phase 2: Reinserting and Aligning the Seat
Proper alignment ensures even weight distribution and comfort.
- Apply grease to the seat post’s lower section (avoid the saddle rails).
- Slide the post back into the frame’s seat tube, aligning it to your desired height. For forward/backward adjustments, loosen the saddle clamp nuts (usually 14mm or 15mm wrench) and slide the saddle on its rails.
- Level the saddle: Use a spirit level app on your phone or a bike-specific tool to ensure it’s parallel to the ground. Tilt slightly nose-down (1-2 degrees) for road bikes or level for mountain bikes to prevent numbness.
- Reattach loosely: For quick-release, flip the lever halfway and tighten the nut on the opposite side by hand. For bolts, turn clockwise 1-2 turns until snug but not tight.
This phase prevents the seat from creaking or shifting laterally. If your bike has a dropper post (suspension seat post), consult the manual, as tightening differs—often involving air pressure or hydraulic adjustments.
Phase 3: Tightening and Securing
This is where you apply the final torque for a firm hold.
- For quick-release: Close the lever fully (parallel to the post). It should feel resistant in the last quarter of the motion—if too easy, reopen and tighten the nut a bit more. Aim for a “firm but not immovable” feel.
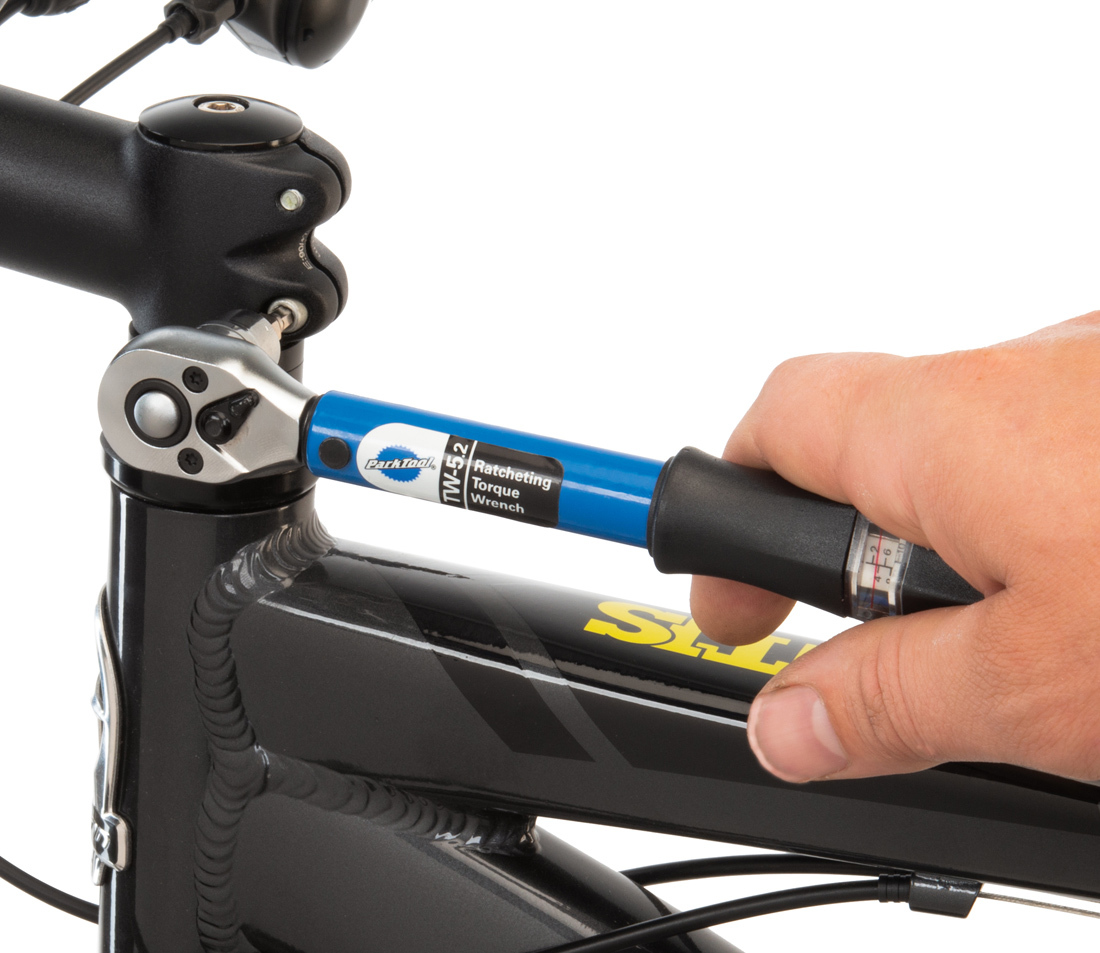
- For bolted clamps: Use your Allen wrench to tighten clockwise. Start with 4-5 Nm of torque (use a torque wrench if available to avoid over-tightening, which can crack carbon frames). Most clamps require 5-6 Nm; check your bike’s manual for specifics.
- Test for wiggle: Sit on the bike (on a stand) and rock the seat side to side. If it moves, repeat tightening in small increments.
- For integrated systems (e.g., some Trek or Specialized models): If your seat uses a proprietary clamp, follow brand-specific instructions—often involving a single 5mm bolt.
Important: Over-tightening can strip threads or damage the frame. If using a torque wrench, it’s a game-changer for precision. After tightening, ride slowly for 1-2 minutes to check for slippage under load.
Post-Completion Testing and Troubleshooting
Once tightened, test your work to confirm everything’s secure. Take a short 5-10 minute test ride on flat terrain, standing and sitting to simulate real use. Bounce on the pedals and check for any creaking or movement—if all good, you’re set!
If issues persist:
– Seat still slips: The post might be undersized; insert a shim (available at bike shops) to fill the gap.
– Uneven tightening: Redistribute torque evenly on multi-bolt clamps.
– Creaking noise: Reapply grease and ensure no dirt is trapped.
– For carbon frames: Use carbon-specific paste instead of grease to avoid slippage without damaging fibers (source: BikeRadar guidelines).
Common complications include rusty bolts (soak with penetrating oil like WD-40) or mismatched parts (replace with OEM equivalents). If these don’t resolve it, the frame might need professional inspection.
Pro Tips for Tightening Bike Seat
To elevate your how to tighten bike seat skills and avoid pitfalls, here are expert insights from cycling mechanics:
- Mark your height: Use a marker or tape on the seat post to quickly reset height after adjustments—saves time on frequent tweaks.
- Common mistake to avoid: Ignoring saddle tilt; a level seat prevents pressure points and improves pedaling efficiency. Always double-check with a level.
- Optimize for your ride: For long-distance road biking, position the seat further back; for aggressive MTB, keep it forward. Use online fit calculators from sites like BikeFit.com.
- Seasonal maintenance: Check tightness monthly, especially after wet rides, as moisture loosens clamps.
- Upgrade wisely: If slippage is chronic, consider a micro-adjust seat post (e.g., Thomson Elite) for better clamping power—costs $50-100 but lasts years.
- Eco-friendly lube: Opt for biodegradable greases like Finish Line EcoTech to minimize environmental impact.
- Torque every time: Even pros use torque wrenches; it’s the difference between a secure ride and a mid-ride failure.
These tips can extend your bike’s lifespan and enhance comfort, turning a simple fix into long-term reliability.
When to Call in Professional Help
While how to tighten bike seat is DIY-friendly, some signs warrant a pro:
– Persistent slippage after multiple attempts, indicating frame damage or worn components.
– Cracks, deep rust, or deformation on the post/frame—safety risks here.
– High-end bikes (e.g., carbon fiber or custom geometries) where improper torque could void warranties.
Look for a certified bike mechanic at a local shop (e.g., via the National Bicycle Dealers Association directory). Choose ones with good reviews on Google or Yelp, specializing in your bike type. Expect costs of $20-50 for a tune-up including seat adjustment. Check your warranty—many brands like Giant or Cannondale cover defects for 1-5 years. Don’t hesitate; a quick shop visit prevents costly repairs down the line.
FAQ
Q: How tight should my bike seat be?
A: It should feel secure with no movement when you push down or rock it side to side while seated. For quick-release, the lever should require moderate force to close; for bolts, aim for 5-6 Nm torque. Over-tightening risks damage, so test incrementally during your ride.
Q: Can I tighten a bike seat without tools?
A: For quick-release systems, yes—flip the lever and adjust by hand. But for bolted clamps (most common), you’ll need an Allen wrench. Skipping tools often leads to incomplete tightening and ongoing slippage.
Q: Why does my bike seat keep loosening?
A: Common causes include dirt buildup, insufficient grease, vibrations from rough terrain, or a mismatched post diameter. Regular cleaning and greasing prevent this; if it’s a new issue, check for frame wear.
Q: Is it safe to ride with a loose bike seat?
A: No— it can cause instability, leading to accidents or discomfort. A loose seat shifts your weight, affecting balance. Fix it immediately before riding, especially on roads or trails.
Q: How do I tighten a carbon fiber bike seat post?
A: Use carbon assembly paste (not regular grease) for grip without residue. Torque to manufacturer specs (usually 4-5 Nm) with a torque wrench. Avoid over-tightening, as carbon can crack under excess force—consult your bike’s manual or a pro.
Q: What’s the difference between quick-release and bolt-on seat clamps?
A: Quick-release levers allow tool-free adjustments via a cam mechanism, ideal for frequent height changes (e.g., shared bikes). Bolt-on clamps provide stronger hold for heavy use but require tools. Both work for how to tighten bike seat, but bolts are more secure for off-road.
Q: My seat post is stuck—how do I loosen it for tightening?
A: Apply penetrating oil, wait 10 minutes, then tap gently with a rubber mallet while twisting. If seized from rust, heat the area slightly with a hairdryer. For stubborn cases, a bike shop can use specialized tools without damaging the frame.
Alternative Solutions for Bike Seat Tightening

If standard methods don’t suit your setup (e.g., older bikes or integrated systems), consider these alternatives. They offer variations when basic tightening falls short.
| Solution | Pros | Cons | Best For |
|---|---|---|---|
| Upgrade to a quick-adjust seat post (e.g., Redshift ShockStop) | Tool-free height changes; absorbs vibrations for comfort | Higher cost ($100+); may add weight | Commuters or long-distance riders needing frequent adjustments |
| Use hose clamps or zip ties as temporary fix | Cheap and immediate; no special tools | Not permanent; can look unprofessional and wear out quickly | Emergency roadside fixes on trails |
| Professional seat fitting service | Custom alignment for ergonomics; includes tightening | Expensive ($50-150); requires shop visit | Riders with pain issues or high-end race bikes |
| Rail clamps or adapters for odd saddles | Secures non-standard rails; improves stability | Installation complexity; potential compatibility issues | Vintage bikes or aftermarket saddles that don’t fit standard posts |
Compare based on your needs— for most, sticking to OEM methods is best, but upgrades shine for specialized riding.
You’re All Set with a Secure Bike Seat
Congratulations—you’ve mastered how to tighten bike seat with our step-by-step guide! To recap the key takeaways:
– Gather essential tools like Allen wrenches and grease for a smooth process.
– Prepare safely by inspecting and cleaning components.
– Follow the phased steps for removal, alignment, and secure tightening.
– Test thoroughly and use pro tips to prevent future slips.
By following this guide, you’ll enjoy a stable, comfortable ride that boosts your confidence on every pedal stroke. Don’t let a loose seat derail your adventures—apply these fixes today and hit the road (or trail) feeling secure.
Have you tightened your bike seat using these steps? Share your tips or any challenges in the comments below to help fellow cyclists! If other bike maintenance topics interest you, let us know what to cover next.


