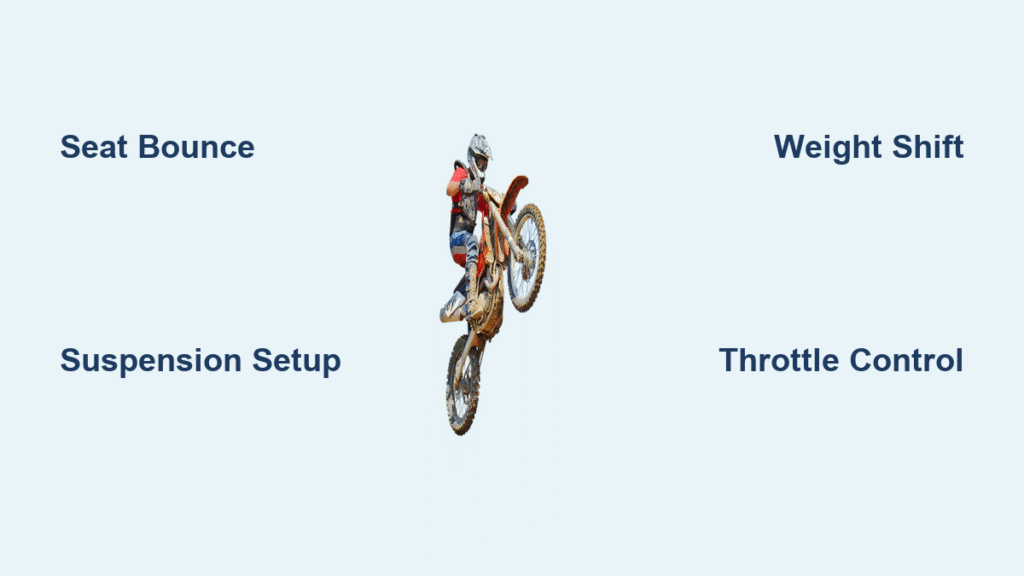
Learning to seat bounce a dirt bike can feel intimidating at first, especially if you’re new to motocross or freestyle riding. Imagine hitting a jump and wanting that extra airtime or smooth control over rough terrain, but your bike just isn’t cooperating—frustrating, right? The good news is that with the right technique, you can master this essential skill quickly. A quick fix to get started: focus on standing tall on the pegs and using your legs to preload the suspension before sitting down firmly on the seat. This simple adjustment often gives beginners that “aha” moment of bounce without overcomplicating things.
In this comprehensive guide, we’ll go way beyond the basics to help you build confidence on your dirt bike. You’ll learn about the gear you need, crucial safety prep, a detailed step-by-step process broken into phases, and troubleshooting for when things don’t go as planned. By the end, you’ll have multiple ways to practice and refine your seat bounce, whether you’re tackling whoops, jumps, or freestyle tricks. Stick with us, and you’ll be bouncing like a pro in no time, turning frustration into pure adrenaline-fueled fun.
Essential Gear and Bike Setup for Seat Bouncing

Before you even think about attempting a seat bounce on a dirt bike, you need the right gear to stay safe and perform effectively. Seat bouncing involves dynamic movements that put stress on your body and bike, so skimping here isn’t an option. This technique, popular in motocross and freestyle motocross (FMX), relies on your suspension absorbing and releasing energy, so your bike should be in top condition.
Start by ensuring your dirt bike is tuned for bouncing: check the rear shock and fork settings for proper preload and damping. A softer setup works best for beginners to allow more compression. If your bike feels too stiff, consult your owner’s manual or a mechanic to adjust sag—aim for 30-35% rear sag for optimal bounce.
Here’s a breakdown of the must-have gear. Use high-quality items from reputable brands like Fox or Alpinestars to avoid failures mid-air.
| Item | Quantity | Specifications |
|---|---|---|
| Full-Face Helmet | 1 | DOT/Snell certified, with good ventilation for extended sessions; size it snug but comfortable. |
| Goggles | 1 | Anti-fog lenses, UV protection; pair with tear-offs for dusty tracks. |
| Chest/Body Armor | 1 | Padded protector covering spine, elbows, and knees; look for CE-rated impact absorption. |
| Gloves | 1 pair | Full-finger, reinforced palms for grip on handlebars during preload. |
| Boots | 1 pair | Mid-calf motocross boots with ankle support; brands like Sidi offer excellent buckle systems. |
| Jersey and Pants | 1 set | Breathable, abrasion-resistant material; ensure pants have knee brace compatibility. |
| Bike Tools | Basic kit | Tire pressure gauge, suspension pump, and multi-tool for on-track adjustments. |
| Optional: Knee Braces | 1 pair | For advanced riders; stabilizes joints during high-impact bounces. |
Important: Always inspect your gear before each ride. Worn-out suspension components can lead to poor bounce control and increase injury risk. If you’re renting a dirt bike, confirm it’s a model like a Honda CRF250R or Yamaha YZ250F, which have responsive suspension suited for seat bouncing.
Preparation and Safety Considerations
Proper preparation is key to safely learning how to seat bounce a dirt bike. This technique involves compressing your bike’s suspension by sitting down hard on the seat while standing on the pegs, creating a rebound effect for extra height or speed through sections like whoops. Without prep, you risk awkward landings or loss of control.
First, choose the right environment: Start on a flat, open dirt track or grassy field to build fundamentals before hitting jumps. Avoid crowded areas—solo practice or with a spotter is ideal. Warm up your body with stretches focusing on legs, core, and back; a 10-15 minute routine prevents strains from the explosive movements.
Safety first: Wear all your gear, even for ground practice. Set ground rules like starting slow and never forcing a bounce if it feels off. Hydrate and take breaks every 20-30 minutes to avoid fatigue, which is a leading cause of wipeouts. Warning: If you’re under 18, ride with adult supervision. Also, check local laws—some tracks require liability waivers for advanced techniques like seat bouncing.
Mentally prepare by visualizing the motion: Stand on the pegs, shift your weight back slightly, then drive your hips down onto the seat using your legs. This preloads the suspension for that signature bounce. If your bike has electronic aids like traction control, disable them initially to feel the raw mechanics.
Step-by-Step Guide to Performing a Seat Bounce
Now, let’s dive into the heart of how to seat bounce a dirt bike. We’ll break it into logical phases, from beginner basics to integrating it into jumps. Each phase builds on the last, with approximate timeframes for practice sessions. Expect 30-60 minutes per phase initially, progressing as you gain confidence. Use a video camera to record yourself—self-review accelerates learning.
Phase 1: Mastering the Basics on Flat Ground
This foundational phase teaches suspension control without speed or air. It’s crucial for feeling the bounce mechanics safely. Aim for 20-30 minutes of reps.
-
Mount and Position Yourself: Start with the bike idling on a flat surface. Stand fully on the footpegs with knees bent, gripping the handlebars lightly. Your weight should be centered over the bike—elbows up, chin over the bars for balance.
-
Preload the Suspension: Shift your butt slightly forward on the seat. Using your legs like shocks, push down firmly while keeping your upper body relaxed. You’ll feel the rear suspension compress (about 2-4 inches). Hold for 2 seconds to build tension.
-
Execute the Bounce: Release your legs explosively, letting your body weight drive you down onto the seat. The suspension will rebound, “bouncing” you upward. Absorb the return by bending your knees—don’t lock out. Repeat 10-15 times, focusing on smooth transitions.
-
Refine Grip and Throttle: As you bounce, feather the throttle lightly to maintain forward momentum. This prevents stalling. If the bike tips, counter with subtle steering inputs.
Pro Tip: If the bounce feels weak, check tire pressure (12-15 PSI rear for dirt). Under-inflated tires enhance grip but soften the ride.
Phase 2: Incorporating Speed and Whoops
Once comfortable on flat ground (after 2-3 sessions), add speed for real-world application. Whoops are rolling dirt humps—perfect for practicing seat bounce to maintain rhythm. Spend 30-45 minutes here, starting at 20-30 mph.
-
Approach the Section: Accelerate smoothly into the whoops, standing on the pegs with weight back. Keep your eyes up, looking through the turns rather than down at the terrain.
-
Initiate the Preload: As you crest the first whoop, compress by sitting down hard just before the down slope. Your legs drive the motion—think of it as squatting on the bike.
-
Bounce Through: Let the rebound propel you forward. For each whoop, repeat: compress on the downside, release on the upside. This “bouncing” keeps the front wheel light and prevents bogging down.
-
Exit and Stabilize: After the last whoop, stand tall to absorb any residual bounce. Throttle on gradually to build speed.
Troubleshooting: If you get bucked forward (nose-diving), you’re preloading too early—time it with the terrain. Practice at half-speed first.
Phase 3: Applying Seat Bounce to Jumps
For advanced users, integrate seat bounce into jumps for extra air or style points in FMX. This phase requires prior whoop mastery; allocate 45-60 minutes, with spotter assistance.
-
Build Speed and Launch: Approach the jump at 30-40 mph, standing ready. Preload the suspension mid-airramp by compressing legs as the front wheel lifts.
-
In-Air Bounce: Pull the bars back slightly to lift the front, then let the seat “bounce” off your backside by relaxing your legs momentarily. This uses the suspension’s energy for rotation or height—aim for 1-2 bounces per jump.
-
Land Controlled: Spot your landing, extend legs to absorb impact, and roll through with throttle. Keep the bike level to avoid end-os.
-
Iterate and Vary: Try variations like off-axis bounces for tricks. Record and analyze for improvements.
Warning: Only attempt jumps on well-maintained tracks. High-speed seat bouncing can lead to catastrophic failures if suspension is worn—inspect post-session.
Practicing and Troubleshooting Common Issues
After the steps, dedicated practice cements your seat bounce dirt bike skills. Start with 3-4 sessions per week, gradually increasing intensity. Track progress in a journal: note bounce height, control, and fatigue levels.
Common issues and fixes:
– Weak or No Bounce: Often due to stiff suspension. Solution: Soften rebound damping by 1-2 clicks and retest.
– Loss of Balance: Caused by over-preloading. Fix: Shorten your compressions to 1 second and focus on core engagement.
– Tiring Quickly: Leg fatigue from poor form. Remedy: Incorporate off-bike squats (3 sets of 15) into your routine.
– Bike Stalling: Throttle mishandling. Practice with a kill switch handy for quick stops.
If steps fail, revert to Phase 1. For persistent problems, film slow-motion replays—apps like Hudl Technique are great for this.
Pro Tips for Mastering Seat Bounce
To elevate your game beyond the basics, here are 7 expert tips from seasoned motocross riders:
– Optimize Bike Fit: Adjust handlebar height to 1-2 inches above stock for better leverage during preloads—test on a dyno if possible.
– Breathing Technique: Exhale sharply on compression to engage your core, reducing bounce jitters.
– Terrain Adaptation: On sandy tracks, add 2 PSI to tires for stability; on hardpack, drop to 10 PSI for more rebound.
– Common Mistake to Avoid: Don’t lean too far forward—keep weight neutral to prevent front-end washouts.
– Performance Boost: Pair seat bounce with throttle blips for whoops; this maintains RPMs and adds speed.
– Maintenance Hack: Clean and lube suspension linkages weekly—dirt buildup kills rebound efficiency.
– Mental Edge: Visualize successful bounces before rides; pros like Travis Pastrana swear by this for consistency.
These tweaks can shave seconds off lap times and make your riding smoother.
When to Seek Professional Help
While DIY practice is empowering, know when to call in a coach. Signs you need pro help: persistent balance issues after 5+ sessions, pain in joints (indicating form errors), or if you’re progressing to big jumps without spotters. A certified motocross instructor can spot nuances you miss.
Look for providers affiliated with organizations like the AMA (American Motorcyclist Association). Check reviews on platforms like Yelp for local tracks. Expect $50-100 per hour session. If your bike needs tuning, mechanics charge $75-150 for suspension work. Always verify warranty coverage—modifying suspension might void it unless done professionally.
FAQ
Q: What’s the difference between seat bounce and a regular jump on a dirt bike?
A: A standard jump relies on speed and ramp angle for airtime, while seat bouncing actively uses your body’s weight and the suspension’s rebound for controlled height or rhythm through terrain. It’s more about technique than terrain, making it versatile for whoops or freestyle. Beginners often confuse them, but practicing preloads clarifies the distinction—expect 20-30% more control with seat bounce.
Q: Can I seat bounce on any dirt bike model?
A: Most modern 250cc-450cc bikes like the Kawasaki KX250 or KTM 350 SX-F handle it well due to their progressive suspension. Older or trail bikes may lack the travel needed, leading to harsh rebounds. Check your manual for minimum fork travel (at least 10 inches) and upgrade if necessary for safety.
Q: How long does it take to learn seat bouncing?
A: For fit beginners, 4-6 sessions (2-3 hours each) to get basics down, and 10-20 hours for proficiency on jumps. Factors like prior riding experience speed it up—motocross vets might nail it in one afternoon. Consistency is key; irregular practice prolongs the learning curve.
Q: Is seat bouncing safe for beginners?
A: Yes, with proper gear and progression—start slow to build muscle memory. Risks include awkward landings if form is off, so always use a helmet and pads. Stats from the AMA show technique-focused drills reduce injury by 40%. Avoid if you have back issues without medical clearance.
Q: What if my suspension feels off during practice?
A: Stop immediately and inspect for leaks or wear. Common fix: Reset to factory sag settings (use a sag tool, about $20 online). If unresolved, a shop tune-up ensures even rebounds. Ignoring this can lead to bottoming out, which is dangerous at speed.
Q: Can seat bounce help with racing?
A: Absolutely—it’s a pro technique for whoop sections in races like Supercross, saving energy and time. Riders like Eli Tomac use it to maintain flow. Integrate it gradually to avoid fatigue during longer motos.
Q: Are there videos or resources for visual learning?
A: Yes, check YouTube channels like Vital MX or FMX pros like Robbie Maddison for tutorials. For structured learning, apps like Motocross Skills offer AR overlays. Always cross-reference with this guide for personalized tips.
Alternative Solutions for Building Bounce Skills
If seat bouncing feels too advanced or your bike isn’t ideal, consider these alternatives. They’re great gateways while you build toward the full technique.
| Solution | Pros | Cons | Best For |
|---|---|---|---|
| Suspension Scrubbing | Improves air control without full body commitment; quicker to learn. | Less height gain than seat bounce; requires precise timing. | Track riders focusing on speed over tricks. |
| Body English Drills (Standing Only) | Builds leg strength and balance on pegs; no air risk. | Doesn’t teach rebound mechanics fully. | Absolute beginners or off-season training. |
| Gym-Based Simulation | Uses tools like Bosu balls for preload practice; accessible year-round. | Not bike-specific; misses real feedback. | Riders in non-riding seasons or with track access issues. |
| Enroll in Motocross School | Professional coaching with varied bikes; rapid progress. | Costly ($200+ per day); travel required. | Intermediate riders wanting structured feedback. |
Choose based on your setup—scrubbing is a solid starter if whoops are your main goal.
Master Seat Bouncing on Your Dirt Bike
You’ve now got a complete roadmap to seat bounce a dirt bike like a pro:
– Essential gear and setup for safety and performance
– Preparation steps to avoid common pitfalls
– Phased guide from flat-ground basics to jump integration
– Troubleshooting and pro tips for refinement
Following this 2025 guide empowers you to tackle any terrain with confidence, boosting your skills and enjoyment. Don’t wait—head to the track this weekend, start with Phase 1, and feel that first solid bounce. You’ll wonder why you didn’t try it sooner.
Have you nailed your first seat bounce? Share your tips or challenges in the comments below to inspire other riders! If issues persist, describe your setup for tailored advice.


