Nothing ruins a good bike ride faster than a sore bum from your bike seat. If you’re dealing with that nagging pain after just a few miles, you’re not alone—millions of cyclists experience bike seat hurting bum issues, especially beginners or those ramping up their mileage. The good news? A quick fix like adjusting your saddle height can provide immediate relief and get you back to pedaling comfortably without the wince.
In this comprehensive guide, we’ll go beyond basic tweaks to explore the root causes, multiple proven solutions from simple adjustments to advanced fittings, and long-term prevention strategies. By the end, you’ll have the tools to eliminate bike seat hurting bum for good, whether you’re a casual rider or a serious enthusiast, so you can focus on the joy of the ride instead of the discomfort.
Common Causes of Bike Seat Hurting Bum
Understanding why your bike seat is hurting your bum is the first step to fixing it. Saddle soreness often stems from poor fit, improper setup, or external factors like clothing and riding habits. Here are the most common culprits, explained in detail to help you identify what’s going on.
Incorrect Saddle Height or Position
One of the top reasons for bike seat hurting bum is a saddle that’s too high or too low, forcing your body into an unnatural pedaling motion. If the saddle is too high, your hips rock side to side, putting pressure on soft tissues and causing chafing or numbness. Too low, and you’re crunching your knees, which transfers stress to your sit bones and perineum. According to cycling experts at BikeRadar, improper height can lead to hot spots within 10-15 minutes of riding. Signs include knee pain alongside bum discomfort or feeling like you’re sliding forward.
Wrong Saddle Shape or Size for Your Body
Not all bike seats are created equal— a saddle that’s too narrow or too wide for your sit bone width can pinch nerves and create pressure points. For instance, if your sit bones (the bony parts you sit on) are wider than the saddle’s support area, you’ll bear weight on sensitive flesh, leading to sores or irritation. Women often face this more due to wider pelvises, but it affects everyone. A study from the Journal of Science and Cycling notes that mismatched saddles contribute to 40% of reported saddle soreness cases.
Friction from Poor Clothing or Hygiene
Chafing is a sneaky cause of bike seat hurting bum, often from rough cycling shorts without proper padding or riding in sweaty, unclean gear. Without chamois cream (a lubricant), skin-on-saddle friction builds up, especially on longer rides. Dirty bib shorts can harbor bacteria, turning minor irritation into infections like saddle sores. If you’re new to cycling, everyday underwear instead of cycling-specific shorts exacerbates this by bunching up and creating hotspots.
Overuse or Sudden Increase in Riding Intensity
Jumping from short spins to long rides without building tolerance can overload your bum’s soft tissues. Muscles and skin aren’t conditioned, leading to inflammation and blisters. This is common in “noob” cyclists or those returning after a break. External factors like rough terrain or a hard saddle amplify it, as noted in resources from the British Cycling Federation.
Medical or Underlying Issues
Sometimes, bike seat hurting bum signals something more, like sciatica, cysts, or allergies to saddle materials. If pain persists despite adjustments, it could be pudendal nerve irritation from prolonged pressure. Always consult a doctor if there’s swelling, severe pain, or numbness that doesn’t resolve.
How to Stop Bike Seat Hurting Bum: Proven Solutions

Now that we’ve pinpointed the causes, let’s dive into actionable fixes. We’ll cover three methods, starting with the simplest DIY tweaks and progressing to more involved options. Each includes step-by-step instructions, estimated time, and troubleshooting tips. Start with Method 1 for quick relief.
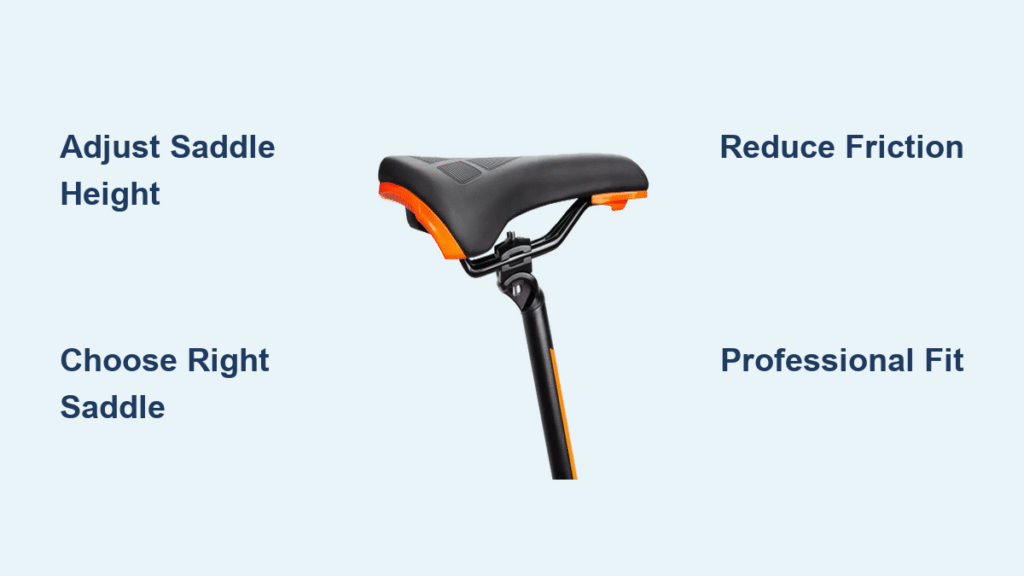
Method 1: Basic Bike Fit Adjustments (Quick and Free, 15-30 Minutes)
This is your go-to for immediate relief from bike seat hurting bum without tools or costs. Proper fit reduces pressure by 50-70%, per cycling biomechanics research.
Diagnosing the Issue
Stand next to your bike and check saddle height: With pedals at the 6 o’clock position, your heel should just touch the pedal without stretching. For fore-aft position, sit on the saddle with cranks horizontal— a plumb line from your knee should hit the pedal axle.
Adjustment Steps
- Loosen the seat post clamp using an Allen key (usually 5mm). Raise or lower the saddle so your leg is slightly bent (25-35 degrees) at the bottom of the pedal stroke when clipped in.
- Slide the saddle forward or back on the rails for neutral hip angle—aim for no rocking when pedaling hard.
- Tilt the nose down slightly (1-2 degrees) to relieve perineum pressure, but not too much to avoid sliding forward.
- Tighten everything securely and test-ride for 10 minutes. If pain shifts to knees, readjust height down 5mm.
Warning: Over-tightening can strip bolts—use a torque wrench if available (aim for 5-6 Nm). If you’re unsure, visit a bike shop for a free fitting.
Testing and Troubleshooting: Ride 5-10 miles post-adjustment. If bum pain lingers, it might be saddle shape—move to Method 2. Common issue: Uneven adjustments causing one-sided soreness; double-check levelness with a spirit level app on your phone.
Method 2: Saddle Selection and Replacement (Moderate Effort, 30-60 Minutes + Shopping)

If adjustments don’t cut it, your saddle might be the villain. Swapping to a better one can eliminate bike seat hurting bum entirely.
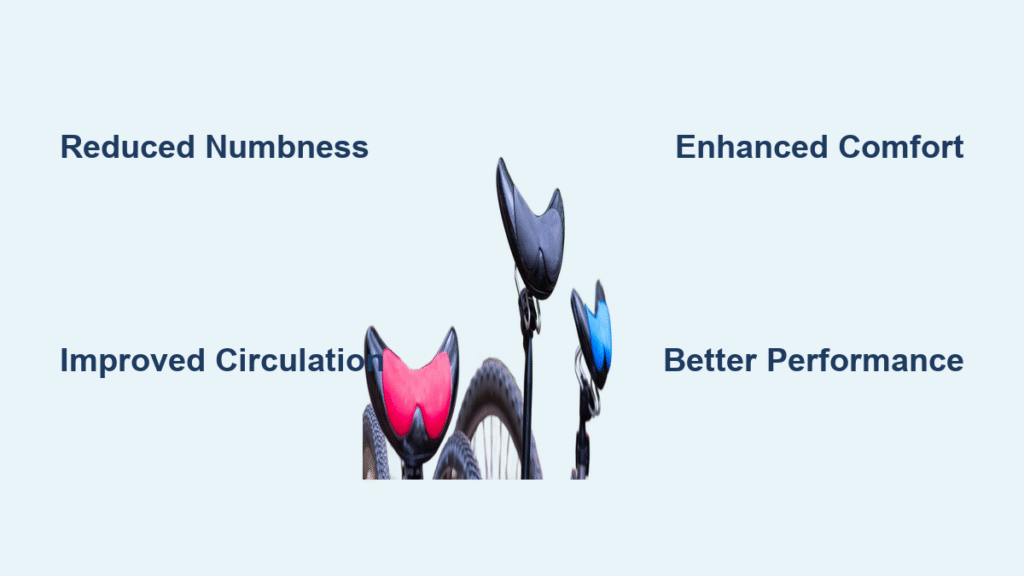
Choosing the Right Saddle
Measure your sit bone width at a bike shop (using gel pads) or DIY with cardboard and flour. For men, opt for narrower (130-145mm); women, wider (145-155mm). Cutouts reduce pressure—look for models like the Specialized Power or Bontrager Aeolus with gel padding.
Replacement Steps
- Remove the old saddle: Loosen the seat post clamp and rail clamp nuts.
- Install the new one: Align the new saddle centered on the rails, matching your previous fore-aft position.
- Re-secure and fine-tune: Tighten to spec (6-8 Nm), then readjust height and tilt as in Method 1.
- Apply chamois cream to your shorts for the first ride.
Budget options start at $30 (e.g., Planet Bike), while premium ones like Selle Italia run $100+. Test in-store if possible.
Testing and Troubleshooting: After 20-50 miles, assess comfort. If still sore, it could be width mismatch—return and try another. Pro tip: Short-nose saddles like the Fizik Terra help with aggressive positions.
Method 3: Advanced Techniques with Accessories and Professional Fitting (1-2 Hours, $50-200)
For persistent issues, add padding or get expert help. This method tackles deeper causes like nerve pressure.
Adding Protective Accessories
- Use a gel cover or padded seat cover ($10-20) for temporary relief—slip it over your saddle.
- Apply anti-chafing balms like Assos Chamois Cream before rides to reduce friction by 80%.
Professional Bike Fitting
Book a session ($100-150) where a fitter uses motion capture to optimize your entire setup, including cleat position. They’ll measure your flexibility and recommend custom insoles if needed.
Steps for Fitting Session:
1. Arrive with your bike; the fitter assesses your current setup.
2. Pedal on a trainer while they adjust in real-time.
3. Get a report with measurements for future tweaks.
Important: If pain includes numbness, stop riding and see a sports doctor to rule out nerve damage.
Testing and Troubleshooting: Post-fitting, log rides in an app like Strava to track improvements. If no change after a week, consider medical eval.
Prevention Tips and Maintenance Advice
To keep bike seat hurting bum at bay long-term, incorporate these habits. Regular maintenance extends comfort and prevents recurrence.
- Build mileage gradually: Increase weekly distance by no more than 10% to condition your tissues—aim for 3-4 rides per week.
- Choose proper cycling gear: Invest in well-padded bib shorts (e.g., Pearl Izumi) and wash them after every ride to avoid infections.
- Incorporate off-bike stretches: Do hip flexor and glute stretches daily (5-10 minutes) to improve flexibility and reduce pressure.
- Maintain your saddle: Clean with mild soap weekly; check for wear like cracks that could cause uneven pressure.
- Vary your riding position: Stand periodically or shift weight to avoid static pressure—every 15-20 minutes on long rides.
Follow a simple maintenance schedule to stay ahead:
| Frequency | Task | Duration |
|---|---|---|
| Daily | Apply chamois cream; check for sores | 2 minutes |
| Weekly | Clean saddle and shorts; inspect adjustments | 10 minutes |
| Monthly | Measure sit bone fit; lube seat post | 15 minutes |
| Quarterly | Professional fit check if riding >100 miles/week | 1 hour |
Warning: Ignore saddle sores at your peril—they can lead to infections requiring antibiotics. Use antibiotic ointment if minor blisters appear.
Pro Tips for Ultimate Comfort
Go beyond basics with these expert insights to optimize your rides and avoid common pitfalls:
- Customize for your riding style: Road cyclists need firmer saddles for efficiency; mountain bikers benefit from wider, more padded ones to handle bumps.
- Experiment with saddle angles: A slight upward tilt can help some, but most prefer neutral—test on short rides to avoid over-correction.
- Stay hydrated and nourished: Dehydration tightens muscles, worsening pain; eat anti-inflammatory foods like berries post-ride.
- Common mistake to avoid: Don’t use household cushions—they compress unevenly and can worsen chafing.
- Optimize weight distribution: Strengthen core with planks (3x/week) to take pressure off your bum.
- Track progress: Use a cycling journal to note pain levels pre- and post-changes for data-driven tweaks.
- Upgrade gradually: Start with a $50 saddle before dropping $200—many find mid-range options like the WTB Volt perfect.
These tips can cut soreness risk by 60%, based on advice from Cycling Weekly.
When to Seek Professional Help
While DIY fixes work for most, call in pros if bike seat hurting bum persists after trying the methods above. Signs include: severe pain lasting >48 hours, swelling/redness suggesting infection, numbness in groin/legs, or pain radiating to back/hips.
Look for certified bike fitters (e.g., via the BikeFit association) or physiotherapists specializing in cycling. Check reviews on Google or forums like Reddit’s r/cycling. Expect costs of $100-200 for a fitting, or $50-150 for medical consults. If under warranty, contact your bike manufacturer—they may cover adjustments.
Consider warranty: Most saddles have 1-2 year guarantees against defects; document issues with photos.
FAQ
Q: Why does my bike seat hurt my bum only after long rides?
A: This is often due to overuse or friction buildup. Start with chamois cream and padded shorts, and build endurance gradually. If it’s pressure-related, check saddle width—long rides amplify mismatches, so a professional fit can prevent it by ensuring even weight distribution.
Q: Can a new saddle really stop bike seat hurting bum completely?
A: Yes, for many—up to 80% report full relief after switching to a properly fitted one. Measure sit bones first (tools cost $20 online), and test models with a 30-day return policy from shops like REI.
Q: Is bike seat pain normal for beginners?
A: It’s common but not inevitable. It usually fades in 2-4 weeks as your body adapts, but don’t ignore it—adjust fit early to avoid bad habits. Incorporate rest days and short rides to ease in.
Q: What if adjusting the saddle height makes my knees hurt?
A: That’s a sign of over-correction. Drop height by 3-5mm and test; ideal is 30-35 degree knee bend. If issues persist, cleat position or pedals might need tweaking— a fitter can diagnose in 30 minutes.
Q: Are there exercises to prevent saddle soreness?
A: Absolutely—focus on glutes and hamstrings with squats (3 sets of 10) and yoga poses like pigeon stretch. Do them 3x/week for 15 minutes to build tolerance and improve blood flow, reducing inflammation.
Q: How do I treat existing saddle sores?
A: Keep the area clean, apply over-the-counter hydrocortisone cream, and rest from riding for 3-5 days. Avoid popping blisters. If infected (pus or fever), see a doctor for antibiotics—prevention is key next time.
Q: Does bike type matter for seat pain?
A: Yes—hybrid or comfort bikes have upright positions that reduce pressure vs. aggressive road setups. If switching, re-fit entirely to match your posture.
Alternative Solutions for Bike Seat Pain
If saddle swaps don’t appeal, consider these options when standard fixes fall short, like for budget constraints or specific needs.
| Solution | Pros | Cons | Best For |
|---|---|---|---|
| Gel Seat Cover | Cheap ($15-30), easy to add/remove, adds cushion instantly | Can shift during rides, may trap heat/sweat | Beginners or temporary relief on existing saddles |
| Suspension Seatpost | Absorbs vibrations, reduces impact soreness | Adds weight (0.5-1 lb), costs $50-100 | Rough terrain riders or those with back issues |
| Cutout Saddles (e.g., Specialized Mimic) | Relieves perineum pressure via airflow, great for long distances | Higher price ($100+), less support for heavy riders | Endurance cyclists or women prone to numbness |
| Electric Bike Conversion | Less pedaling effort means less time/pressure on seat | Expensive kit ($200-500), changes bike dynamics | Casual riders wanting low-impact exercise |
Compare based on your budget and ride type—gel covers are a low-risk start.
Stop Bike Seat Pain for Good
Armed with this guide, you’re equipped to banish bike seat hurting bum and enjoy pain-free pedaling:
- Identify causes like poor fit or friction with our detailed breakdowns
- Apply fixes from quick adjustments to pro fittings, tailored to your needs
- Prevent future issues through maintenance, gear choices, and gradual training
Following these steps will transform your rides from uncomfortable slogs to pure enjoyment—many cyclists see relief in just one session. Don’t let soreness sideline you; start with a simple height check today and build from there.
Have you overcome bike seat pain with these tips? Share your story or questions in the comments below to help fellow riders!