
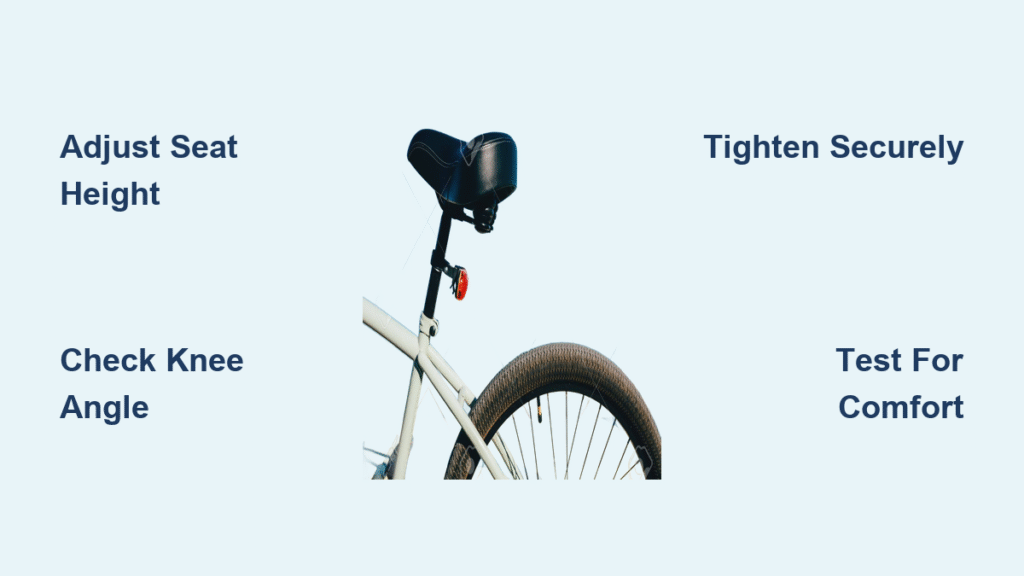
If you’ve been pedaling away on your Sunny Health & Fitness exercise bike only to feel discomfort in your back, knees, or hips, you’re not alone—many users struggle with improper seat height or positioning that turns workouts into a pain. The good news is that a simple Sunny bike seat adjustment can transform your ride into a comfortable, efficient session. As a quick fix, start by sitting on the bike and adjusting the seat height so your knee has a slight 25-30 degree bend at the bottom of the pedal stroke—this often resolves basic alignment issues in under 5 minutes.
In this comprehensive guide, we’ll go beyond that initial tweak to cover everything you need to know about Sunny bike seat adjustment, from understanding the right fit for your body to advanced positioning tips. Whether you’re dealing with a model like the Sunny SF-B1002 or SF-B901, you’ll find step-by-step instructions, tools required, safety precautions, and troubleshooting for common hurdles. By the end, you’ll have the confidence to customize your bike for optimal performance, preventing injuries and maximizing your cardio gains.
Why Proper Sunny Bike Seat Adjustment Matters
Before diving into the how-to, it’s essential to understand the impact of a well-adjusted seat on your Sunny exercise bike. An incorrect seat height or fore-aft position can lead to strain on your joints, reduced power output, and even long-term issues like knee pain or lower back discomfort. According to fitness experts from the American Council on Exercise (ACE), proper bike fit can improve pedaling efficiency by up to 20% and reduce injury risk significantly.
For Sunny bikes, which are popular for their affordability and durability, seat adjustment is straightforward but model-specific. Most models feature a vertical post for height and sometimes horizontal sliders for tilt or depth. Getting this right ensures your legs extend fully without locking knees, promoting a smooth, natural motion that mimics outdoor cycling. We’ll cover the biomechanics briefly: ideal seat height aligns your hip with the pedal at the bottom of the stroke, while fore-aft positioning keeps your knee over the pedal spindle to avoid undue stress on your quads or hamstrings.
Tools and Materials Needed for Sunny Bike Seat Adjustment

Adjusting your Sunny bike seat doesn’t require fancy equipment, but having the right tools ensures a secure and precise fit. Most adjustments can be done with basic household items or those included with your bike. Below is a table outlining the essentials for common Sunny models like the SF-B1002 Belt Drive or SF-B1423 Indoor Cycling Bike.
| Item | Quantity | Specifications |
|---|---|---|
| Allen wrench set | 1 set | Sizes 4mm-6mm (often included with bike; for loosening seat post clamp) |
| Adjustable wrench or pliers | 1 | For tightening bolts on older models; ensure it’s rust-resistant for longevity |
| Measuring tape or ruler | 1 | 12-24 inches long; for precise height measurements from pedal to seat |
| Bike repair stand (optional) | 1 | Portable model under $50; elevates bike for easier access during adjustment |
| Lubricant spray (e.g., WD-40) | 1 can | Bike-specific formula to prevent squeaks on adjustment mechanisms |
| Level tool | 1 | Small digital or bubble level; ensures seat is even for balanced riding |
Important: Always consult your Sunny bike’s user manual for model-specific torque specs—overtightening can damage threads, while undertightening leads to wobbling. If your bike is under warranty, avoid using power tools to prevent voiding coverage.
Preparation Steps and Safety Considerations
Proper preparation sets the stage for a smooth Sunny bike seat adjustment and minimizes risks. Start by placing your bike on a flat, stable surface like a rubber mat to prevent slips—exercise bikes can weigh 50-100 pounds, so stability is key. Turn off any electronic features if your model has them, and unplug the power cord for safety.
Safety first: Wear gloves to protect your hands from pinch points, and ensure the room is well-ventilated if using lubricants. If you’re new to bike adjustments, have a spotter nearby for heavier models. Check for wear: Inspect the seat post for cracks or rust, as compromised parts could fail during use. Measure your inseam beforehand (stand against a wall, place a book between your legs, and measure from floor to book top) to calculate ideal height—multiply inseam by 0.883 for a starting point.
Warning: Never adjust the seat while mounted on the bike, as this can cause imbalance and falls. If your Sunny bike has been unused for months, wipe down the adjustment mechanisms to remove dust buildup, which might cause sticking.
Step-by-Step Sunny Bike Seat Adjustment Process
Now, let’s get into the core of the guide: a detailed, phase-based process for adjusting your Sunny bike seat. This is broken into logical phases for clarity, suitable for most Sunny models. The entire process typically takes 15-30 minutes. Use numbered steps for sequential actions, and test after each phase.
Phase 1: Accessing and Loosening the Seat Mechanism
- Locate the seat post clamp: On Sunny bikes, this is usually a quick-release lever or bolt at the base of the seat tube, near the frame’s intersection with the pedal crank.
- Loosen the clamp: Insert the appropriate Allen wrench (typically 5mm) and turn counterclockwise 2-3 full rotations. For lever-style clamps, flip it to the open position. If it’s stiff, apply a spritz of lubricant and wait 1-2 minutes.
- Remove any height limiters: Some models have plastic stops—gently slide them up or down as needed for full range.
Tip: If the post doesn’t budge, tap it lightly with a rubber mallet wrapped in cloth to avoid scratches. This phase should take about 5 minutes.
Phase 2: Adjusting Seat Height for Optimal Leg Extension

Height is the most critical aspect of Sunny bike seat adjustment, as it directly affects your pedaling biomechanics. Aim for a position where your leg is almost fully extended at the bottom pedal position, with a 25-35 degree knee bend.
- Sit on the bike with shoes on (the ones you’ll use for workouts) and place one foot on the pedal at the 6 o’clock position.
- Raise or lower the seat post: Slide it up or down until your knee bends slightly—use a mirror or helper to check heel alignment (your heel should just touch the pedal).
- Secure the post: Slide it back into the frame, align the clamp, and tighten clockwise with the wrench to the manual’s torque (usually 15-20 Nm). Wiggle to ensure no play.
For precision, measure from the center of the pedal axle to the top of the saddle—this should be about 109% of your inseam for road-like efficiency on Sunny bikes. If your model has numbered markings on the post, note your setting for future reference. This phase takes 10 minutes and is where most users see immediate comfort improvements.
Phase 3: Fine-Tuning Fore-Aft Position and Tilt
Not all Sunny bikes allow fore-aft adjustment, but models like the SF-B1805 have sliders. This ensures your knee tracks over the pedal without forward lean.
- Loosen the fore-aft bolts: Under the seat, find the two rails and bolts—use an Allen wrench to loosen by 1-2 turns.
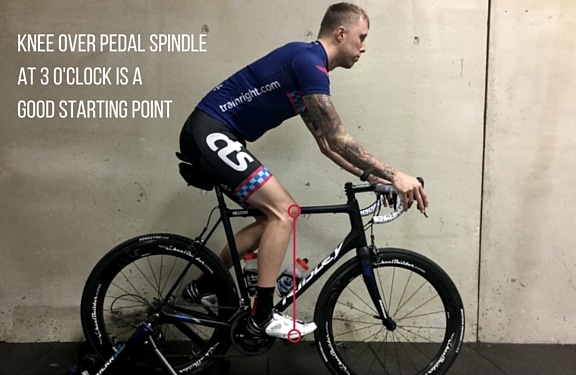
- Position the seat: Slide forward or back so that when the pedal is at 3 o’clock, a plumb line from your kneecap falls over the pedal axle (use string and weight for a DIY plumb bob).
- Adjust tilt if available: Most Sunny seats have a nose-down tilt of 0-5 degrees for comfort—loosen the rear bolts, angle slightly downward, and retighten.
- Tighten everything: Torque to spec and level the seat using your tool to ensure it’s even side-to-side.
Potential Complication: If rails are worn, they may slip—apply thread locker sparingly. This advanced phase adds 10 minutes but prevents patellar tracking issues.
Phase 4: Testing and Initial Ride
- Mount the bike carefully and pedal slowly at low resistance for 2-3 minutes.
- Check for discomfort: Note any pinching, rocking, or uneven pressure—readjust height by 1/4 inch if needed.
- Simulate a workout: Increase resistance and cadence to 70-90 RPM, monitoring for 10 minutes.
If everything feels smooth, congrats—you’ve nailed the Sunny bike seat adjustment! If not, revisit Phase 2.
Post-Completion Testing and Troubleshooting
After adjustment, thorough testing ensures longevity. Ride for a full 20-minute session, varying intensity, and assess: Does your back stay neutral? Are there no hot spots on your sit bones? Use a bike fit app like Bike Fast Fit for video analysis if available.
Common issues and fixes:
– Seat wobbles: Retighten clamp; if persistent, replace with a Sunny-compatible post ($20-30 on Amazon).
– Knee pain post-adjustment: Lower seat by 1 cm and retest—overextension is a frequent culprit.
– Squeaking: Lubricate moving parts; if it persists, check for loose frame bolts.
– Model variations: For upright Sunny bikes like the SF-B1001, focus more on height; recumbents like the SF-RB415 prioritize backrest alignment.
If adjustments don’t hold, the post might be bent—inspect visually or measure straightness with a level.
Pro Tips for Optimal Sunny Bike Seat Adjustment
To elevate your setup beyond basics, here are 5-7 expert tips from cycling pros and Sunny user forums:
– Personalize for body type: Taller riders (over 6’2″) may need an extended post extension kit; shorter users benefit from setback seats for better reach.
– Incorporate flexibility: Adjust seasonally—if you’re tighter in winter, raise the seat slightly for less hip flexion.
– Avoid common mistakes: Don’t adjust based on “feel” alone; use the knee-heel method for objectivity. Overlooking tilt can cause numbness—always angle nose down.
– Optimize performance: Pair with handlebar adjustment for a 90-degree elbow bend, boosting upper body comfort during HIIT.
– Maintenance hacks: Mark your ideal height with tape on the post for quick resets after moves or cleanings.
– Track progress: Log adjustments in a journal; many users find fine-tuning every 3 months accounts for fitness gains or weight changes.
– Enhance with accessories: Add a gel cover for extra padding on long rides, but ensure it doesn’t alter your fit measurements.
These tweaks can extend your Sunny bike’s usability and make workouts more enjoyable.
When to Seek Professional Help
While Sunny bike seat adjustment is DIY-friendly, some signs warrant a pro: Persistent pain despite tweaks, visible frame damage, or if your model has electronic adjustments (e.g., auto-leveling on premium Sunny variants). Look for certified bike fitters via the International Bike Fitting Institute—expect $50-150 for a session.
Choose providers with Sunny experience; check reviews on sites like BikeForums. Costs for parts like new seats run $30-60, and warranty claims (Sunny offers 3 years on frames) are free if adjustments caused issues. Always mention your model number for accurate advice.
FAQ
Q: How often should I perform Sunny bike seat adjustment?
A: Check and adjust every 1-3 months or after any body changes like weight loss/gain. For heavy use (5+ sessions/week), monthly tweaks prevent wear and maintain fit. It’s quick—5-10 minutes—and keeps your rides pain-free.
Q: What’s the ideal seat height for different Sunny bike models?
A: For most like the SF-B1002, use the 0.883 x inseam formula. Example: 30-inch inseam = ~26.5 inches from pedal center to seat top. Recumbent models focus on back angle (100-110 degrees); consult the manual for variances.
Q: Can I adjust the seat on a Sunny bike without tools?
A: Yes, for quick-release models—flip the lever to loosen. But for bolted setups, an Allen wrench is essential for security. Skipping tools risks instability during intense workouts.
Q: Why does my Sunny bike seat feel too high after adjustment?
A: This often means overextension; lower by 1 cm and retest the knee bend (aim for 30 degrees). If it’s a new bike, break-in period stiffness can mislead—ride 2-3 sessions before finalizing.
Q: Is there a difference in adjustment for upright vs. spin Sunny bikes?
A: Upright models (e.g., SF-B901) emphasize vertical height for posture, while spin bikes (e.g., SF-B1007) allow more fore-aft for aggressive positioning. Both use similar clamps, but spin seats are often narrower for speed.
Q: What if my seat post won’t slide after loosening?
A: Apply penetrating oil like WD-40, let it sit 10 minutes, then gently rock the post. If corroded, sand lightly or replace the post ($15-25). Avoid forcing to prevent frame damage.
Q: Does seat adjustment affect my Sunny bike’s warranty?
A: No, as long as you follow manual guidelines. Sunny encourages user adjustments for fit, but document changes if issues arise for claims.
Alternative Solutions for Sunny Bike Seat Comfort
If standard Sunny bike seat adjustment doesn’t suffice—say, due to a damaged post—consider these options. They provide similar benefits with varying trade-offs.
| Solution | Pros | Cons | Best For |
|---|---|---|---|
| Replacement Seat (e.g., Sunny OEM or Gel-Infused) | Enhanced padding, easy swap; improves comfort without full adjustment | Costs $20-50; may require minor tweaks | Users with numbness or long sessions |
| Bike Fit Kit (Professional Service) | Customized to your biomechanics; includes video analysis | Expensive ($100+); time-intensive | Chronic pain sufferers or athletes |
| Adjustable Seat Post Upgrade (e.g., Carbon Fiber) | Smoother height changes; lighter weight | $40-80; installation may need tools | Frequent adjusters or heavier riders |
| Ergonomic Saddle Adapter | Adds tilt/width options; no permanent changes | Can add bulk; compatibility check needed | Budget-conscious users avoiding full replacement |
Compare based on your needs—start with a replacement for quick wins.
Get Your Sunny Bike Ride Comfortable Again
With this guide, you’ve got the tools to master Sunny bike seat adjustment and eliminate discomfort for good:
– Essential tools and safety prep for hassle-free setup
– Phased steps from loosening to testing for precise fit
– Pro tips, troubleshooting, and alternatives for long-term success
Following these instructions will not only boost your workout efficiency but also protect your body from strain, ensuring every session on your Sunny bike is productive and enjoyable. Take action today—adjust your seat and hop on for a test ride. You’ll feel the difference immediately.
Have you adjusted your Sunny bike seat using these steps? Share your before-and-after experience in the comments below to inspire other riders! If issues persist, drop details for tailored advice.


