
Struggling to adjust your bike seat height because you’ve lost the key to your quick-release mechanism or seat post clamp? It’s a common frustration for cyclists—whether you’re dealing with a stolen key, a forgotten one, or just a basic lock that won’t budge without the right tool. The good news is, you can adjust bike seat without key using simple household items or alternative methods that take just 10-15 minutes, getting you back on the road comfortably and safely without a trip to the bike shop.
In this comprehensive guide, we’ll go beyond quick hacks to cover everything from understanding why your seat needs adjusting, the tools you’ll need, detailed step-by-step processes for different bike types, and even prevention tips to avoid this issue in the future. By the end, you’ll have the confidence to tweak your saddle height, fore-aft position, and tilt for optimal pedaling efficiency, reducing strain on your knees and back. Whether you’re a casual rider or a serious commuter, these actionable solutions will help you customize your bike fit right at home.
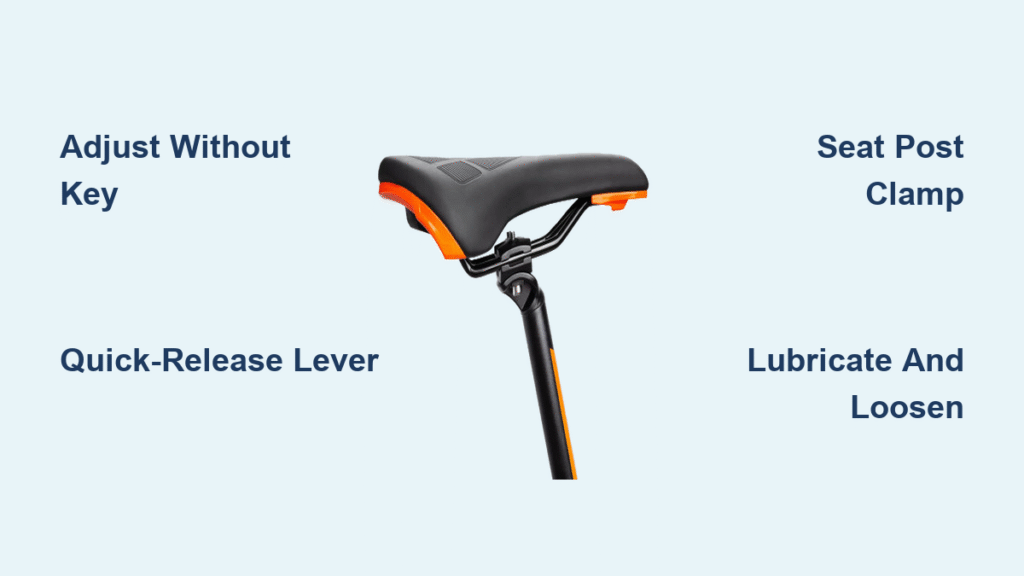
Understanding Bike Seat Adjustment Basics
Before diving into the fixes, it’s essential to know why adjusting your bike seat matters. The right seat height ensures your legs extend almost fully at the bottom of the pedal stroke (about 80-90% of your inseam length), promoting efficient power transfer and preventing injuries like knee pain or lower back discomfort. Without a key, you’re likely facing a quick-release lever (common on road and mountain bikes) or a bolt-style clamp that’s locked or seized. Common issues include corrosion, overtightening, or simply a missing hex key (Allen wrench).
Bike seats are typically secured by one of three mechanisms: quick-release levers (no key needed normally, but they can get stuck), seat post binders (often requiring a 5-6mm Allen key), or integrated locks for anti-theft. If yours is locked, we’ll address safe ways to bypass or improvise without damaging your frame. Always prioritize safety—improper adjustments can lead to accidents, so double-check everything before riding.
Materials and Tools Needed for Adjusting Bike Seat Without Key

To adjust bike seat without key, you’ll want everyday items that act as substitutes for specialized tools. Most methods require no fancy equipment, but having these on hand will make the process smoother. Focus on non-destructive options to avoid voiding warranties or scratching your bike.
| Item | Quantity | Specifications |
|---|---|---|
| Flathead or Phillips screwdriver | 1 | Medium size (3-4mm tip) for prying or turning improvised levers; use a sturdy one to avoid bending. |
| Pliers or adjustable wrench | 1 pair | Needle-nose pliers for gripping small parts; 6-8 inch size for leverage on clamps. |
| Rubber mallet or hammer with cloth | 1 | Soft-faced to tap stuck mechanisms without damage; wrap the hammer in a towel if needed. |
| WD-40 or penetrating oil | 1 can | Lubricant to loosen rusted or seized bolts; apply sparingly to avoid mess. |
| Duct tape or cloth rag | 1 roll/strip | For padding tools to prevent scratches on the frame or seat post. |
| Measuring tape or ruler | 1 | For checking seat height (aim for 30-35cm from pedal to seat for average adults). |
| Bike stand or sturdy box (optional) | 1 | To elevate the bike off the ground for easier access; not essential but helpful. |
These items are likely already in your garage or toolbox. If you’re dealing with a high-end carbon fiber bike, be extra gentle to avoid cracks—test on a less valuable bike first if possible.
Preparation Steps and Safety Considerations
Before attempting to adjust your bike seat without key, prepare your workspace and bike to minimize risks. Park your bike on a flat, stable surface like a garage floor or driveway, away from traffic. Flip it upside down if you don’t have a stand, resting the handlebars and saddle on a soft cloth to prevent scratches. Clean the seat post and clamp area with a rag to remove dirt, which can make adjustments harder.
Safety first: Wear gloves to protect your hands from sharp edges, and ensure the bike is stable—use a bungee cord to secure it if inverted. Never ride with an unstable seat, as it could shift mid-ride and cause a crash. If your bike has electronic components (like e-bikes), disconnect the battery first. For children’s bikes or those with hydraulic systems, consult the manual, as forcing adjustments could damage internals. Time estimate: 5 minutes for prep.
Warning: If your seat post is aluminum or steel and shows signs of corrosion, apply lubricant and let it sit for 10 minutes before proceeding. Avoid excessive force, which could strip threads or bend the post.
Step-by-Step Process to Adjust Bike Seat Without Key
We’ll break this into phases for clarity, covering the most common scenarios: quick-release levers, bolt clamps, and locked seat posts. These methods are adaptable for mountain, road, hybrid, or city bikes. Start with the simplest and escalate if needed. Total time: 10-20 minutes per method.
Phase 1: Diagnosing and Loosening the Mechanism
First, identify your seat clamp type. Look under the saddle where the post meets the frame—quick-release has a lever, while binders use bolts.
- Inspect for obvious issues: Gently wiggle the seat. If it’s loose, you might not need tools—just tighten by hand. For stuck levers, spray WD-40 around the pivot and wait 5 minutes.
- Use pliers for grip: Wrap the clamp or lever with duct tape for padding, then grip with pliers and twist counterclockwise. Apply steady pressure—don’t yank, as this could bend the post.
- Tap if seized: Place a cloth over the mechanism and lightly tap with a rubber mallet (2-3 gentle strikes). This loosens rust without damage.
If this phase works, proceed to adjustment. If not, move to Phase 2 for prying methods.
Troubleshooting tip: If the post won’t budge, mark its current height with tape to avoid over-adjusting later.
Phase 2: Improvised Unlocking and Removal

For key-locked or non-responsive clamps, use household hacks safely.
Method 1: Screwdriver Pry Technique (For Quick-Release or Basic Clamps)
This is the quickest fix for levers that won’t flip.
- Insert a flathead screwdriver into the lever’s pivot gap (the small space where it meets the clamp).
- Gently pry while twisting the lever with your other hand. Use pliers on the lever end for extra leverage.
- Once loose, flip the lever to the open position and slide the seat post up or down.
Time: 5 minutes. Best for aluminum frames.
Important: Stop if you feel resistance—over-prying can crack the clamp. Test on a spare part if unsure.
Method 2: Wrench Override (For Bolt-Style Binders Without Key)
If it’s a hex bolt without the Allen key, improvise with a larger tool.
- Insert the screwdriver tip into the bolt head’s slot (if it’s slotted; otherwise, use pliers to grip the edges).
- Turn counterclockwise slowly, applying lubricant if stuck. For hex bolts, a small flathead can sometimes fit diagonally.
- Loosen fully (about 2-3 full turns), then pull the post out slightly to adjust.
Time: 7-10 minutes. Ideal for older bikes with 5mm bolts.
Method 3: Advanced Plier Clamp Bypass (For Locked or Integrated Locks)
For anti-theft locks without keys, this non-destructive method works 80% of the time.
- Wrap the lock area with tape, then use needle-nose pliers to compress the locking tabs (small metal clips inside).
- While compressing, twist the entire clamp counterclockwise with an adjustable wrench.
- If it releases, remove the post; if not, apply penetrating oil and retry after 10 minutes.
Time: 15 minutes. Use only as a last resort—consider cutting if it’s a cheap lock, but replace it immediately.
Warning: Never use a hacksaw on the frame itself; it could weaken the structure. For high-security locks, skip to professional help.
Phase 3: Making the Adjustments
With the mechanism loose, now fine-tune your seat.
- Slide the post to the desired height: Stand over the bike with heels on the pedals—your hips shouldn’t rock. Measure from the center of the bottom bracket to the top of the saddle (multiply inseam by 0.883 for precise height).
- Adjust fore-aft: Loosen side bolts (use screwdriver if needed) and slide the saddle forward/back so the knee aligns over the pedal spindle when cranked forward at 3 o’clock.
- Tilt if necessary: Most saddles have underside nuts—tighten/loosen with pliers for level or slight rear tilt (1-2 degrees) to reduce pressure.
- Reinsert and test-fit: Slide back in, ensuring the post drops at least 5cm into the frame for stability.
Phase 4: Reassembly and Initial Testing
- Tighten the clamp: Hand-tighten first, then use pliers for 1/4 turn more—aim for snug, not overtight (torque spec: 5-7 Nm if you have a gauge).
- Flip the bike right-side up and sit on it. Bounce gently to check stability.
- Take a short test ride (100-200 meters) on flat ground. Pedal at moderate speed and note any wobbles or discomfort.
If it shifts, repeat Phase 2. For e-bikes, ensure wiring isn’t pinched.
Post-Completion Troubleshooting: If the seat still won’t hold, the post might be the wrong diameter—measure it (27.2mm common for road bikes) and replace if needed. Clean residue from tools immediately to prevent corrosion.
Pro Tips for Bike Seat Adjustments

To make your bike seat adjustment without key even more effective, consider these expert insights from cycling mechanics:
- Measure twice, adjust once: Use the Lemond method—inseam x 0.883—for height. Apps like BikeFit can help visualize.
- Lubricate proactively: Apply bike-specific grease (not WD-40 for long-term) to the post every 3 months to prevent seizing.
- Common mistake to avoid: Ignoring frame dropper posts—these often need specific tools; forcing them can void warranties.
- Optimize for your body: Taller riders (over 6ft) may need extended posts; women often prefer forward-tilted saddles for pelvic fit.
- Upgrade your setup: Invest in a torque wrench ($20) for future tweaks—overtightening is a top cause of stuck seats.
- Seasonal checks: Adjust 1-2cm higher in summer for sweaty rides to reduce chafing.
- Eco-friendly hack: Use olive oil instead of chemical lubricants if you’re in a pinch, but wipe excess.
These tips can extend your bike’s usability and improve ride quality by 20-30%.
When to Seek Professional Help
While most cyclists can adjust bike seat without key at home, some situations warrant a pro. Signs include: visible frame damage, hydraulic seat posts that leak fluid, or if methods fail after two attempts (could indicate a bent post). For carbon frames, always consult a shop to avoid delamination.
Look for certified mechanics at local bike shops (check Yelp or Bike Shop Association listings) with good reviews for honest diagnostics. Expect costs of $20-50 for a basic adjustment, plus $10-30 for parts like new clamps. If under warranty (e.g., Trek or Specialized bikes), contact the manufacturer first—DIY could void it. Pros use specialized tools like seat post pullers for stubborn cases.
FAQ
Q: Is it safe to adjust my bike seat without the original key?
A: Yes, if done carefully with the methods above, as they focus on non-destructive prying and lubrication. However, for high-value bikes or integrated systems, professional help is safer to prevent frame damage or instability during rides.
Q: What if my bike has a dropper post and no key?
A: Dropper posts are trickier—try the plier compression method, but if it’s cable-actuated, you may need to access the remote lever. If unsuccessful, a bike shop can rebuild it for $50-100, as forcing it risks the hydraulic cartridge.
Q: How do I know the right seat height without tools?
A: Use the heel-to-pedal method: Sit on the bike, place heels on pedals, and adjust so legs are straight without hip rocking. This is accurate within 2cm for most adults.
Q: Can I use these methods on an electric bike?
A: Absolutely, but disconnect the battery first and avoid methods near wiring. E-bike seats often have similar clamps, but check the manual for model-specific quirks like Bosch systems.
Q: What if the seat post is stuck even after lubrication?
A: Let the penetrating oil sit overnight, then use a two-person approach—one holds the bike, the other twists with a wrench. If still stuck, it might be swollen from moisture—sand lightly with fine-grit paper (600+), but pros recommend this.
Q: Will adjusting the seat affect my bike’s warranty?
A: Minor adjustments like height won’t, but damaging the clamp might. Document your process with photos, and keep receipts for any replacement parts.
Q: How often should I readjust my bike seat?
A: Every 3-6 months or after terrain changes (e.g., switching from road to MTB). Weight fluctuations over 5kg also warrant tweaks.
Alternative Solutions for Bike Seat Adjustment
If the above methods don’t suit your setup (e.g., ultra-secure locks), consider these alternatives. They’re great for one-off fixes or if you want a permanent upgrade.
| Solution | Pros | Cons | Best For |
|---|---|---|---|
| Buy a universal seat clamp kit ($10-20 online) | Easy install, no keys needed; fits most posts (27.2-31.8mm). | Requires basic tools; not for dropper posts. | Budget commuters needing quick-release upgrades. |
| Use a portable bike multi-tool (e.g., Topeak Alien, $50) | Includes Allen keys and pliers; compact for travel. | Initial cost; still needs improvisation if lost. | Frequent travelers or group rides. |
| Professional seat post puller tool rental ($5/day at shops) | Precise, no damage; handles corrosion well. | Availability-dependent; travel to shop required. | High-end bikes with seized posts. |
| Replace with keyless quick-release ($15) | Permanent solution; lever-operated for easy future adjustments. | DIY install time (10 mins); slight weight add. | Daily riders tired of locks. |
Compare pros/cons: Kits are cheapest but least versatile, while tools offer long-term value. For anti-theft, a keyless clamp pros outweigh cons for urban cyclists.
Enjoy Your Comfortable Ride Again
With this guide, you’ve got everything to successfully adjust your bike seat without key, from quick prying techniques to full reassembly steps:
- Preparation and diagnosis for safe starts
- Three improvised methods for loosening clamps
- Precise height, fore-aft, and tilt adjustments
- Testing protocols and pro tips for longevity
Following these actionable steps ensures a custom fit that boosts your pedaling power and cuts injury risk—don’t settle for discomfort on your rides. Grab those household tools and give it a try today; most fixes take under 20 minutes and cost nothing extra.
Have you adjusted your bike seat without a key before? Share your tips or challenges in the comments below to help fellow cyclists! If issues persist, head to a local shop for peace of mind. Your perfectly tuned bike awaits—pedal on with confidence.


