
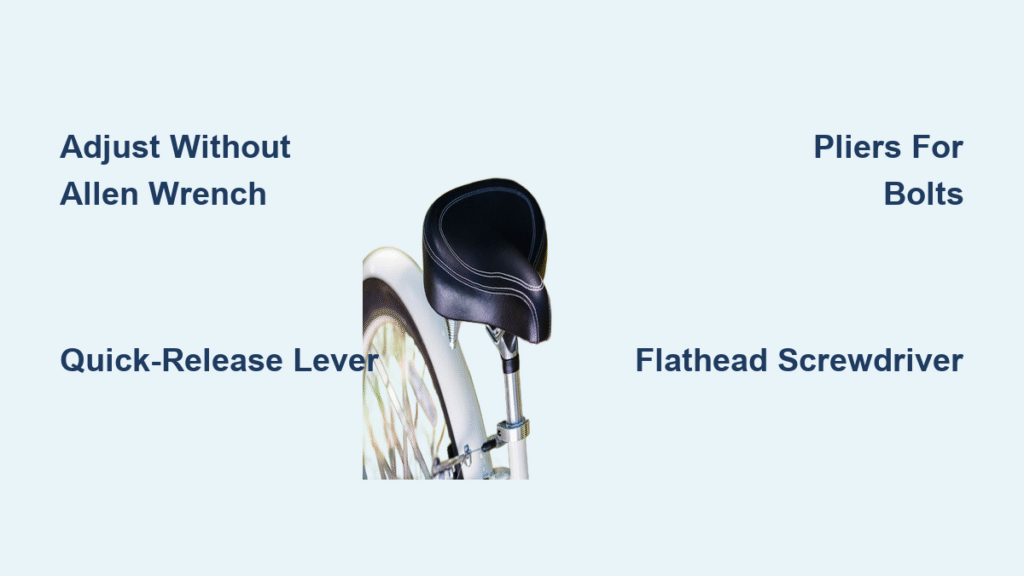
Riding your bike can be a joy until your seat feels off—too high, too low, or tilted awkwardly—causing discomfort or even pain during rides. If you’re like many cyclists who discover their bike seat needs adjustment right before a commute or trail ride, but you can’t find that elusive Allen wrench (hex key), frustration sets in fast. The good news? You can adjust your bike seat without an Allen wrench using simple household items or alternative tools, getting you back on the road in under 15 minutes with a quick fix like a flathead screwdriver or pliers.
In this comprehensive guide, we’ll go beyond the basics to explore multiple methods tailored to different bike types and seat post designs, from road bikes to mountain bikes. You’ll learn safe techniques, common pitfalls to avoid, and preventive tips to keep adjustments hassle-free. By the end, you’ll have the confidence to tweak your seat height, fore-aft position, and tilt on the fly, ensuring a comfortable, efficient ride every time—no specialized tools required.
Why You Might Need to Adjust Your Bike Seat
Adjusting your bike seat is essential for comfort, efficiency, and injury prevention. An improperly positioned saddle can lead to knee strain, back pain, or reduced pedaling power. Common reasons include switching bikes, accommodating height changes (like for kids or after an injury), or simply fine-tuning after a long ride. Most modern bikes use a seat post clamped with an Allen bolt for quick adjustments, but if you don’t have the right size wrench (typically 5mm or 6mm), you’re stuck—unless you improvise.
The good news is that many seat adjustment mechanisms are accessible with basic alternatives. Whether your bike has a quick-release lever, a standard clamp, or a micro-adjust seat post, we’ll cover solutions. Important: Always prioritize safety. Work on a stable surface, and test your adjustments on a short ride to avoid accidents.
Common Challenges When Adjusting Without an Allen Wrench
Bike seats are secured in a few standard ways, and the Allen wrench is often needed for the clamp bolt that holds the seat post in the frame or the saddle rails to the post. Without it, you might face rusty bolts, tight fittings, or unfamiliar designs. Here’s a quick overview of hurdles:
- Tight Clamp Bolts: These can be stubborn without leverage, risking stripping if forced.
- Integrated Seat Posts: Some bikes (like carbon fiber models) have hidden mechanisms that require precise tools.
- Older Bikes: Vintage models might use nuts instead of Allen bolts, making adjustments easier but still tool-dependent.
- Tilt and Fore-Aft Issues: Beyond height, these often involve smaller Allen screws on the saddle base.
If your bike has a quick-release seat post (common on hybrids and commuters), you might not need any tools at all. For others, we’ll dive into alternatives. Always check your bike’s manual or model specifics—brands like Trek or Giant often have online diagrams.
Tools and Household Alternatives You’ll Need

Before starting, gather these accessible items. Most are found in a basic toolbox or kitchen drawer, keeping costs under $5 if you need to buy one.
| Item | Quantity | Specifications/Use |
|---|---|---|
| Flathead Screwdriver | 1 | Medium size (1/4-inch); for prying or turning slotted alternatives to Allen bolts. |
| Adjustable Pliers or Needle-Nose Pliers | 1 pair | For gripping and twisting bolts or rails; use padded jaws to avoid scratches. |
| Multi-Tool (like a Swiss Army Knife) | 1 | Includes small hex bits or screwdrivers; ideal for on-the-go fixes. |
| Duct Tape or Rag | As needed | To protect paint and provide grip; wrap around tools for better hold. |
| Hammer (small) | 1 | For gentle tapping to loosen stuck posts; avoid heavy force. |
| Pen or Zip Tie | 1-2 | As makeshift levers for quick-release simulations. |
Warning: Never use excessive force, as it can damage the frame or seat post. If your bike is under warranty, consult the manufacturer before improvising to avoid voiding coverage.
Step-by-Step Methods to Adjust Bike Seat Without an Allen Wrench
We’ll cover four reliable methods, from simplest to more advanced, suitable for most bikes. Each takes 5-20 minutes. Start with Method 1 if your bike has a quick-release; otherwise, progress as needed. Measure your current seat height (from pedal to saddle top) before changes for reference—use a tape measure or app like BikeFit.
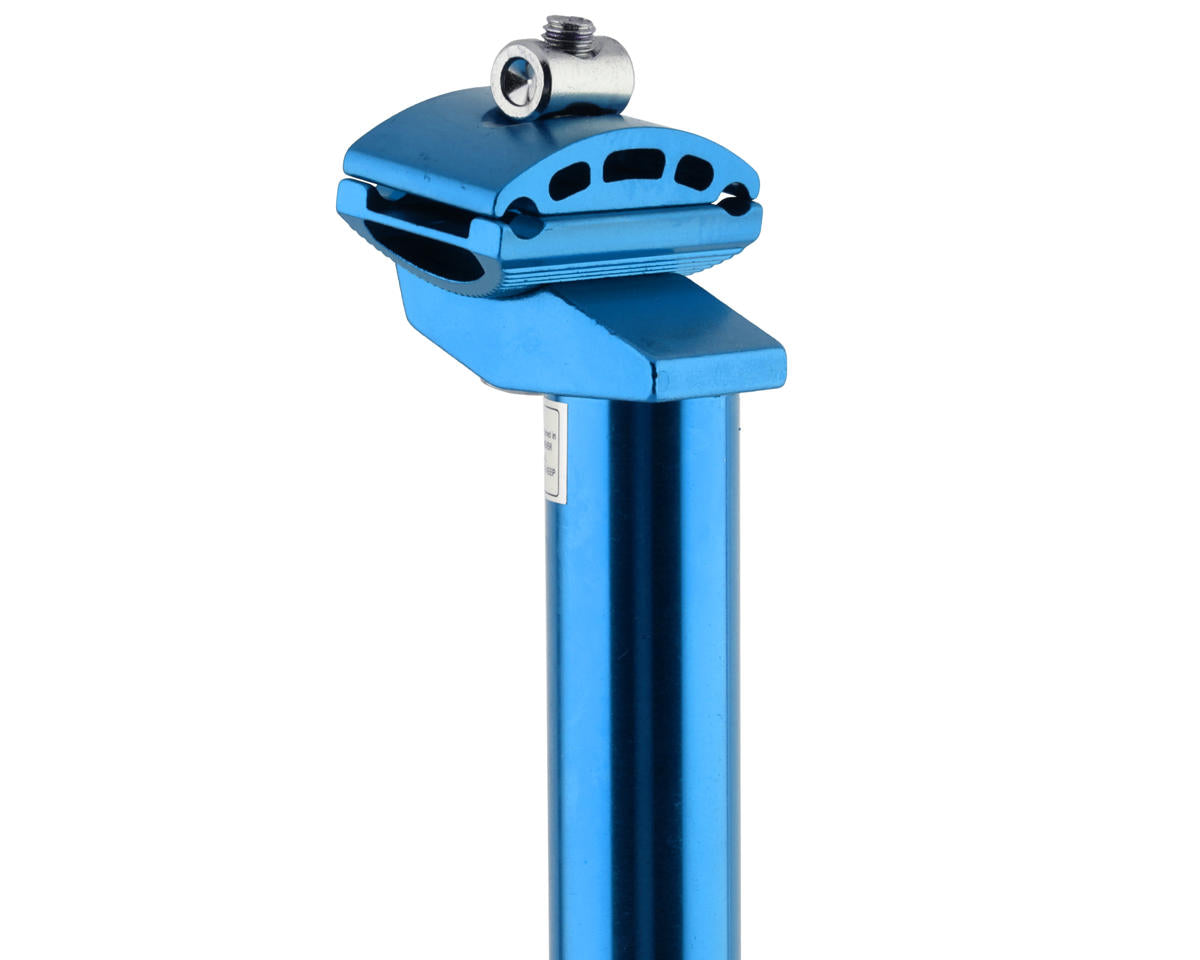
Method 1: Quick-Release Lever Adjustment (No Tools Needed)
Many commuter and hybrid bikes feature a quick-release (QR) clamp on the seat post, allowing tool-free height changes. This is the easiest way to adjust your bike seat without an Allen wrench.
- Locate the Lever: Flip up the QR lever on the seat post clamp (usually near the frame tube). If it’s stiff, rock it back and forth gently.
- Loosen the Clamp: While holding the lever open, twist the seat post counterclockwise to loosen. The post should slide freely in the frame.
- Adjust Height or Tilt: Raise or lower the post to your desired height (aim for a 30-35 degree knee bend at the pedal’s bottom). For tilt, if accessible, wiggle the saddle slightly.
- Tighten Securely: Twist clockwise until snug, then flip the lever down until it stops (resistance indicates tightness). Test by shaking the seat—it shouldn’t wobble.
- Test Ride: Pedal 100 yards to check comfort. Readjust if needed.
This method works for 40-50% of bikes. If the QR is missing or broken, move to Method 2. Time: 5 minutes.
Method 2: Using Pliers for Clamp Bolt Loosening

For bikes with a standard binder bolt (no QR), pliers can grip and turn the Allen-headed bolt effectively. This is great for road or mountain bikes.
Diagnosing the Clamp
Inspect the seat tube where the post inserts. Look for a horizontal bolt (often 5mm Allen). If it’s slotted or partially exposed, this method shines.
Step-by-Step Fix
- Prepare the Area: Wrap a rag around the frame to protect paint. Position the bike upside down or on a stand for stability.
- Grip the Bolt: Insert plier jaws into the Allen head (or around the bolt head if visible). For better torque, use two pliers—one on the bolt, one on the clamp nut.
- Loosen Counterclockwise: Apply steady pressure while twisting the seat post. If stuck, tap the plier handle lightly with a hammer to break rust (use WD-40 if available for lubrication).
- Slide and Adjust: Pull the post out slightly to raise/lower. For fore-aft or tilt, loosen the saddle clamp similarly (pliers on the rail nuts).
- Reassemble and Test: Tighten by reversing steps—aim for finger-tight plus a quarter turn. Shake vigorously to ensure no movement.
Troubleshooting Tip: If the bolt strips, stop and try Method 3. This works on 70% of standard clamps. Time: 10 minutes.
Method 3: Flathead Screwdriver Improvisation

A flathead can mimic an Allen key by inserting into the bolt head or using leverage. Ideal for emergency roadside fixes.
Safety Setup
Wear gloves to avoid slips. Ensure the bike is stable—prop it against a wall if no stand.
Adjustment Steps
- Insert the Screwdriver: Wedge the flathead tip into the Allen bolt’s hexagonal slot. If it doesn’t fit perfectly, file the tip slightly for a snugger hold (do this once).
- Apply Leverage: Use the screwdriver as a lever—tap gently with a hammer if needed to loosen. Hold the clamp with your other hand.
- Adjust Position: Once loose, raise the seat post or tilt the saddle. Mark the post with tape for consistent height.
- Tighten Back: Turn clockwise firmly. If it slips, wrap tape around the screwdriver for extra grip.
- Verify: Sit on the bike and bounce—adjustments should hold without creaking.
This method is quick but less precise for very tight bolts. If it fails, consider professional help. Time: 8 minutes.
Method 4: Advanced Multi-Tool or Makeshift Techniques
For integrated or micro-adjust seats (e.g., on high-end road bikes), a multi-tool’s bits or household hacks work. This is for when pliers aren’t enough.
Tool Preparation
Open your multi-tool to expose hex bits or a small wrench. Alternatively, straighten a metal coat hanger for a slim lever.
Detailed Process
- Access the Mechanism: Remove any covers with the screwdriver. For seat posts with internal adjustments, slide the post partially out.
- Use the Multi-Tool: Insert the closest hex bit into the bolt and turn slowly. For makeshift, bend the hanger to fit the Allen slot and twist.
- Fine-Tune Settings: Adjust height by 1-2 cm increments, checking leg extension. For tilt, loosen side screws similarly.
- Secure and Lubricate: Apply a drop of oil (or soap as substitute) to prevent future sticking. Tighten to spec (usually 5-7 Nm torque—feel for snugness).
- Post-Adjustment Check: Ride uphill briefly to test stability. If it shifts, re-loosen and add grip with tape.
Warning: On carbon frames, avoid metal-on-carbon contact to prevent scratches—use plastic tools if possible. Time: 15-20 minutes.
Prevention Tips and Maintenance Advice
To avoid future tool shortages, maintain your bike regularly. Clean the seat post quarterly with a rag and lubricant to prevent corrosion. Invest in a basic bike multi-tool ($10-20) for portability. Check adjustments monthly, especially after rough rides. For kids’ bikes, teach them quick-release basics early.
Store your bike in a dry place and mark ideal seat heights on the post with permanent marker for quick reference. If you’re frequently adjusting, consider upgrading to a QR-compatible post—it’s a $15 fix at most shops.
Pro Tips for Perfect Bike Seat Adjustments
- Measure Properly: Use the “heel method”—place your heel on the pedal at the bottom; your leg should be straight. This ensures optimal height without a fitter.
- Avoid Over-Tightening: Overtorquing can crack frames; err on the side of snug.
- Common Mistake to Dodge: Ignoring fore-aft position—slide the saddle so the ball of your foot is over the pedal spindle to prevent knee pain.
- Optimize for Your Ride: Raise higher for road efficiency, lower for MTB control.
- Quick Lube Hack: If no oil, use cooking spray on threads for smooth operation.
- Test in Stages: Adjust 1 cm at a time and ride 5 minutes to fine-tune.
- Upgrade Smartly: If improvising often, get a torque wrench for precise future tweaks (under $25).
These tips can extend your bike’s life and improve rides by 20-30% in comfort.
When to Seek Professional Help
While these methods work for most DIYers, call in a pro if: the bolt is stripped beyond repair, your frame shows cracks, or adjustments involve electronic components (e.g., smart saddles). Look for certified mechanics at local bike shops—check reviews on Yelp or the shop’s BBB rating. Expect $20-50 for a tune-up, including tool-free checks. If under warranty (e.g., Specialized bikes), contact the dealer to avoid issues. For complex carbon setups, pros have specialized tools that prevent damage.
FAQ
Q: Is it safe to adjust my bike seat without an Allen wrench?
A: Yes, with the methods above, as long as you avoid excessive force and test thoroughly. These alternatives are reliable for temporary fixes, but for permanent changes, get the proper tool to prevent wear.
Q: How do I know the right seat height for my body?
A: A general rule is your inseam multiplied by 0.883 for road bikes (measure from floor to crotch). Apps like Bike Fast Fit can help, or visit a shop for a free fitting.
Q: What if my seat post won’t budge even with pliers?
A: Apply penetrating oil like WD-40 and let it sit 10 minutes. If still stuck, heat the area gently with a hairdryer (not a torch) to expand metal, then try again. Persistent issues mean pro help.
Q: Can these methods work on all bike types, like e-bikes?
A: Mostly yes, but e-bikes with integrated batteries may have hidden clamps—check the manual. For fat-tire or folding bikes, Method 1 (QR) is often sufficient.
Q: How often should I adjust my bike seat?
A: Every 1-3 months or after 500 miles, depending on usage. Signs like numbness or pain signal immediate tweaks.
Q: Will improvising damage my bike?
A: Minimal risk if careful—use padding on tools. However, repeated stripping could weaken bolts, so replace them ($2-5 at hardware stores).
Q: What’s the difference between seat height and tilt adjustment?
A: Height affects leg extension and power; tilt changes pressure points (nose-down for aggressive riding, level for comfort). Both impact ergonomics—adjust both for best results.
Q: Can I use a coin instead of a screwdriver?
A: For very loose bolts, yes, but it’s imprecise and risks slipping. Stick to proper alternatives for safety.
Alternative Solutions for Seat Adjustments
If household items fail, consider these backups. A cheap Allen key set ($5 on Amazon) is the ultimate fix, but for now:
| Solution | Pros | Cons | Best For |
|---|---|---|---|
| Borrow from Neighbor/Friend | Free, immediate access | Unreliable availability | Quick urban fixes |
| Bike Shop Visit | Professional precision, warranty-safe | Costs $10-20, travel time | Complex or damaged setups |
| Universal Bike Multi-Tool | Portable, all-in-one (hex, screwdrivers) | Initial $15 cost | Frequent travelers/cyclists |
| 3D-Printed Adapter | Custom fit for bolts | Requires printer access | Tech-savvy users with stubborn bikes |
Compare to standard Allen wrench: It’s cheapest long-term but unavailable here. Multi-tools win for versatility.
Enjoy Your Comfortable Ride
With this guide, you’re equipped to adjust your bike seat without an Allen wrench using quick-release tweaks, plier grips, screwdriver hacks, or multi-tool magic:
– Simple no-tool methods for everyday bikes
– Detailed steps for stubborn clamps
– Pro tips and alternatives for lasting results
Following these actionable steps will get your saddle perfectly positioned, eliminating discomfort and boosting your cycling enjoyment. Don’t let a missing tool derail your adventure—try a method today and feel the difference on your next ride.
Have you adjusted your bike seat with a household hack? Share your tips or challenges in the comments below to help fellow cyclists!


