
Riding your bike only to feel discomfort in your back, knees, or hips? You’re not alone—many cyclists struggle with an improperly adjusted bike seat that leads to pain and reduced performance. Adjusting your bike seat with an Allen wrench is a simple, quick fix that can transform your ride, ensuring better posture and efficiency without needing a bike shop visit. In just 10-15 minutes, you can raise, lower, or tilt your seat for optimal comfort.
In this comprehensive guide, we’ll go beyond the basics to cover everything you need to know about adjusting your bike seat with an Allen wrench. From gathering the right tools and preparing safely to detailed step-by-step instructions, troubleshooting common issues, and pro tips for long-term maintenance, you’ll gain the confidence to handle this yourself. By the end, you’ll have a perfectly fitted bike seat that enhances your cycling experience and prevents future discomfort.
Tools and Materials Needed for Adjusting Bike Seat
Before diving into the adjustment process, it’s essential to have the right tools on hand. Most bike seats are secured with a clamp that requires an Allen wrench (also known as a hex key) for loosening and tightening. This method is common on modern bikes, from road racers to mountain bikes, and works for both quick-release and bolted seat posts.
Here’s a breakdown of what you’ll need. These items are inexpensive and readily available at bike shops or hardware stores. If your bike has a different setup (like a quick-release lever), you might not need the Allen wrench, but we’ll cover variations later.
| Item | Quantity | Specifications |
|---|---|---|
| Allen Wrench Set | 1 set | Sizes 4mm, 5mm, and 6mm are most common for seat clamps; opt for a foldable multi-tool for portability |
| Bike Multi-Tool (optional) | 1 | Includes Allen wrenches, screwdrivers, and chain tools for all-in-one convenience |
| Clean Rag or Microfiber Cloth | 1-2 | For wiping down the seat post and frame to remove dirt |
| Bike Grease or Lubricant | Small tube | Anti-seize compound to prevent corrosion on the seat post |
| Ruler or Measuring Tape | 1 | For measuring seat height accurately (in inches or cm) |
| Level Tool (optional) | 1 | Bubble level or smartphone app to check seat tilt |
| Bike Stand (optional) | 1 | For stability during adjustment; a wall-mounted or floor stand works best |
Important: Always check your bike’s manual or model specifics. For example, carbon fiber frames may require torque wrenches to avoid damage—don’t overtighten!
Preparing to Adjust Your Bike Seat
Proper preparation ensures a smooth adjustment process and prevents accidents or damage to your bike. Start by working in a well-lit, flat area like a garage or driveway. If possible, flip your bike upside down or use a stand to elevate it securely—this keeps the bike stable and makes accessing the seat post easier.
Safety Considerations
Safety first: Wear gloves to protect your hands from sharp edges, and ensure the bike is stable to avoid it tipping over. If you’re adjusting a high-end bike with electronic components (like e-bikes), disconnect the battery to prevent any electrical issues. Park the bike on a soft surface to avoid scratching the frame.
Warning: Never adjust your seat while riding, as this can cause loss of control and injury. Also, if your bike has been in storage, inspect for rust or wear on the seat post, which could make adjustments unsafe.
Initial Assessment
Before grabbing the Allen wrench, assess your current setup. Sit on the bike in your normal riding position (or have a friend hold it steady) and note any discomfort:
– Height issues: If your knees are bent too much or your hips rock side-to-side while pedaling, the seat might be too low or high.
– Tilt problems: A nose-up seat can cause pressure on your groin; nose-down might make you slide forward.
– Fore-aft position: This is trickier and often requires a bike fit, but we’ll touch on it.
Measure your current seat height from the center of the bottom bracket (crank axle) to the top of the saddle. A good starting point is the LeMond method: Stand on the ground with your heel on the pedal at the bottom of the stroke—the seat should allow your leg to fully straighten. This prep step takes about 5 minutes and sets you up for success.
Step-by-Step Guide to Adjusting Bike Seat with Allen Wrench

Now, let’s get to the core of how to adjust your bike seat with an Allen wrench. This process is straightforward and can be done in phases: loosening, adjusting, and securing. We’ll break it into logical steps, assuming a standard dropper or fixed seat post with a bolted clamp. Time estimate: 10-20 minutes total.
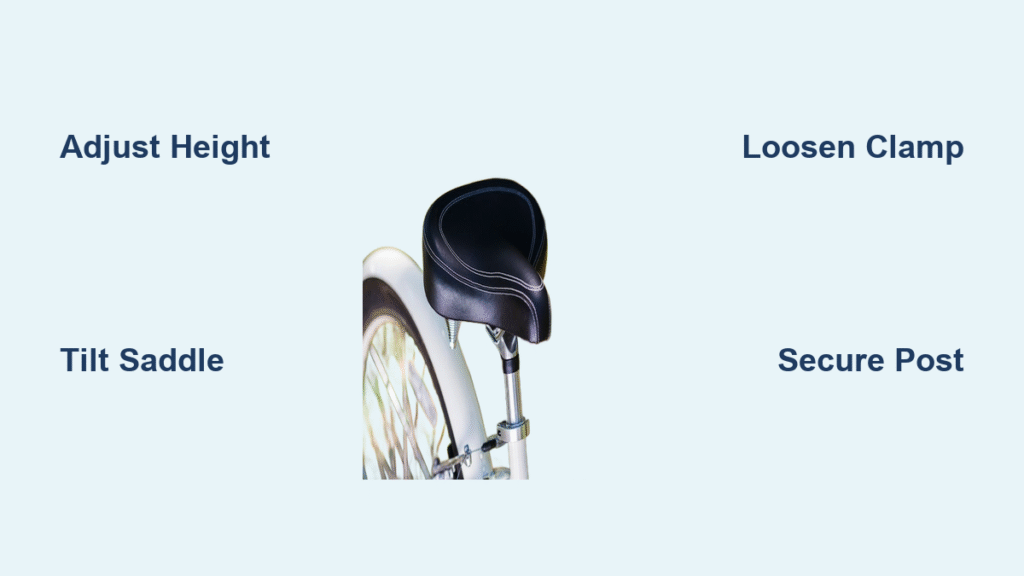
Phase 1: Loosening the Seat Clamp
The seat post is held in place by a clamp at the frame’s seat tube, secured with an Allen bolt.
- Locate the seat clamp: It’s usually at the top of the seat tube, where the post inserts. On most bikes, it’s a two-bolt system or a single binder bolt.
- Insert the Allen wrench: Choose the correct size (often 5mm for standard clamps). Insert it into the bolt head and turn counterclockwise to loosen. Apply steady pressure—don’t force it if it’s stuck, as this could strip the bolt.
- Wiggle the seat post: Once loose, gently rock the seat side-to-side to free it from the frame. If it’s seized (common in wet climates), apply a bit of lubricant and wait 2-3 minutes.
- Remove the seat post if needed: For height adjustments, slide it out partially. Clean the post and frame tube with a rag to remove grime.
Tip: If your bike has a quick-release skewer instead of bolts, you won’t need the Allen wrench here—just flip the lever. But for fixed bolts, the wrench is essential.
Phase 2: Making the Adjustments
With the clamp loose, you can now fine-tune height, tilt, and position. Always make small changes (1-2 cm at a time) and test ride after each.
Adjusting Seat Height
- Slide the post up or down: For a higher seat, pull it out; for lower, push it in. Use your measuring tape to match your desired height (e.g., inseam length x 0.883 for road bikes).
- Mark the position: Use a marker or tape to note the new height for future reference.
- Reinsert and align: Ensure the post is straight and fully seated (at least 5-7 cm into the frame for stability).
Adjusting Seat Tilt and Fore-Aft
- Tilt the saddle: Most saddles have rails clamped by two Allen bolts underneath. Loosen them (usually 4-5mm wrench) slightly, then angle the nose up/down. Use a level tool to aim for 0-2 degrees nose-down for comfort.
- Fore-aft adjustment: Loosen the same rail clamp bolts fully, slide the saddle forward/back on the rails (aim for the “KOPS” position: knee over pedal spindle when cranks are at 3 o’clock). Tighten incrementally.
- Check for evenness: Ensure both sides are tightened equally to avoid wobbling.
Warning: For carbon seat posts, use a torque wrench set to 5-6 Nm to prevent cracking. Overtightening can damage threads.
Phase 3: Securing and Testing
- Tighten the clamp: Insert the Allen wrench and turn clockwise until snug—about 5-7 Nm of torque (hand-tight plus a quarter turn). Apply a dab of grease to the bolt for smooth future adjustments.
- Reinstall if removed: Slide the post back in and tighten the frame clamp bolt.
- Initial test: Sit on the bike and bounce gently to check stability. No creaking or movement means it’s secure.
After adjustments, take a short test ride (5-10 minutes) on flat ground. Pedal smoothly and note any pain. If needed, repeat Phase 2. For precise fitting, consider a professional bike fit if you’re experiencing persistent issues.
Post-Adjustment Testing and Troubleshooting
Once adjusted, thorough testing ensures your bike seat stays in place and feels right. Start with a stationary check: Sit and rock the seat—it shouldn’t shift more than 1mm. Then, ride varying terrain to simulate real use.
Common issues and fixes:
– Seat slips down: The clamp wasn’t tightened enough or the post is dirty/slippery. Loosen, clean, grease, and retighten with the Allen wrench.
– Wobbly tilt: Uneven bolt tightening—loosen both rail bolts fully, realign, and torque to spec (use a manual for your bike model).
– Pain persists: Height might be off by 1 cm; remeasure using the heel-to-pedal method. For fore-aft, apps like Bike Fast Fit can help virtually.
– Bolt stripped: If the Allen head rounds out, stop immediately and use a bolt extractor or seek pro help to avoid further damage.
If adjustments don’t hold after 10-20 miles, inspect for wear. This phase should take 5-10 minutes and confirms your bike seat adjustment with Allen wrench was successful.
Pro Tips for Bike Seat Adjustments
To elevate your skills beyond the basics, here are expert tips from seasoned cyclists and mechanics:
– Customize for your riding style: Road bikers often prefer a slightly higher seat for power; mountain bikers lower it for control. Experiment during off-season rides.
– Avoid common mistakes: Don’t adjust in a rush—always double-check measurements. Also, never cut your seat post shorter without expert advice, as it voids warranties and risks frame damage.
– Optimize for performance: After adjusting, mark your ideal position on the post with paint. This saves time for future tweaks.
– Maintenance routine: Every 3-6 months, loosen and regrease the clamp to prevent corrosion, especially if you ride in rain.
– Tech upgrades: Consider a dropper post for trail bikes—it allows on-the-fly height changes without tools.
– Fit for different users: If sharing the bike, note multiple height marks. For kids’ bikes, involve a parent for safety.
– Sustainability tip: Reuse old Allen wrenches in a DIY bike tool kit to reduce waste.
These tips can extend your bike’s life and make adjustments quicker next time.
When to Seek Professional Help
While adjusting your bike seat with an Allen wrench is DIY-friendly, some situations call for a pro. Signs include: persistent slipping despite tightening, damage to the frame or post (e.g., cracks on carbon), or if your bike is a high-end model like a Trek Madone or Specialized Tarmac that requires specialized tools.
Look for a reputable bike shop certified by organizations like the United Bicycle Institute. They offer full bike fits starting at $50-150, which include precise measurements using lasers and motion capture. Typical costs for a simple seat adjustment: $20-40. Check your warranty—many brands like Giant or Cannondale cover free adjustments for the first year if done improperly at home.
If unsure, visit a local shop for a quick consult; it’s often free and prevents costly mistakes.
FAQ
Q: What size Allen wrench do I need to adjust my bike seat?
A: Most bike seat clamps use a 5mm or 6mm Allen wrench, but check your bike’s specs. A multi-tool set with 4-8mm sizes covers 90% of bikes. For saddle rail clamps, 4mm is common. Always test-fit before starting to avoid frustration.
Q: Can I adjust the bike seat without an Allen wrench?
A: Yes, if your bike has a quick-release lever, just flip it to loosen. However, for bolted systems (common on fixed-gear or older bikes), the Allen wrench is necessary. Alternatives include a socket wrench adapter, but it’s bulkier.
Q: How high should my bike seat be?
A: Use the LeMond formula: Multiply your inseam by 0.883 for road bikes. Your leg should be almost straight with the heel on the pedal at bottom dead center. This prevents knee strain and maximizes power—adjust in 5mm increments and test ride.
Q: Why does my bike seat keep slipping after adjustment?
A: It’s often due to insufficient torque, dirt on the post, or a worn clamp. Clean thoroughly, apply anti-seize lubricant, and tighten to 5-7 Nm. If it persists, the seat post might need replacing, costing $20-50.
Q: Is it safe to adjust the seat on a carbon fiber bike?
A: Yes, but use a torque wrench to avoid over-tightening, which can crack the frame. Specs are usually 4-6 Nm for clamps. Consult your manual or a pro if you’re new to carbon bikes.
Q: How often should I readjust my bike seat?
A: Check every 500-1,000 miles or after terrain changes (e.g., switching from road to gravel). Annual professional fits are ideal for serious riders to account for fitness improvements.
Q: What if the Allen bolt is stuck?
A: Apply penetrating oil like WD-40, let it sit 10 minutes, then tap gently with a hammer while turning counterclockwise. If stripped, use pliers or call a mechanic to prevent worsening the damage.
Alternative Solutions for Bike Seat Adjustment
If an Allen wrench method doesn’t suit your bike (e.g., no bolts or you’re tool-less), consider these options. They’re great backups for quick fixes on the go.
| Solution | Pros | Cons | Best For |
|---|---|---|---|
| Quick-Release Lever | No tools needed; fast adjustment (under 1 minute) | Less secure on rough terrain; not universal | Casual road or hybrid bikes |
| Adjustable Seat Post (Dropper) | On-the-fly height changes via remote; hydraulic for smoothness | Expensive ($100-300); requires installation | Mountain biking or commuting |
| Professional Bike Fit Service | Precise, data-driven adjustments; includes full body analysis | Costs $100+; time-consuming (1-2 hours) | Competitive cyclists or those with chronic pain |
| Clamp-Free Systems (e.g., RockShox Reverb) | Tool-free via air pump or lever | High cost ($200+); compatibility limited | Advanced trail riders |
Compare these to the Allen wrench method, which is free, precise, and versatile for most standard bikes. If your setup varies, start with the lever option for simplicity.
Enjoy Your Perfectly Adjusted Bike Seat
With this guide, you’ve mastered how to adjust your bike seat with an Allen wrench, from tools and prep to testing and tweaks:
– Essential materials like a 5mm Allen wrench and grease for smooth work
– Step-by-step phases for height, tilt, and secure tightening
– Troubleshooting for slips or wobbles, plus pro tips for longevity
Following these actionable steps will eliminate discomfort, boost your pedaling efficiency, and make every ride more enjoyable. Take that test spin today—you’ll feel the difference immediately!
Have you adjusted your bike seat using an Allen wrench? Share your tips or challenges in the comments below to help fellow cyclists! If pain lingers, consult a pro for personalized advice. Happy riding!


