
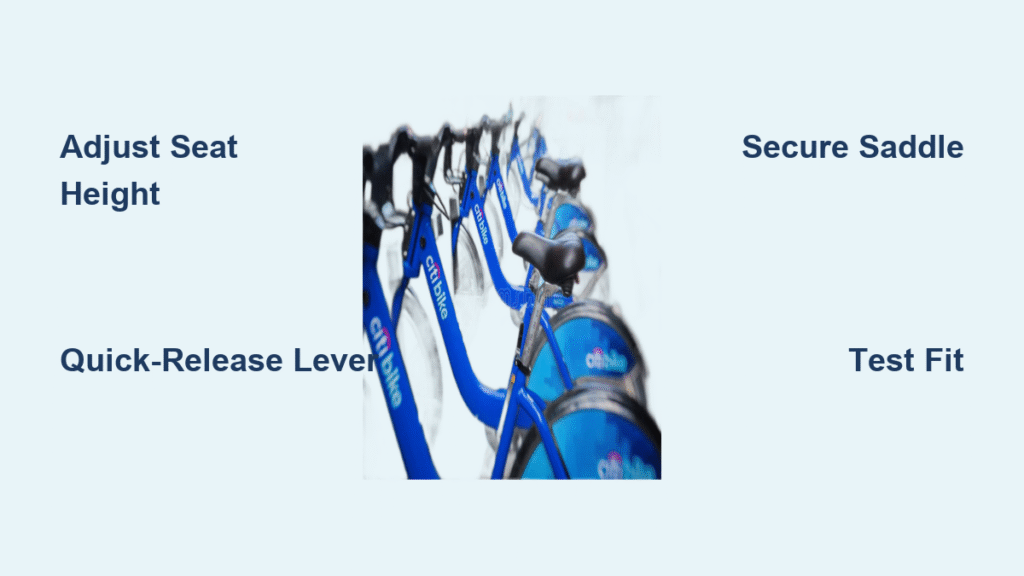
Riding a Citi Bike is a fantastic way to zip around the city, but nothing ruins a smooth commute like an uncomfortable seat height. If you’ve hopped on a Citi Bike and felt your knees straining or your back aching, you’re not alone—many riders struggle with improper seat adjustments. The good news is that learning how to adjust Citi Bike seat height is a quick and straightforward process that takes just a few minutes at any docking station. With a simple lever or bolt mechanism, you can customize the seat to fit your body perfectly, ensuring a safer and more enjoyable ride right away.
In this comprehensive guide, we’ll go beyond the basics to cover everything you need to know about Citi Bike seat adjustment. From gathering the right tools (spoiler: you might not need any) to detailed step-by-step instructions, safety tips, and troubleshooting common issues, you’ll have all the tools to get it right every time. By the end, you’ll confidently adjust your seat for optimal pedaling efficiency, reducing strain and preventing injuries—whether you’re a daily commuter or a casual explorer in NYC.
What You’ll Need to Adjust Your Citi Bike Seat
Adjusting the seat on a Citi Bike is designed to be user-friendly, as these bikes are built for quick rentals and public use. Most models, like the standard Citi Bike hybrids or the newer electric-assist versions, use a simple quick-release lever for seat height changes. You won’t need fancy tools, but having a few basics on hand can make the process smoother, especially if you’re dealing with a stubborn bolt.
Here’s a breakdown of the essentials in table form for easy reference:
| Item | Quantity | Specifications |
|---|---|---|
| Citi Bike (unlocked at a station) | 1 | Any model from the Citi Bike fleet; ensure it’s undamaged |
| Allen wrench (hex key) | 1 | 5mm size (optional; some seats have bolts instead of levers) |
| Multi-tool or bike repair kit | 1 | Compact version with pliers for tightening if needed |
| Rag or cloth | 1 | For wiping down the seat post after adjustment |
| Measuring tape (optional) | 1 | To measure inseam for precise height (about 12-18 inches needed) |
Important: Citi Bikes are public property, so always adjust carefully to avoid damaging the bike. If the seat mechanism is broken, report it via the Citi Bike app before riding to ensure safety and avoid fees.
Preparing to Adjust Your Citi Bike Seat
Before diving into the adjustment, proper preparation is key to avoiding accidents or discomfort during your ride. Start by selecting a safe location—ideally, right at the docking station where you unlock the bike. This gives you stable ground and easy access to return the bike if something’s wrong. Check the weather too; adjusting in rain can make the seat post slippery and harder to grip.
Safety first: Always wear a helmet, even for short trips, as per NYC bike laws. Position the bike on flat, even ground, and flip the quick-release lever to the open position if it’s locked. Inspect the seat post for rust, dirt, or damage—these can cause the post to stick. If you’re new to biking, measure your inseam (the distance from your crotch to the floor) beforehand. A general rule is to set the seat height so your leg is almost fully extended at the bottom of the pedal stroke, with a slight bend in the knee (about 25-35 degrees).
Warning: Never ride with an improperly adjusted seat, as it can lead to knee pain, lower back strain, or even falls. If the bike feels unstable after adjustment, dock it and select another one. Also, ensure no one is nearby when flipping the bike upside down for better access—public spaces can be crowded.
Take about 5-10 minutes for this prep phase to ensure everything goes smoothly.
Step-by-Step Guide to Adjusting Citi Bike Seat Height

Adjusting the seat height on a Citi Bike is broken into logical phases: unlocking the mechanism, raising or lowering the seat, securing it, and a quick test fit. This process typically takes 2-5 minutes and works for most Citi Bike models, including the classic aluminum-framed bikes and the ebikes with similar setups. We’ll use numbered lists for the sequential steps to make it easy to follow.
Phase 1: Unlocking and Inspecting the Seat Mechanism
Before making changes, familiarize yourself with the bike’s setup. Citi Bikes use either a quick-release lever (most common) or a bolted clamp for seat height adjustments.
- Locate the seat post clamp: Stand beside the bike and look at the seat tube where the seat post inserts. You’ll see a small lever on the side or a bolt head.
- Open the quick-release if applicable: Flip the lever to the “open” position (perpendicular to the seat post). This loosens the clamp without tools.
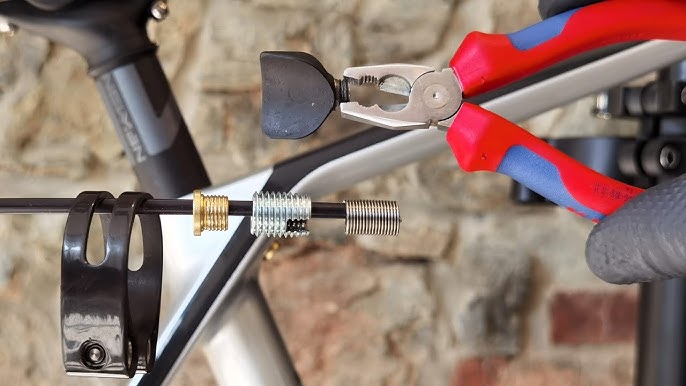
- Inspect for issues: Pull the seat up and down gently. If it moves freely, great. If it’s stuck due to dirt, wipe the post with your rag. For bolted models, insert the 5mm Allen wrench and turn counterclockwise to loosen (about 1-2 full turns).
- Measure your ideal height: If you have your inseam measurement, note it. The seat height should be roughly 0.883 times your inseam (a standard cycling formula for optimal leg extension).
Pro Tip: If the seat post has minimum/maximum insertion marks (etched lines on the post), ensure the post is inserted at least to the minimum mark for safety—never expose more than 2-3 inches above the frame.
Phase 2: Raising or Lowering the Seat
This is the core of how to adjust Citi Bike seat height. Decide if you need to raise it (for taller riders) or lower it (for shorter ones or kids using adult bikes).
- Grip the seat firmly: Hold the saddle with one hand while supporting the bike frame with the other to keep it steady.
- Slide the post up or down: For raising, pull upward slowly until it reaches your desired height. For lowering, push down. Aim for the top of the pedal (with the crank arm at 6 o’clock) to be just below the bend in your knee when seated.
- Check incrementally: Stop every inch or so to test by sitting on the bike (straddle it without mounting fully). Your hips should stay level as you pedal in the air—no rocking side to side.
- Account for shoe/pedal variations: Citi Bikes have flat pedals, so factor in about 1 cm for your shoes. If you’re wearing thicker soles, raise slightly higher.
This phase should take 1-2 minutes. If the post binds, apply a drop of lubricant (if you have it) or wiggle gently—avoid forcing it, as that could bend the post.
Phase 3: Securing the Seat and Final Checks
Once adjusted, lock everything in place to prevent slippage during your ride.
- Tighten the mechanism: For quick-release, flip the lever to the “closed” position (parallel to the post) until it feels snug with slight resistance. For bolts, turn the Allen wrench clockwise until firm (about 5-7 Nm torque if you have a gauge; otherwise, tight but not overtightened).
- Test the tightness: Give the seat a firm upward and downward tug. It should not move more than 1mm. If it does, loosen and retighten.
- Adjust fore-aft position if needed: Some Citi Bikes allow sliding the saddle forward/back on the rails for better reach to the handlebars. Loosen the saddle clamp under the seat (usually another quick-release or bolt), slide to align your knee over the pedal spindle, then tighten.
- Wipe down: Clean any fingerprints or dirt from the post to prevent future sticking.
Troubleshooting Note: If the seat won’t stay put, the clamp might be worn—dock the bike and report it via the app. For ebike models, the battery can add weight, so double-check tightness.
Post-Completion Testing and Troubleshooting
After adjusting, it’s time to verify everything works. Mount the bike carefully at the station and do a short stationary pedal test: Sit, place feet on pedals, and rotate a few times. Your legs should extend nearly straight at the bottom without locking knees, and you should feel balanced.
Ride a short test loop (100-200 feet) if possible, checking for wobbling or discomfort. If the seat slips mid-ride, pull over safely, retighten, and continue.
Common post-adjustment issues and fixes:
– Seat too high/low: Readjust using your inseam formula. Too high causes hip rocking; too low strains knees.
– Slipping post: Clean and dry the post thoroughly; overtightening can strip threads, so use moderate force.
– Uneven saddle: Ensure the nose points forward; if tilted, loosen the saddle clamp and level it.
– Model variations: Older Citi Bikes might have different clamps—check the Citi Bike website for model-specific guides.
If issues persist, scan the bike’s QR code to report mechanically via the app, avoiding a $100+ damage fee.
Pro Tips for Adjusting Your Citi Bike Seat
To take your Citi Bike seat adjustment to the next level, here are 5-7 expert tips from seasoned cyclists and Citi Bike mechanics:
- Personalize for terrain: For hilly routes in Brooklyn or Manhattan, set slightly lower for better control during climbs. Use the app’s route planner to anticipate needs.
- Account for multiple riders: If sharing a membership, note your height settings in the app notes for quick resets.
- Seasonal tweaks: In winter, lower the seat 1 cm for stability on slippery streets; raise in summer for efficiency.
- Combine with handlebar adjustments: Citi Bikes have limited stem rise, but tilting the bars slightly can improve posture—loosen the stem bolts carefully.
- Avoid common mistakes: Don’t adjust while riding (obvious, but it happens in a rush). Never use WD-40 as lubricant—it attracts dirt; opt for bike-specific silicone spray if needed.
- Optimize for speed: Proper height can boost pedaling efficiency by 10-20%, per cycling studies from the American Journal of Sports Medicine—pedal smoother and faster.
- Maintenance hack: Every 5-10 rides, inspect the post for wear to prevent sudden drops.
These tips can extend your comfort and the bike’s usability, making every trip feel custom-fitted.
When to Seek Professional Help for Citi Bike Seat Issues
While most adjustments are DIY, some situations call for pros. Signs include: the quick-release lever broken or non-functional, deep rust on the post making it impossible to move, or the seat post bent from prior misuse. If you’ve tried loosening and it won’t budge, or if the bike’s serial number shows it’s flagged for maintenance in the app, stop and report it.
Look for Citi Bike ambassadors at high-traffic stations (like those in Midtown) or contact Lyft (Citi Bike’s operator) support via the app. They offer free on-site fixes during business hours. Typical costs? None for members if reported promptly, but unreported damage can lead to $50-200 fees. Check your membership warranty—annual passes include mechanical support. For persistent fleet-wide issues, visit citibikenyc.com for updates on model recalls.
FAQ
Q: How do I know the correct seat height for my body on a Citi Bike?
A: Measure your inseam while standing barefoot against a wall (crotch to floor). Multiply by 0.883 for the distance from pedal to saddle top. On the bike, ensure a 30-35 degree knee bend at the bottom pedal position. This prevents overextension and maximizes power, as recommended by the League of American Bicyclists.
Q: Can I adjust the seat angle on a Citi Bike?
A: Yes, but it’s limited. Loosen the saddle clamp under the seat and tilt slightly for comfort—nose down 2-5 degrees reduces pressure on sensitive areas. Retighten securely to avoid numbness on long rides.
Q: What if the seat post is stuck and won’t adjust?
A: Clean around the clamp with a rag and warm soapy water to remove grime. If bolted, use penetrating oil sparingly. If still stuck, dock and report—mechanics handle corrosion without voiding your rental.
Q: Is seat adjustment different for Citi Bike ebikes?
A: Mostly the same, but ebikes have heavier frames, so tighten more firmly. The electric assist doesn’t affect height, but test for balance with the battery weight. Refer to the ebike user manual via the app for specifics.
Q: How often should I readjust my Citi Bike seat?
A: Every time you ride a different bike, as heights vary. For frequent use of the same model, check monthly or after wet rides to ensure no slippage from moisture.
Q: Are there height limits for Citi Bike seats?
A: Yes, posts range from about 25-35 inches adjustable. Riders under 5’0″ may find it high; kids under 12 aren’t permitted. Taller folks over 6’4″ might max out—choose a larger frame if available.
Q: Can adjusting the seat void my Citi Bike warranty?
A: No, as long as you don’t damage parts. Improper tightening could, so follow torque guidelines (hand-tight plus quarter turn for levers).
Alternative Solutions for Citi Bike Seat Comfort
If standard adjustment doesn’t suffice—say, for very short or tall riders—the main fix might not fully work. Consider these alternatives:
| Solution | Pros | Cons | Best For |
|---|---|---|---|
| Use a different Citi Bike model | Variety in frame sizes; quick swap at stations | Not always available; requires docking time | Riders needing exact fit without mods |
| Add aftermarket seat cover/pad | Extra cushioning for long rides; inexpensive ($10-20) | Not permanent; must remove before docking | Comfort-focused commuters with sore spots |
| Request a custom fleet bike via app feedback | Tailored options in future; free input | Slow process; no immediate fix | Frequent users suggesting improvements |
| Switch to personal bike rental apps (e.g., Revel) | More adjustable seats; app-based sizing | Higher cost per ride; less ubiquitous in NYC | Those frustrated with Citi Bike uniformity |
These options provide flexibility if Citi Bike seat adjustment falls short, with personal rentals offering the most customization.
Enjoy Your Comfortable Ride on Citi Bike
With this guide, you’ve got everything to master how to adjust Citi Bike seat height and beyond:
– Essential tools and prep for safe starts
– Detailed phases from unlocking to securing
– Testing tips and pro advice for long-term comfort
– FAQs and alternatives for tricky scenarios
Following these steps ensures a pain-free, efficient ride every time, boosting your confidence on NYC streets. Don’t settle for discomfort—adjust at your next station and feel the difference in pedaling power and reduced strain.
Ready to hit the road? Share your adjustment experience or any tweaks you’ve tried in the comments below to help fellow riders. Have you fixed a stubborn post? Let us know! Safe cycling!


