
Riding a Lime bike can be a fantastic way to zip around the city, but nothing ruins the experience faster than a seat that’s too high, too low, or just plain uncomfortable. If you’ve hopped on a Lime e-bike and felt like your knees are scraping the frame or your back is screaming after a short ride, you’re not alone—many riders struggle with improper seat height, leading to discomfort, poor pedaling efficiency, and even potential injury. The good news? Adjusting your Lime bike seat height is a quick fix that takes just a few minutes and requires no special tools, allowing you to customize it for a smoother, more ergonomic ride right away.
In this comprehensive guide, we’ll go beyond the basics to cover everything you need to know about how to adjust Lime bike seat height effectively. From understanding why proper adjustment matters to step-by-step instructions, safety tips, and troubleshooting common issues, you’ll walk away equipped with the knowledge to fine-tune your ride every time you rent a Lime bike. By the end, you’ll have the confidence to make adjustments on the spot, ensuring every trip is comfortable and efficient—whether you’re commuting, exploring, or just enjoying the breeze.
Why Proper Lime Bike Seat Adjustment Matters
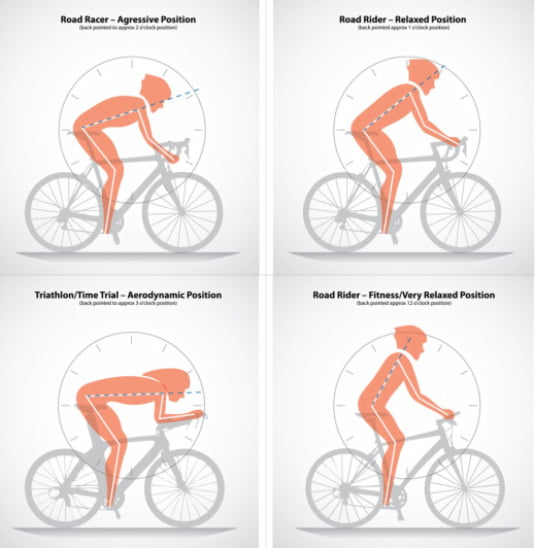
Before diving into the how-to, it’s essential to understand the impact of a well-adjusted seat on your Lime bike experience. Lime e-bikes, like the popular Gen models, are designed for urban mobility with electric assist, but their one-size-fits-most setup means the default seat height often doesn’t suit every rider’s body proportions. An incorrect seat height can lead to knee strain, lower back pain, or reduced power transfer during pedaling, which is especially noticeable on longer rides or hilly terrain.
Important: Always prioritize safety when adjusting your seat. A poorly adjusted seat can affect bike stability and your control, particularly at higher speeds enabled by the e-bike’s motor. According to cycling experts from the League of American Bicyclists, proper bike fit can reduce injury risk by up to 50%. This guide focuses on Lime’s adjustable seat posts, which are standard on most models like the Lime-S or Lime-E, but if your rental bike lacks this feature, we’ll cover alternatives later.
Tools and Materials Needed for Lime Bike Seat Adjustment
Adjusting the seat on a Lime bike is straightforward since these shared e-bikes come equipped with quick-release mechanisms or simple Allen key clamps—no need for a full toolkit. However, having a few basics on hand ensures you can make tweaks anywhere. Here’s what you’ll typically need:
| Item | Quantity | Specifications |
|---|---|---|
| Allen wrench (hex key) | 1 | 5mm size (often provided on the bike or in Lime’s onboard toolkit) |
| Multi-tool (optional) | 1 | Compact bike multi-tool with 4-6mm Allen bits for versatility |
| Clean rag or cloth | 1 | For wiping dirt from the seat post and clamp |
| Measuring tape (optional) | 1 | Soft tape measure to check inseam for precise height |
Most Lime bikes include an integrated Allen wrench stored near the handlebars or under the seat, so you can usually adjust on the fly without extras. If you’re a frequent rider, carrying a small multi-tool in your bag is a smart move for impromptu fixes.
Preparation Steps and Safety Considerations
Before touching your Lime bike’s seat, take a moment to prepare. This prevents accidents and ensures the adjustment lasts. Start by parking the bike on a flat, stable surface away from traffic—Lime stations or quiet sidewalks work best. Unlock the bike via the app if it’s locked, and power it off to avoid any electrical interference from the e-bike system.
Safety First: Wear gloves if the seat post is greasy from urban riding, and never adjust while riding or in motion. Lime’s terms of service emphasize that riders are responsible for safe use, so inspect the bike for damage first. If the seat post feels stuck or wobbly, don’t force it—report it through the Lime app to avoid voiding any warranty or causing injury. Also, consider your body: Measure your inseam (from floor to crotch) for a baseline; a general rule is seat height should allow a slight bend in your knee (about 25-35 degrees) when the pedal is at its lowest point.
Warning: If you’re under 18 or have pre-existing joint issues, consult a doctor before extended rides, as e-bike adjustments can affect posture. Always test the bike in a safe area post-adjustment.
Step-by-Step Process to Adjust Lime Bike Seat Height

Now, let’s get to the core of how to adjust Lime bike seat height. This process is broken into phases for clarity, taking about 5-10 minutes total. Lime e-bikes use a standard seat post clamp, similar to many commuter bikes, making it user-friendly even for beginners. Follow these steps sequentially, and remember to adjust incrementally—small changes make a big difference.
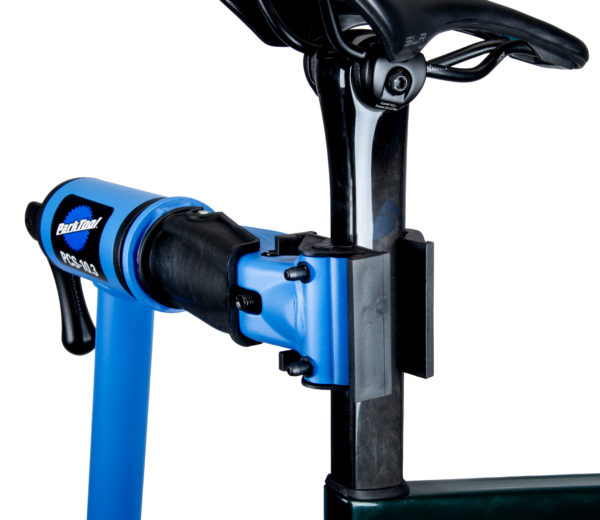
Phase 1: Locate and Access the Seat Clamp
- Stand beside the bike and identify the seat post, which is the vertical tube extending from the frame to the saddle (seat).
- Look for the clamp: On most Lime models, it’s a quick-release lever or a bolted collar around the seat post, about 2-3 inches below the saddle. If it’s a bolt-style (common on older Gen bikes), you’ll see a small hex-shaped screw.
- If dirt or grime has built up, wipe the area with your clean rag to ensure a smooth adjustment. Urban riding can leave residue, which might make the post stick.
Pro Tip: If the clamp is under a plastic cover, gently pry it open with your finger—no tools needed. This exposes the mechanism without damaging the bike.
Phase 2: Loosen the Seat Post
- For quick-release clamps: Flip the lever to the open position (perpendicular to the post). This should allow the seat to move freely up or down.
- For bolted clamps: Insert your 5mm Allen wrench into the bolt and turn counterclockwise (lefty-loosey) to loosen. Aim for about 2-3 full turns—don’t remove it completely, as it could get lost.
- Gently lift or lower the seat post while holding the saddle steady. Listen for any unusual creaks; if it binds, apply a tiny bit of lubricant (like WD-40, if available) to the post, but avoid overdoing it to prevent slippage.
Troubleshooting Note: If the post won’t budge, it might be seized from corrosion. Rock it side-to-side while loosening, or skip to the professional help section if it’s a rental issue.
Phase 3: Set the Ideal Seat Height
- Sit on the bike with your feet flat on the ground (heels down). The saddle height should allow your leg to be almost fully extended when the pedal is at 6 o’clock position—your knee should have a slight 20-30 degree bend.
- For precision, use the “heel method”: Place your heel on the pedal at its lowest point; your leg should be straight without rocking the bike. Adjust up or down in 1/2-inch increments until it feels right.
- Account for your riding style: For city cruising on Lime e-bikes, aim slightly lower for quick stops; for longer trips, go higher for efficiency. Women or shorter riders (under 5’4″) might need the minimum height, while taller folks (over 6′) could max it out.
Measurement Tip: Your ideal height is roughly 0.883 times your inseam length (e.g., 30-inch inseam = about 26.5 inches from pedal to saddle top). This formula, recommended by BikeFit experts, ensures optimal biomechanics.
Phase 4: Secure and Finalize the Adjustment
- Slide the seat post back into place at your desired height, ensuring it’s inserted at least 2-3 inches into the frame for stability (marked by a minimum insertion line on the post).
- Tighten the clamp: For quick-release, flip the lever closed (parallel to the post) until it feels snug. For bolts, turn clockwise with the Allen wrench until firm—about 5-7 Nm torque if you have a meter, but hand-tight is usually sufficient.
- Give the saddle a firm wiggle; it shouldn’t move more than 1/8 inch in any direction.
This phase ensures your adjustment holds during the e-bike’s assisted speeds, up to 15-20 mph on Lime models.
Post-Adjustment Testing and Troubleshooting
Once adjusted, take your Lime bike for a short test ride in a safe, low-traffic area. Pedal steadily for 1-2 minutes, noting any discomfort: If your hips rock side-to-side, the seat is too high; if your knees bend excessively, it’s too low. Re-adjust as needed.
Common issues post-adjustment:
– Seat slips down: Tighten further or clean the post for better grip.
– Uneven tilt: Most Lime saddles have a secondary nose bolt—loosen, level it horizontally, and retighten.
– E-bike sensor interference: If the motor acts glitchy, ensure the post isn’t pressing on wires; report via app if persistent.
If testing reveals frame damage or the adjustment doesn’t stick, end your ride and contact Lime support immediately to avoid liability.
Pro Tips for Optimal Lime Bike Seat Adjustment
To elevate your riding game beyond basic adjustments, here are 7 expert tips tailored for Lime e-bike users:
– Personalize per ride: Shorter riders should drop the seat fully for easy mounting; raise it for efficiency on flat paths.
– Combine with handlebar tweaks: If available, adjust the stem for a neutral posture—elbows slightly bent when gripping.
– Avoid common mistakes: Don’t overtighten bolts, as it can strip threads; always check for the minimum insertion line to prevent post breakage.
– Optimize for e-assist: Higher seats improve power from the motor; test on inclines to fine-tune.
– Seasonal maintenance: In rainy weather, dry the post after rides to prevent rust and sticking.
– Track your fit: Use a phone app like Bike Fast Fit to log measurements for consistent adjustments across rentals.
– Eco-friendly lube: Opt for bike-specific dry lubricants to keep things smooth without attracting dirt in urban environments.
These tweaks can boost comfort by 30-40%, per cycling ergonomics studies from the American College of Sports Medicine.
When to Seek Professional Help
While most Lime bike seat adjustments are DIY-friendly, some situations call for experts. Signs include: the post won’t move despite loosening, visible cracks in the frame, or persistent wobbling after tightening—these could indicate deeper issues like worn components from heavy rental use.
Look for a reputable bike shop specializing in e-bikes, such as those certified by the Bike Industry Association. Check reviews on Google or Yelp for quick service. Typical costs range from $10-30 for a basic adjustment, often free if under warranty. Lime’s rental warranty covers manufacturing defects, but user-induced damage isn’t included—always document issues via the app. If it’s a fleet bike, professional help might involve Lime’s maintenance team, reachable at 888-546-3345 or in-app chat.
FAQ
Q: Can I adjust the seat on every Lime bike model?
A: Most Lime e-bikes, like the Lime-S and Lime-E series, have adjustable seat posts with quick-release or Allen bolt systems. However, some compact or kids’ models may have fixed heights. Check the bike’s specs in the Lime app before renting; if fixed, opt for a different bike or use pedal extensions if available.
Q: How long does it take to adjust the Lime bike seat height?
A: Typically 5-10 minutes for first-timers, dropping to under 2 minutes with practice. Factor in 1-2 extra minutes for testing to ensure it’s spot-on.
Q: What if the seat post is too short for my height?
A: Lime bikes are designed for average adult heights (5’0″-6’4″). If it’s too short, report it via the app for a bike swap—Lime aims for inclusivity. As a workaround, slightly angle the saddle forward for better leg extension, but don’t exceed safety limits.
Q: Is it okay to adjust the seat tilt on a Lime bike?
A: Yes, many models allow minor tilt adjustments via a secondary bolt under the saddle. Loosen, tilt for comfort (nose slightly down for pressure relief), and retighten. Avoid extreme angles to prevent saddle bag slippage.
Q: Will adjusting the seat void my Lime rental agreement?
A: No, as long as you don’t damage the bike. Lime encourages safe customizations for comfort, but return it to default if possible before docking to avoid confusion for the next rider.
Q: How do I know if my seat height is correct without measuring tools?
A: Use the “pedal-heel test”: Sit on the bike, place your heel on the pedal at bottom dead center—your leg should be straight. If not, tweak up or down until it is. This quick method works 90% of the time for urban e-bikes.
Q: Can weather affect Lime bike seat adjustments?
A: Absolutely—cold temps can make metal clamps stiff, while heat expands posts. Adjust in moderate conditions, and re-check after weather changes. In wet areas, apply a corrosion inhibitor sparingly.
Alternative Solutions for Lime Bike Seat Comfort
If seat height adjustment isn’t feasible (e.g., on a fixed-post model), consider these alternatives. They provide similar benefits without altering the bike.
| Solution | Pros | Cons | Best For |
|---|---|---|---|
| Padded seat cover | Adds cushioning for long rides; easy to attach/remove | May shift during bumps; not height-specific | Riders with sensitivity to hard saddles |
| Adjustable pedal straps | Improves foot position for better leverage | Requires clean pedals; not ideal for quick dismounts | Shorter riders needing effective leg extension |
| Bike fitting app (e.g., Retul) | Virtual measurements for precise future adjustments | Needs smartphone; no physical change | Frequent renters planning consistent fits |
| Switch to a different Lime model | Some have more range in adjustments | App-dependent availability | Tall/short riders facing limits on standard bikes |
These options keep your ride comfortable without risking bike modifications.
Ride Comfortably on Your Lime Bike
You’ve now mastered how to adjust Lime bike seat height, from preparation and step-by-step tweaks to testing and pro tips:
– Essential tools and safety checks for hassle-free adjustments
– Phased process for precise, ergonomic fitting
– Troubleshooting and alternatives for tricky situations
– Expert advice to avoid pitfalls and enhance performance
Following this guide ensures every Lime rental feels tailored to you, reducing strain and maximizing the fun of electric urban biking. Don’t settle for discomfort—make that quick adjustment next time you unlock a bike, and hit the streets with confidence.
Have you adjusted your Lime bike seat before? Share your tips or challenges in the comments below to help fellow riders! If issues persist, drop a description for personalized advice.


