If you’ve been spinning away on your Peloton Bike but feel discomfort in your hips, knees, or lower back during rides, it might be time to learn how to adjust seat angle on Peloton Bike. Many riders overlook this simple tweak, leading to poor posture and reduced performance. The good news? A quick adjustment can realign your body for better comfort and efficiency—often taking just 5-10 minutes with no special tools required.
In this comprehensive guide, we’ll go beyond the basics to cover everything from understanding why seat angle matters to detailed step-by-step instructions, troubleshooting common issues, and pro tips for maintaining optimal fit. By the end, you’ll have the confidence to fine-tune your Peloton setup like a pro, ensuring every ride feels supportive and sustainable. Whether you’re a beginner or a seasoned cyclist, these actionable steps will help you achieve a personalized, pain-free pedaling experience.
Why Adjusting Seat Angle Matters for Your Peloton Bike
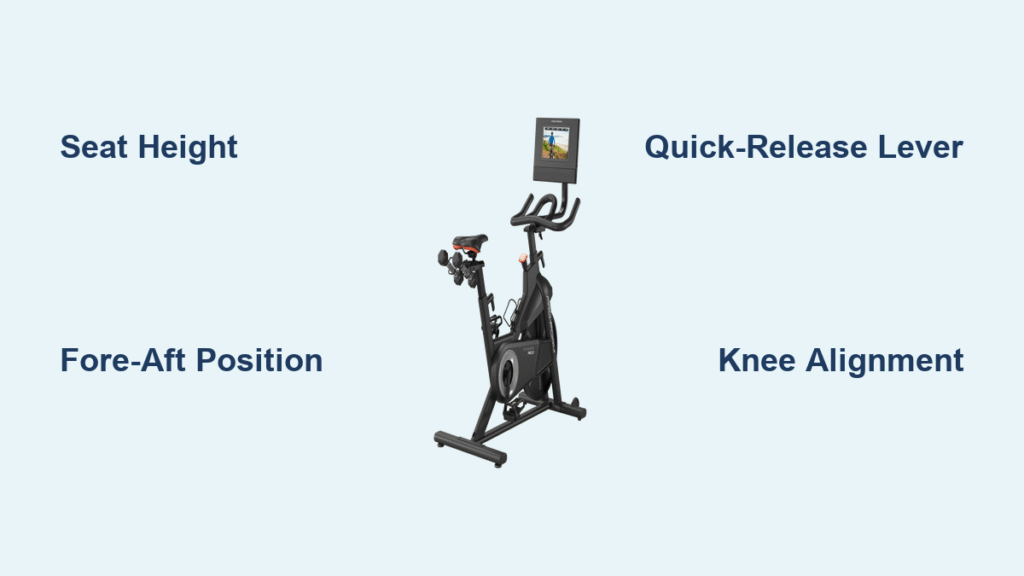
Before diving into the how-to, let’s address the fundamentals. The seat angle on your Peloton Bike refers to the tilt of the saddle—whether it’s level, slightly nose-up, or nose-down—which directly impacts your riding posture and biomechanics. An improper angle can cause pressure points, numbness, or strain, especially during longer sessions. According to Peloton’s official guidelines and cycling experts from sources like the American Council on Exercise, a neutral or slightly downward tilt (about 1-3 degrees) promotes even weight distribution and reduces the risk of injury.
Common signs that your seat angle needs adjustment include persistent saddle soreness, uneven leg extension, or a feeling of sliding forward or backward on the seat. Adjusting it correctly can enhance power transfer to the pedals, improve endurance, and make your workouts more enjoyable. In fact, Peloton recommends checking your bike fit every few months or after any physical changes, like weight fluctuations or new fitness goals.
What You’ll Need to Adjust Seat Angle on Peloton Bike
Adjusting the seat angle on your Peloton Bike is straightforward and doesn’t require advanced tools. Most riders can do this with items you likely already have at home. Below is a table outlining the essentials, including quantities and specifications for clarity.
| Item | Quantity | Specifications |
|---|---|---|
| Allen wrench (hex key) | 1 | 5mm size (included with Peloton Bike; if lost, a standard bike multi-tool works) |
| Soft cloth or towel | 1 | For wiping down the seat post and protecting the floor from scratches |
| Level tool (optional) | 1 | Smartphone app like Bubble Level or a small bubble level for precise measurement |
| Ruler or measuring tape | 1 | For checking tilt angle (in inches or degrees; optional for verification) |
| Bike stand or sturdy surface | 1 | To stabilize the Peloton if needed (the bike’s frame is usually sufficient) |
Important: Always unplug your Peloton Bike from power before any adjustments to avoid accidental screen interactions or safety hazards. If your bike is under warranty, note that these DIY steps won’t void it as long as you don’t modify components.
Preparing to Adjust Your Peloton Bike Seat Angle
Proper preparation ensures a smooth process and prevents damage to your Peloton Bike. Start by positioning your bike in a well-lit, spacious area with at least 3-4 feet of clearance around it. If you’re new to bike adjustments, wear comfortable clothing and consider having a spotter if you’re working on a raised platform.
Safety Considerations
Safety first—Peloton’s support team emphasizes avoiding over-tightening bolts, which can strip threads and lead to costly repairs. Warning: Never adjust the seat while the bike is powered on or during a ride; this could cause instability or injury. If you have pre-existing back or joint issues, consult a doctor or physical therapist before making changes, as improper fit can exacerbate conditions.
Initial Assessment
Before touching the tools, assess your current setup. Sit on the bike in your normal riding position (shoes clipped in if using SPD pedals) and note any discomfort. Use Peloton’s in-app fit guide via the touchscreen: Go to Settings > Bike Settings > Bike Fit Quiz for personalized recommendations based on your height and inseam. This digital tool can suggest an ideal seat angle, typically starting at level and adjusting from there. Spend 2-3 minutes pedaling lightly (unplugged) to feel the baseline.
Clean the seat post and adjustment mechanism with a damp cloth to remove any sweat or residue buildup, which could affect grip. Dry thoroughly to prevent slippage. This prep phase should take about 5 minutes and sets the stage for accurate adjustments.
Step-by-Step Guide to Adjusting Seat Angle on Peloton Bike
Now, let’s get to the core of how to adjust seat angle on Peloton Bike. This process is divided into logical phases for ease, and it’s designed for both the original Peloton Bike and Bike+ models (slight variations noted). The entire adjustment typically takes 10-15 minutes. Follow these steps sequentially, and test after each phase.
Phase 1: Accessing the Adjustment Mechanism
- Locate the seat post: On your Peloton Bike, the saddle attaches to a vertical post with a horizontal clamp at the top. The angle adjustment is controlled by a bolt on the underside of the saddle clamp.
- Loosen the bolt: Insert the 5mm Allen wrench into the bolt head (usually facing downward). Turn counterclockwise 2-3 full rotations to loosen—do not remove it completely, as this secures the saddle. If it’s stiff, apply a drop of lubricant like WD-40 Bike (avoid over-spraying to prevent mess).
- Stabilize the bike: Hold the handlebars with one hand while working the wrench with the other. For Bike+ models, ensure the resistance knob is at zero to avoid tension.
Tip: If the bolt is seized (common after heavy use), warm it gently with a hairdryer for 30 seconds to expand the metal slightly.
Phase 2: Tilting the Seat to the Desired Angle
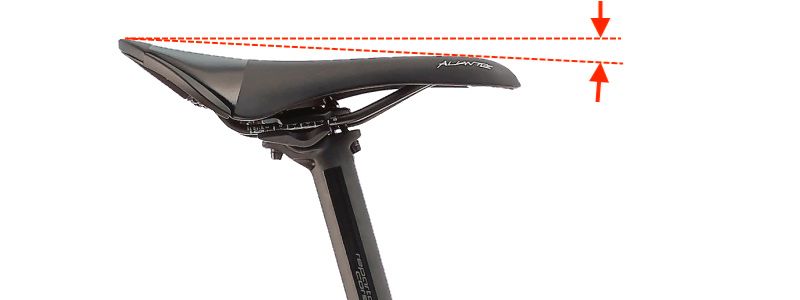
- Grip the saddle: With the bolt loose, gently tilt the nose of the seat (front edge) downward or upward. For most riders, a slight nose-down tilt of 1-2 degrees relieves perineal pressure—use your level tool here by placing it on the saddle surface.
- Measure the angle: Place the ruler or level along the seat’s length. A neutral position is parallel to the ground; for nose-down, aim for the front to be 0.5-1 inch lower than the rear. Peloton recommends starting conservative to avoid over-correction.
- Secure temporarily: While holding the tilt, tighten the bolt clockwise by hand first, then use the wrench for 1-2 full turns. Avoid full torque yet—wiggle the saddle to ensure it holds without flopping.
Pro Variation: If you have the Peloton Bike+ with touchscreen calibration, use the app’s visual guide to input your measurements for real-time feedback during this phase.
Phase 3: Fine-Tuning and Securing
- Test the fit: Sit on the bike and pedal slowly for 1-2 minutes. Check for even pressure distribution—your sit bones (the bony parts under your pelvis) should feel supported without numbness in sensitive areas.
- Readjust if needed: Loosen the bolt again (one rotation) and tweak the angle by 0.5 degrees. Repeat until comfortable. For taller riders (over 6 feet), a level seat might work best; shorter riders often prefer a slight upward tilt for stability.
- Final tighten: Use the Allen wrench to fully secure the bolt—turn until snug but not stripped (about 10-15 Nm of torque if you have a torque wrench; otherwise, firm hand-tight plus a quarter turn). Wipe away any fingerprints.
Time Estimate: Phase 3 adds 3-5 minutes but ensures long-term stability.
Post-Adjustment Testing and Troubleshooting
After adjusting the seat angle on your Peloton Bike, thorough testing is crucial to confirm everything works seamlessly. Power on the bike and complete a 5-10 minute low-resistance ride via a beginner class or just free ride mode. Pay attention to your form: Your hips shouldn’t rock side-to-side, and knees should track straight over the pedals.
Common Troubleshooting Issues
- Saddle Slips During Ride: If it moves, the bolt isn’t tight enough—loosen, clean threads, and re-tighten. Persistent slipping may indicate worn parts; contact Peloton support.
- Persistent Discomfort: Angle might be off by too much. Revert to neutral and adjust in tiny increments (0.5 degrees). If pain continues, check seat height simultaneously, as angle interacts with vertical position.
- Bolt Won’t Loosen: Apply penetrating oil and wait 10 minutes. For stubborn cases, use pliers on the wrench for leverage, but wrap in cloth to avoid scratches.
- Model-Specific Quirks: On older Peloton Bikes (pre-2020), the clamp might have a secondary set screw—loosen that first. For Bike+, ensure the auto-resistance doesn’t engage during manual tests.
If tests reveal no improvement after two attempts, document your setup (photos help) and reach out to Peloton’s virtual support for a free diagnostic. Most issues resolve with these steps, but tracking your rides in the app can help monitor long-term comfort.
Pro Tips for Optimal Peloton Bike Seat Adjustment

To elevate your setup beyond the basics, here are 5-7 expert tips from cycling pros and Peloton ambassadors. These go deeper into customization and maintenance for peak performance.
- Personalize Based on Ride Type: For high-intensity interval training (HIIT), opt for a level seat to maintain aggressive posture. Endurance rides benefit from a 1-degree nose-down tilt to reduce fatigue—test during varied classes.
- Combine with Full Bike Fit: Adjusting seat angle alone isn’t enough; integrate with handlebar height and pedal cleat position. Use Peloton’s full fit guide for a holistic approach, potentially improving efficiency by 10-15%.
- Monitor Wear and Tear: Check the saddle clamp monthly for looseness, especially if you ride 5+ hours weekly. A quick tighten prevents vibrations that could misalign the angle over time.
- Avoid Common Mistakes: Don’t over-tilt (more than 3 degrees nose-down can cause forward sliding and lower back strain). Also, never use non-Peloton parts without verification, as they may not fit securely.
- Optimize for Body Changes: If you’ve gained or lost 10+ pounds, re-adjust immediately—weight shifts affect pressure points. Pregnant riders or those with injuries should prioritize professional input.
- Enhance Comfort Add-Ons: Pair adjustments with a gel seat cover for extra padding, but ensure it doesn’t alter the angle. Track progress with apps like Strava to correlate fit changes with performance metrics.
- Seasonal Maintenance: In humid climates, clean the adjustment area bi-weekly to prevent corrosion, extending the bolt’s lifespan.
These tips can transform your Peloton experience, making rides feel custom-tailored.
When to Seek Professional Help for Peloton Bike Adjustments
While most seat angle adjustments are DIY-friendly, certain signs warrant professional assistance to avoid voiding your warranty or causing damage. Look for persistent slipping despite tightening, unusual creaking noises, or if the saddle doesn’t hold any position—these could indicate a faulty clamp or post, covered under Peloton’s 12-month hardware warranty (extendable via All-Access membership).
Choose a service provider like Peloton’s certified technicians (book via the app under Support > Hardware) or local bike shops experienced with indoor cycles. What to look for: ASE-certified mechanics, positive reviews on sites like Yelp, and familiarity with Peloton models. Typical costs range from $50-150 for an in-home visit or full tune-up, often free if under warranty. Always provide your bike’s serial number (found on the frame) for quick diagnostics. If issues stem from user error, costs may apply, but pros can prevent escalation.
FAQ
Q: How often should I adjust the seat angle on my Peloton Bike?
A: Peloton recommends checking and adjusting every 1-3 months, or immediately after noticing discomfort, body changes, or moving the bike. For heavy users (20+ hours/week), monthly tweaks ensure consistent comfort and prevent wear.
Q: Can adjusting the seat angle affect my warranty?
A: No, as long as you use the provided tools and don’t modify parts. Peloton encourages proper fit adjustments in their user manual. If unsure, contact support before proceeding.
Q: What’s the ideal seat angle for different rider heights?
A: Height isn’t the sole factor, but generally: Under 5’6″ may prefer a slight nose-up tilt for stability; 5’7″-6’0″ a level seat; over 6’0″ a nose-down for reach. Use the app’s fit quiz for precise, personalized angles based on inseam and flexibility.
Q: Why does my seat angle keep changing after adjustment?
A: This is often due to insufficient tightening or dirt buildup. Clean thoroughly, apply thread locker (like Loctite blue), and torque to spec. If it persists, it could be a manufacturing defect—Peloton offers free replacements.
Q: Is there a difference in adjusting seat angle on Peloton Bike vs. Bike+?
A: The mechanism is identical, but the Bike+ has enhanced stability features. Follow the same steps, but use the touchscreen’s interactive fit tools for real-time guidance on the Plus model.
Q: Can a wrong seat angle cause knee pain?
A: Yes, an upward tilt can force knees outward, leading to strain. A proper nose-down adjustment aligns hips and knees better. If pain lingers post-adjustment, consult a bike fitter or physician.
Q: Do I need to adjust seat angle for off-bike use, like strength classes?
A: Not necessarily, but for hybrid workouts, a neutral angle supports varied postures. Test during a full class to ensure versatility.
Alternative Solutions for Peloton Bike Seat Comfort
If adjusting the seat angle doesn’t fully resolve discomfort—perhaps due to saddle shape incompatibility—consider these alternatives. They offer comparable benefits with different approaches.
| Solution | Pros | Cons | Best For |
|---|---|---|---|
| Replace with Aftermarket Saddle (e.g., WTB Volt) | Custom shapes for better pressure relief; wider options for larger sit bones | May require professional installation; $50-150 cost | Riders with chronic soreness seeking long-term ergonomics |
| Use a Seat Cover or Pad (e.g., Gel-Infused Cover) | Quick add-on without tools; affordable ($20-40) and easy to remove | Adds minimal angle change; can feel bulky during intense rides | Beginners testing comfort without permanent changes |
| Full Professional Bike Fit Session | Comprehensive analysis including angle, height, and cleats; app integration | Higher cost ($100-200); time-intensive (1-hour session) | Advanced users or those with injuries needing expert precision |
| Peloton’s Official Saddle Upgrade | Designed specifically for the bike; maintains warranty | Limited options; $100+ shipping | Loyal Peloton users wanting seamless compatibility |
Compare these based on your needs—start with a cover for low commitment, escalating to a full fit if issues persist.
Enjoy Your Optimized Peloton Bike Rides
With this guide, you’ve mastered how to adjust seat angle on Peloton Bike, from preparation and step-by-step tweaks to testing and pro enhancements. Key takeaways include:
– Using basic tools like a 5mm Allen wrench for safe, quick adjustments.
– Prioritizing safety and app-guided personalization for ideal fit.
– Troubleshooting slips or discomfort with targeted fixes.
– Exploring alternatives like saddle upgrades for stubborn issues.
Following these steps will not only alleviate pain but also boost your workout efficiency and enjoyment. Take action today—hop on your Peloton and make that adjustment to unlock smoother, more powerful rides.
Have you adjusted your Peloton Bike seat angle using these tips? Share your before-and-after experience in the comments below to inspire other riders! If discomfort continues, describe your setup for tailored advice.