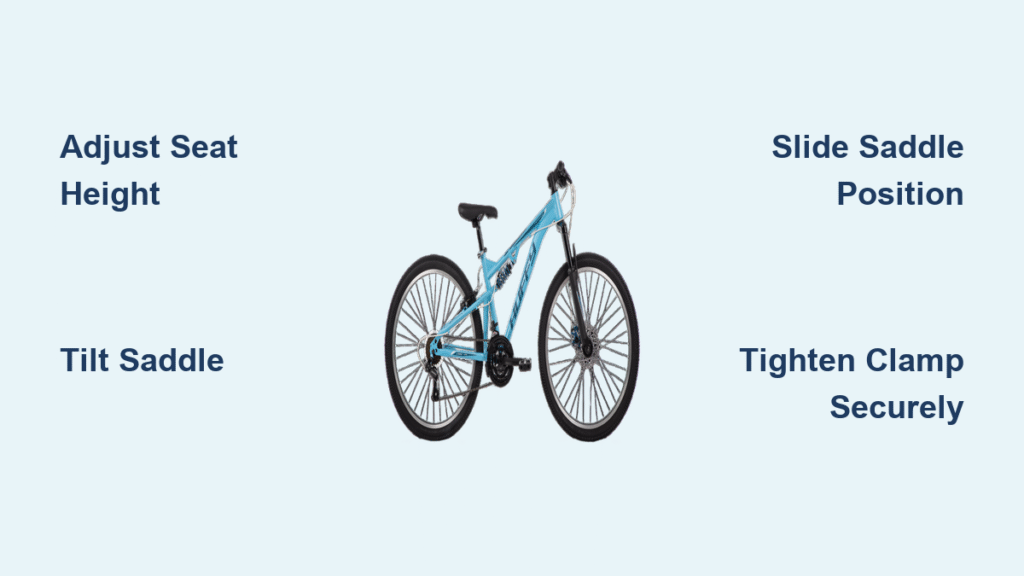
If you’ve ever hopped on your Huffy bike only to find the seat too low, too high, or just plain uncomfortable during a ride, you’re not alone—many cyclists face this issue, especially with affordable models like Huffy bikes that prioritize simplicity and ease of use. Adjusting the seat on a Huffy bike is a straightforward process that can make all the difference in your riding comfort and efficiency, preventing back pain or knee strain. The good news is there’s a quick fix: most Huffy seats adjust via a simple bolt system that you can tweak in under 10 minutes with basic tools, giving you immediate relief for your next ride.
In this comprehensive guide, we’ll go beyond the basics to cover everything you need to know about how to adjust the seat on a Huffy bike, from gathering the right tools to detailed step-by-step instructions tailored to common Huffy models like the Hardtail Mountain Bike or the Nel Lusso Cruiser. You’ll learn multiple methods for fine-tuning height, angle, and fore-aft position, plus tips for prevention and troubleshooting if things don’t go smoothly. By the end, you’ll have the confidence to customize your Huffy bike’s seat for optimal performance, ensuring safer, more enjoyable rides every time.
What You’ll Need to Adjust the Seat on Your Huffy Bike
Before diving into the adjustment process, it’s essential to gather the right materials and tools. Huffy bikes, known for their durable yet budget-friendly frames, typically use a standard seat post clamp system that’s easy to work with. Having everything on hand will save you time and frustration. Most adjustments require minimal equipment, but for more precise tweaks, you’ll want a few extras.
Here’s a breakdown of the essential items in a handy table format:
| Item | Quantity | Specifications |
|---|---|---|
| Allen wrench set | 1 set | Sizes 4mm, 5mm, and 6mm (most Huffy bikes use 5mm for seat post clamps) |
| Adjustable wrench or open-end wrench | 1 | 13mm or 14mm size for bolt loosening (optional for stubborn clamps) |
| Bike grease or lubricant | 1 tube | Anti-seize compound to prevent corrosion on threads |
| Torque wrench (optional) | 1 | For precise tightening to 5-7 Nm to avoid over-tightening |
| Clean rag or cloth | Several | For wiping down the seat post and frame |
| Measuring tape | 1 | For accurate height measurements (in inches or cm) |
| Bike stand (optional) | 1 | To elevate the bike for easier access, especially for beginners |
These tools are inexpensive and widely available at hardware stores or online retailers like Amazon. If your Huffy model has a quick-release seat post (common on newer cruisers), you might not need wrenches at all—just flip the lever. Always check your Huffy bike’s user manual for model-specific details, as variations exist between mountain, hybrid, and kids’ bikes.
Preparing Your Huffy Bike for Seat Adjustment
Proper preparation is key to safely adjusting the seat on your Huffy bike without damaging the frame or components. Rushing this step can lead to scratches, loose bolts, or even instability during rides. Start by working in a well-lit, flat area like your garage or driveway, and give yourself about 15-20 minutes for the entire process.
Safety Considerations
Warning: Always wear safety glasses when using tools to protect your eyes from debris. If your Huffy bike has been stored outdoors, inspect for rust or wear on the seat post, as this could cause slippage. Park the bike on a stable surface and flip it upside down or use a bike stand to avoid straining your back. For electric Huffy models (like the Everett+), disconnect the battery first to prevent any electrical hazards.
Initial Preparation Steps
- Clean the bike: Wipe down the seat post and surrounding frame with a rag to remove dirt or grime. This ensures a smooth adjustment and prevents grit from damaging the clamp.
- Measure your current setup: Use the measuring tape to note the current seat height from the center of the bottom bracket (the axle where the pedals attach) to the top of the saddle. For most adults on Huffy bikes, the ideal inseam-based height is about 0.883 times your inseam length—measure from floor to crotch while standing barefoot.
- Check for minimum insertion depth: Huffy seat posts must be inserted at least 2-3 inches into the frame to maintain stability. Never raise it beyond the “minimum insertion” mark etched on the post.
- Loosen any accessories: Remove any seat bags or reflectors attached to the saddle for unobstructed access.
These prep steps not only make the adjustment easier but also help you baseline your bike’s fit, which is crucial for Huffy’s versatile designs suited for casual commuting or light trails.
Step-by-Step Process to Adjust the Seat on a Huffy Bike
Adjusting the seat on a Huffy bike involves three main phases: height adjustment, angle and tilt tweaks, and fore-aft positioning. We’ll break it down logically, with variations for different Huffy models. This process typically takes 10-30 minutes, depending on your experience level. Follow these steps in order for the best results.
Phase 1: Adjusting Seat Height
Height is the most critical adjustment for comfort and pedaling efficiency on your Huffy bike. Too low, and you’ll strain your knees; too high, and you’ll rock side-to-side.
Diagnosing the Need for Height Adjustment
Stand over the bike with both feet flat on the ground. When seated, your leg should have a slight bend (about 25-35 degrees) at the bottom of the pedal stroke. If your Huffy feels unstable or uncomfortable, it’s time to adjust.
Step-by-Step Height Adjustment
- Flip the quick-release lever (if equipped) or use a 5mm Allen wrench to loosen the seat post clamp bolt on the frame. Turn counterclockwise until the post moves freely—about 2-3 full turns.
- Raise or lower the seat post to your desired height. For a Huffy mountain bike like the Stone Mountain, aim for the pedal at its lowest point to be just below the ball of your foot when seated.
- While holding the post, tighten the clamp bolt clockwise with the Allen wrench or wrench. Apply firm pressure but avoid over-tightening, which can strip the threads on aluminum Huffy frames.
- Test by sitting on the bike and pedaling in place. Readjust if needed.
Important: After tightening, the seat should not wobble. If it does, apply a dab of bike grease to the post before reinserting to reduce friction.
Phase 2: Fine-Tuning Seat Angle and Tilt
Once height is set, adjust the tilt to level the saddle, which prevents pressure on sensitive areas during longer rides on your Huffy.
Tools and Setup for Angle Adjustment
You’ll need the Allen wrench again, as Huffy seats typically have two rails clamped under the saddle with adjustment bolts.
Step-by-Step Angle Adjustment
- Locate the saddle clamp under the seat—loosen the two bolts (usually 5mm) evenly by turning counterclockwise.
- Use a level app on your phone or a small bubble level placed on the saddle to check tilt. For most Huffy cruisers like the Panama Jack, keep it perfectly level or slightly nose-down (1-2 degrees) for forward pedaling.
- Tilt the saddle as needed and retighten the bolts in a cross-pattern (like tightening lug nuts) to ensure even pressure.
- Wipe away any excess grease and test by sitting—your weight should distribute evenly without sliding forward or backward.
This phase is especially useful for Huffy women’s or kids’ bikes, where a slight forward tilt can improve comfort.
Phase 3: Setting Fore-Aft Position

Fore-aft adjustment (sliding the saddle forward or back) affects your knee alignment over the pedal, optimizing power transfer on Huffy’s sturdy frames.
Measuring for Proper Fore-Aft
Use the “knee over pedal spindle” rule: With the crank arm horizontal, your kneecap should align with the pedal axle.
Step-by-Step Fore-Aft Adjustment
- Loosen the same saddle clamp bolts from Phase 2.
- Slide the saddle forward or backward along the rails. For Huffy hybrids, start with the saddle nose aligned with the handlebar stem end when viewed from the side.
- Retighten the bolts securely and test-ride on a flat surface. Pedal at moderate speed and check if your hips rock—if so, slide back slightly.
- Recheck knee alignment using a plumb line (string with a weight) dropped from your kneecap.
For advanced users, a micro-adjust seat post (aftermarket upgrade for Huffy) can make this easier without tools.
Post-Completion Testing and Troubleshooting

After adjustments, test your Huffy bike thoroughly to ensure everything feels right. Take a short 5-10 minute ride on varied terrain—flat roads for cruisers or light trails for mountain models. Pedal in different gears and note any discomfort. Measure the seat height again to confirm it hasn’t shifted.
If issues persist:
– Seat slips down: Clean and grease the post; replace the clamp if worn (common on older Huffy bikes).
– Uneven tilt: Double-check bolt torque—use a torque wrench set to 5 Nm.
– Frame damage: If the post won’t insert fully, inspect for burrs and file smooth if needed.
– Model-specific quirks: For Huffy kids’ bikes like the Sea Star, ensure the post doesn’t exceed the frame’s smaller diameter.
Regular re-testing after 50-100 miles of riding accounts for any settling in.
Pro Tips for Optimal Seat Adjustment on Huffy Bikes
To get the most out of adjusting the seat on your Huffy bike, here are 5-7 expert tips that elevate your setup beyond the basics:
– Personalize for your riding style: For commuting on a Huffy Rock Creek, raise the seat higher for efficiency; lower it for off-road stability.
– Common mistake to avoid: Don’t ignore the minimum insertion line—violating it can cause frame failure under weight.
– Optimize with accessories: Add a gel cover to your Huffy saddle for extra cushion without readjusting height.
– Seasonal maintenance: Check adjustments before spring rides, as temperature changes can affect aluminum post expansion.
– Use a fit calculator: Apps like BikeFit use your height and inseam for precise Huffy measurements, saving trial-and-error time.
– Upgrade wisely: If frequent adjustments annoy you, swap to a micro-adjust post compatible with Huffy’s 27.2mm diameter (measure yours first).
– Track your fit: Keep a log of measurements to monitor wear and maintain consistency across rides.
These tips can extend your Huffy bike’s usability and prevent common pitfalls like numbness from poor saddle tilt.
When to Seek Professional Help for Huffy Bike Seat Adjustments
While DIY adjustments are simple for most Huffy bikes, some situations call for a pro. Signs include: persistent slippage despite greasing, visible frame cracks around the seat tube, or if your model has integrated components (like suspension on the Hardtail) that complicate access. If you’re unsure about torque specs or dealing with a warranty-covered bike, don’t risk voiding it.
Look for a reputable bike shop via the National Bicycle Dealers Association directory—choose one experienced with entry-level brands like Huffy. Expect costs of $20-50 for a basic adjustment, or $100+ for custom fitting. Always check your Huffy warranty (typically 1-2 years); professional service preserves it. If buying used, a pro inspection ensures the seat post isn’t bent from prior crashes.
FAQ
Q: How high should the seat be on my Huffy bike for my height?
A: For adults around 5’6″ to 6’0″ on standard Huffy models, set the seat height so your heel just touches the pedal at its lowest point with the ball of your foot on the pedal center. This typically means 28-32 inches from the bottom bracket. Use the formula: inseam x 0.883 for precision, and adjust in 1/4-inch increments for comfort.
Q: Can I adjust the seat angle on all Huffy bikes?
A: Yes, most Huffy bikes from cruisers to mountain models allow tilt adjustments via the under-saddle clamp. However, some kids’ bikes like the Green Machine have fixed seats—check the manual. Loosen bolts evenly to avoid warping the saddle.
Q: What if my Huffy seat post won’t budge when loosening?
A: Apply penetrating oil like WD-40 and let it sit for 10 minutes. Tap gently with a rubber mallet if seized from rust. If it’s still stuck, take it to a shop to avoid damaging the frame threads.
Q: Is it safe to raise the seat higher than the mark on the post?
A: No—Warning: Exceeding the minimum insertion mark reduces structural integrity, risking collapse under your weight. Huffy recommends at least 2 inches inserted; consult a pro if your frame seems shallow.
Q: How often should I readjust the seat on my Huffy bike?
A: Check monthly or after 100 miles, especially if you notice discomfort. New bikes may settle in after 50 miles, requiring a tweak.
Q: Does adjusting the seat affect the bike’s warranty?
A: Basic adjustments won’t void it, but improper tools causing damage might. Keep receipts and follow Huffy’s guidelines from their website for peace of mind.
Q: Can I use these steps for electric Huffy bikes?
A: Absolutely, but power off the battery first. Models like the Vertis e-bike have similar posts, though some integrate with the frame—verify in the owner’s manual.
Alternative Solutions for Huffy Bike Seat Adjustment

If standard adjustment doesn’t suit your needs—say, due to a damaged post or desire for more features—consider these alternatives. They’re great for customizing your Huffy without a full replacement.
| Solution | Pros | Cons | Best For |
|---|---|---|---|
| Quick-Release Seat Post Upgrade | Easy tool-free adjustments; improves stability | Costs $20-40; may require frame compatibility check | Frequent riders needing fast changes on cruisers like Nel Lusso |
| Adjustable Saddle with Rails | Built-in tilt and slide mechanisms; more comfort | Higher price ($30-60); adds slight weight | Long-distance commuters on Huffy hybrids |
| Professional Bike Fit Service | Customized to your body; includes full bike check | Expensive ($75-150); time-consuming | Beginners or those with chronic discomfort on mountain models |
| Replacement Seat Post Kit | Fixes worn parts; Huffy-specific sizing | Installation requires tools; $15-30 | Older bikes with corroded posts |
Compare these based on your budget and riding frequency. For instance, a quick-release upgrade is ideal if DIY tweaks feel tedious, while a full fit service shines for ergonomic precision.
Start Enjoying Comfortable Rides on Your Huffy Bike
With this guide, you’ve got everything to master how to adjust the seat on your Huffy bike for peak comfort and performance:
– Essential tools and prep for safe setup
– Detailed phases for height, angle, and position tweaks
– Testing methods and pro tips to fine-tune further
Following these actionable steps will transform your rides, reducing strain and boosting enjoyment on your Huffy whether it’s a casual cruiser or trail-ready model. Don’t settle for discomfort—grab your Allen wrench and make the adjustments today for rides that feel just right.
Have you adjusted the seat on your Huffy bike before? Share your tips or challenges in the comments below to help fellow riders! If issues linger, describe your model for more tailored advice.


