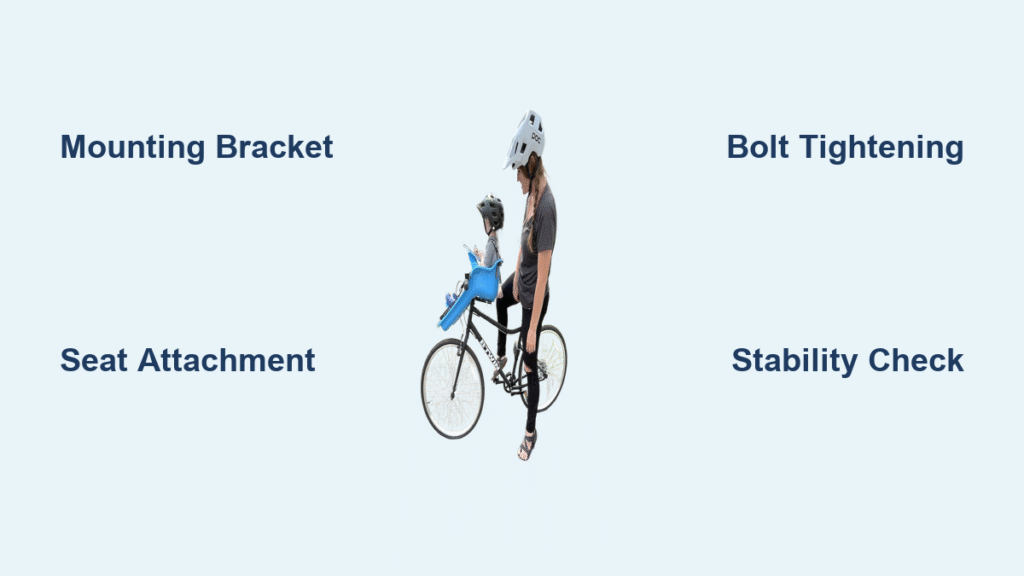
Installing an iBert bike seat can transform your family bike rides into safe, fun adventures, but the process might feel intimidating if you’re new to bike accessories. If you’ve just unboxed your iBert front-mounted child seat and are staring at the parts, wondering how to attach it without risking a wobbly setup, you’re not alone—many parents face this hurdle. The good news is that with the right steps, you can install your iBert bike seat securely in under an hour, ensuring your little one has a stable perch right in front of you for better visibility and interaction.
In this comprehensive guide, we’ll go beyond the basic manual to provide detailed, step-by-step instructions tailored for different bike types, along with essential safety tips and troubleshooting advice. Whether you’re dealing with a hybrid, mountain bike, or cruiser, we’ll cover everything from tools needed to post-install checks, helping you avoid common pitfalls and get pedaling confidently. By the end, you’ll have your iBert installed perfectly, ready for countless joyful rides.
What You’ll Need for iBert Bike Seat Installation

Before diving in, gather the right materials and tools to make the installation smooth and hassle-free. The iBert bike seat typically comes with most hardware, but you’ll need some basic bike tools for adjustments. Always check your specific model (like the iBert Safe-T-Seat) for included parts, as they can vary slightly.
Here’s a handy table of essentials:
| Item | Quantity | Specifications |
|---|---|---|
| iBert Bike Seat Kit | 1 | Includes seat base, adjustable footrests, safety strap, mounting bracket, and hardware (bolts, washers, spacers) |
| Allen Wrench Set | 1 set | Sizes 4mm, 5mm, and 6mm for tightening bolts; metric hex keys work best |
| Screwdriver (Phillips) | 1 | Medium size for any loose screws on the seat |
| Torque Wrench (optional but recommended) | 1 | Adjustable to 5-8 Nm for precise tightening to prevent over-torquing |
| Bike Multi-Tool | 1 | Compact version with pliers for adjustments if needed |
| Anti-Seize Lubricant | Small tube | For bolts to prevent rust and ease future removals |
| Measuring Tape | 1 | To verify handlebar diameter (fits 25.4mm to 31.8mm standard bars) |
| Safety Gear | As needed | Gloves for handling metal parts; helmet for test rides |
Important: Verify your bike’s compatibility first—iBert seats are designed for bikes with straight handlebars and adequate stem clearance (at least 2 inches from the head tube). They support kids up to 35 lbs and 38 inches tall. If your bike has drop bars or is an e-bike with non-standard geometry, consult the iBert website for adapters.
Preparing Your Bike for iBert Installation
Proper preparation is key to a secure iBert bike seat installation and prevents accidents down the road. Start by assessing your bike in a well-lit, flat workspace like your garage or driveway—avoid uneven surfaces that could cause slips.
Safety Considerations
Warning: Always prioritize safety. Disconnect the battery if it’s an e-bike, and ensure no one is riding during installation. Wear gloves to protect your hands from sharp edges on the bracket. If you’re installing on a shared family bike, double-check that the setup won’t interfere with the adult rider’s control. Children should never ride unsupervised, and always use the included 5-point harness.
Initial Preparation Steps
- Inspect Your Bike: Park the bike on a stable stand or flip it upside down (resting on the saddle and handlebars) to access the front easily. Measure the handlebar diameter and stem height. iBert requires at least 1.5 inches of exposed stem above the head tube for mounting.
- Clean the Area: Wipe down the handlebar and stem with a damp cloth to remove dirt or grease. This ensures a firm grip for the clamp.
- Unbox and Inventory Parts: Lay out all iBert components. The kit includes the U-shaped mounting bracket, seat pan, foot platforms, and bolts. Test-fit the bracket loosely around the handlebars without tightening to confirm fit.
- Adjust for Bike Type: For mountain bikes with wider bars, you may need spacers (included). Cruisers often require the bracket to be positioned centrally to avoid cable interference.
This prep phase should take about 10-15 minutes. If your bike has electronic shifters or lights on the bars, temporarily remove them to avoid pinching wires during clamping.
Step-by-Step iBert Bike Seat Installation Process
Now for the core of the installation— we’ll break it into logical phases for clarity. Follow these sequentially, and take your time; rushing can lead to loose fittings. The entire process typically takes 30-45 minutes for first-timers.
Phase 1: Mounting the Bracket to Your Bike
This phase secures the foundation of your iBert setup.
Positioning the Bracket
- Locate the center of your handlebars, about 2-3 inches below the stem for optimal balance.
- Slide the U-bracket around the handlebars at this spot. Ensure it’s centered and doesn’t rub against brake or shifter cables.
- If your bars are thicker than 28mm, insert the provided spacers between the bracket and bars for a snug fit.
Securing the Bracket
- Insert the two main bolts through the bracket holes from the inside, adding washers on the outer side.
- Hand-tighten the bolts using your Allen wrench (5mm size usually fits).
- Use a torque wrench to tighten to 6-8 Nm—snug but not so tight it deforms the bracket. Warning: Over-tightening can damage aluminum bars; under-tightening risks vibration during rides.
- Tug firmly on the bracket to test stability. It shouldn’t shift more than 1mm.
For bikes with angled stems, rotate the bracket slightly upward to align with the seat’s mounting points.
Phase 2: Attaching the Seat to the Bracket
With the bracket in place, connect the seat pan.
Assembling the Seat Components
- Attach the adjustable footrests to the seat base using the small Phillips screws—position them low for younger toddlers (12-24 months) or higher for older kids.
- Thread the safety strap through the harness slots and buckle it loosely for now.
Connecting Seat to Bracket
- Align the seat’s rear mounting holes with the bracket’s upward-facing posts.
- Slide the seat down onto the posts until it clicks into place (a safety pin or latch will engage).
- Secure with the pivot bolt (usually 4mm Allen) at the back—tighten to 5 Nm.
- Adjust the seat’s angle: Loosen the side knobs, tilt forward 10-15 degrees for comfort, then retighten. The child’s knees should clear the handlebars by at least 2 inches when seated.
Pro Tip: If the seat wobbles here, add the included rubber shims under the posts for extra stability.
Phase 3: Final Adjustments and Checks
Fine-tune for safety and comfort.
- Adjust the footrest height so your child’s feet rest flat without dangling or pressing on the front wheel.
- Tighten the harness: Ensure the 5-point system buckles securely, with chest clip at mid-torso level.
- Check cable clearance: Spin the handlebars fully left and right— the seat shouldn’t bind or hit components.
Flip the bike right-side up and give it a shake test. All parts should feel solid.
Post-Installation Testing and Troubleshooting

Once installed, don’t hit the road yet—test thoroughly to catch issues early.
Basic Testing
- Static Test: Sit on the bike with the seat empty. Bounce gently and turn the bars to simulate riding. Listen for rattles or loose bolts.
- Loaded Test: Place a sandbag or weighted backpack (simulating 20-30 lbs) in the seat. Ride slowly in a driveway for 5 minutes, checking for stability.
- Braking Test: Apply brakes firmly while stationary—the seat shouldn’t shift forward.
Common Troubleshooting
If something’s off:
– Seat Wobbles: Re-torque all bolts; add lubricant if threads are seized.
– Handlebar Interference: Reposition the bracket 1 inch lower or use an extension spacer (available from iBert for $10-15).
– Footrest Too Tight: Loosen and readjust; for larger kids, consider the iBert BigKid model.
– Vibration on Rough Roads: This is normal initially—ride 10 miles to bed in the parts, then re-check tightness.
If tests fail, disassemble and restart Phase 1. For persistent issues, refer to the iBert user manual or their support site.
Pro Tips for iBert Bike Seat Success
To elevate your installation and riding experience, here are 5-7 expert tips from seasoned cyclists and parents:
- Customize for Your Child’s Growth: Mark the footrest positions with tape for quick adjustments as your kid grows—iBert accommodates from 12 months to 4 years.
- Avoid Common Mistakes: Never install on bikes with suspension forks, as they can cause excessive movement. Also, skip full knobby tires if you’re new; they amplify vibrations.
- Optimize Visibility: Position the seat so you can glance down easily—test by having a friend sit in it during a short ride.
- Weatherproof It: Apply silicone spray to metal parts post-install to prevent rust in rainy climates.
- Maintenance Routine: Every 50 rides, loosen and re-torque bolts to catch wear. Clean the seat with mild soap after muddy adventures.
- Enhance Comfort: Add a padded seat cover (like those from Thule) for longer trips; it reduces pressure on little bottoms.
- Pair with Accessories: Use a bike bell or mirror for extra awareness—iBert’s front position already gives great eye contact, but these boost safety.
These tweaks can make your iBert feel like a custom fit, extending its usability.
When to Seek Professional Help
While iBert installation is DIY-friendly, some setups warrant a pro. Signs include: your bike has unusual geometry (e.g., fat-tire bikes), you’re uncomfortable with tools, or post-tests reveal instability. Look for a reputable bike shop certified in child seat installs—check reviews on Yelp or the shop’s affiliation with the League of American Bicyclists. Expect costs of $20-50 for the service. If under warranty (iBert offers 1 year), contact their support first to avoid voiding it. Always provide your bike model details for accurate advice.
FAQ
Q: Is the iBert bike seat compatible with all bike types?
A: No, it’s best for standard adult bikes with flat or riser handlebars (22-31.8mm diameter) and a rigid front fork. It’s not recommended for full-suspension mountain bikes, tandems, or recumbents due to stability risks. Check the iBert compatibility chart online for specifics—if unsure, measure your stem height and bar width.
Q: How long does iBert installation take for beginners?
A: About 45-60 minutes if you’re methodical. Pros can do it in 20 minutes. Factor in extra time for troubleshooting if your bike has accessories like GPS mounts.
Q: What’s the weight limit for the iBert seat?
A: It supports children up to 35 pounds and 38 inches tall. Always weigh your child and adjust the harness snugly—overloading can compromise safety and bike handling.
Q: Can I install iBert on an e-bike?
A: Yes, but only on Class 1 or 2 e-bikes with standard handlebars. Avoid high-torque models, as the front weight can affect balance. Disconnect the battery during install to prevent accidental starts.
Q: How do I remove the iBert seat for storage?
A: Loosen the pivot bolt with a 4mm Allen wrench, lift the seat off the posts, then unscrew the bracket bolts. It takes 5 minutes—store in a dry place to prevent mildew on the fabric.
Q: What if the bracket doesn’t fit my handlebars?
A: Use the included spacers or purchase iBert’s universal adapter kit ($15). If bars are over 31.8mm (rare for adults), you may need a custom clamp from a bike shop.
Q: Is the iBert seat comfortable for long rides?
A: Yes, with its adjustable recline and footrests, but add padding for kids over 2 years. Parents report 5-10 mile rides are fine; take breaks for very young toddlers.
Q: Does installation void the warranty?
A: No, as long as you follow the manual’s torque specs. iBert’s 1-year warranty covers defects, but misuse (like improper tightening) isn’t covered—keep receipts handy.
Alternative Solutions to iBert

If iBert doesn’t suit your bike (e.g., due to handlebar style), consider these front or rear child seat alternatives. iBert excels in visibility but may not fit all setups.
| Solution | Pros | Cons | Best For |
|---|---|---|---|
| Thule Yepp Nexxt Mini (front mount) | Quick-release for easy on/off; lightweight (4.4 lbs); fits more bar types | Higher price ($150+); less adjustable for footrests | Urban commuters needing versatility |
| Hamax Caress (rear rack mount) | Stable on bumpy terrain; higher weight limit (48 lbs); folds for storage | Rear position reduces parent-child interaction; requires rack install | Mountain bikers or longer family tours |
| Bell Classic Child Seat (rear) | Budget-friendly ($40); simple strap-on design | Basic harness; not ideal for very young kids under 1 year | Casual riders on a tight budget |
| Topeak BabySeat II (rear) | Padded for comfort; integrated storage pockets | Bulkier profile affects bike aesthetics; max 40 lbs | Parents wanting extras like cup holders |
Compare based on your riding style—front seats like iBert offer better supervision, while rears are more stable for off-road.
Enjoy Safe Family Rides with Your iBert
With this guide, you’ve got everything to successfully install your iBert bike seat and hit the trails worry-free:
– Essential tools and compatibility checks
– Detailed step-by-step phases from bracket mounting to adjustments
– Testing protocols and pro tips for longevity
Following these instructions ensures a secure, reliable setup that prioritizes your child’s safety while enhancing your biking bond. Don’t delay—grab your tools and get that iBert mounted today for guilt-free adventures.
Have you installed an iBert on your bike? Share your tips or challenges in the comments below to help other parents! If issues persist, describe your bike model for tailored advice.


