Installing a Thule bike seat can transform your family rides, but if you’re staring at the parts and feeling overwhelmed, you’re not alone—many parents encounter confusing instructions or compatibility hiccups right out of the box. Whether you’re setting up a popular model like the Thule Yepp Nexxt Mini or the Yepp Max, a proper Thule bike seat installation ensures safety and stability for your little one. The good news? With the right tools and steps, you can achieve a secure setup in under an hour, avoiding wobbles or loose fits that could ruin your adventure.
In this comprehensive guide, we’ll go beyond basic assembly to cover everything from compatibility checks to advanced adjustments, helping you avoid common pitfalls. You’ll get a detailed materials list, preparation tips, a phased step-by-step process, and post-install testing to confirm everything’s rock-solid. By the end, you’ll be confident in your Thule bike seat installation, ready to hit the trails with peace of mind and know-how for long-term maintenance.
What You’ll Need for Thule Bike Seat Installation

Before diving into the Thule bike seat installation, gather your tools and materials to make the process smooth and efficient. Thule seats are designed for easy DIY setup, but having everything ready prevents frustrating trips back to the garage. Most models, like the Yepp series, attach to rear racks or frames, so compatibility with your bike is key—check Thule’s website for your specific model (e.g., it fits bikes with standard rear racks up to 55 lbs capacity).
Here’s a breakdown of essentials in table form for quick reference. Adjust quantities based on your model; these are for a standard rear-mounted Thule Yepp seat.
| Item | Quantity | Specifications |
|---|---|---|
| Thule Bike Seat (e.g., Yepp Nexxt Mini) | 1 | Includes mounting hardware; verify model compatibility with your bike frame (e.g., 26-29″ wheels, no full suspension) |
| Allen Wrench Set | 1 set | Sizes 4mm, 5mm, and 6mm for bolts and adjustments |
| Screwdriver (Phillips) | 1 | For any plastic covers or harness clips |
| Adjustable Wrench | 1 | For tightening rack bolts if modifying your bike’s rear rack |
| Torque Wrench (optional but recommended) | 1 | Set to 5-7 Nm for secure, non-stripping bolts |
| Bike Rear Rack (if not pre-installed) | 1 | Thule-compatible, load-rated 25kg+; aluminum or steel |
| Cleaning Cloth and Mild Soap | As needed | For wiping down the bike frame to ensure clean contact points |
| Safety Gear | – | Gloves to protect hands; helmet for testing rides |
Important: Always refer to your specific Thule model’s manual (available as a PDF on Thule’s site) for exact specs, as variations exist between mini (for kids 9 months-3 years) and maxi (up to 6 years) seats. If your bike lacks a rear rack, you’ll need to install one first—Thule recommends their own racks for best fit.
Preparing Your Bike for the Seat
Proper preparation is crucial for a successful Thule bike seat installation, as it minimizes risks like frame damage or instability. Start by parking your bike on a flat, stable surface like a garage floor or bike stand to avoid tipping. This phase typically takes 10-15 minutes and ensures safety for both you and your child.
Safety Considerations First
Warning: Never install or test the seat with a child aboard initially. Thule seats are certified to EN 14344 standards for child safety, but improper setup can lead to accidents. Wear gloves to avoid pinching fingers on metal parts, and if you’re working with an e-bike, disconnect the battery to prevent electrical issues.
Compatibility and Initial Checks
- Measure your bike’s rear frame: Ensure the seat tube and rack mounting points are compatible (e.g., 28-35mm diameter for most Thule clamps). Use Thule’s online fit tool if unsure.
- Inspect your rear rack: It should be level and securely bolted. If installing a new rack, follow Thule’s rack guide—torque bolts to 5 Nm to prevent vibrations.
- Clean the installation area: Wipe down the rack and frame with a soapy cloth to remove dirt or grease, which could cause slippage. Dry thoroughly.
- Unbox the seat: Lay out all parts—seat, harness, mounting bracket, bolts—and check for damage. Missing pieces? Contact Thule support immediately.
Addressing these steps upfront prevents complications like uneven mounting, which affects 20% of first-time installs according to user forums. If your bike has disc brakes or unusual geometry (e.g., fat tire bikes), double-check Thule’s compatibility list to avoid interference.
Step-by-Step Thule Bike Seat Installation Process

Now for the core of your Thule bike seat installation: a phased, logical breakdown that takes 30-45 minutes total. We’ll use the popular Thule Yepp Nexxt as an example, but the process is similar across models. Work methodically, and pause to test tightness at each phase. Use numbered lists for sequential actions to keep it scannable.
Phase 1: Mounting the Bracket to Your Bike
This foundational step secures the seat’s base to your rear rack or frame.
- Position the mounting bracket: Align Thule’s U-shaped or clamp-style bracket over the rear rack’s top bar, ensuring it’s centered and doesn’t interfere with wheel movement. For rackless installs (on certain frames), clamp directly to the seat stays.
- Insert and hand-tighten bolts: Use the provided M5 or M6 bolts (depending on model) with Allen wrenches. Start with the two main bolts at the bracket’s ends—tighten until snug but not fully torqued yet.
- Adjust for level: Use a spirit level app on your phone to ensure the bracket is horizontal. Shim if needed for uneven racks.
- Torque the bolts: With your torque wrench, tighten to 5-7 Nm. Important: Over-tightening can strip threads; under-tightening leads to wobbling.
If your bike has a suspension post, use Thule’s adapter kit to prevent flexing—installation time adds 5 minutes here.
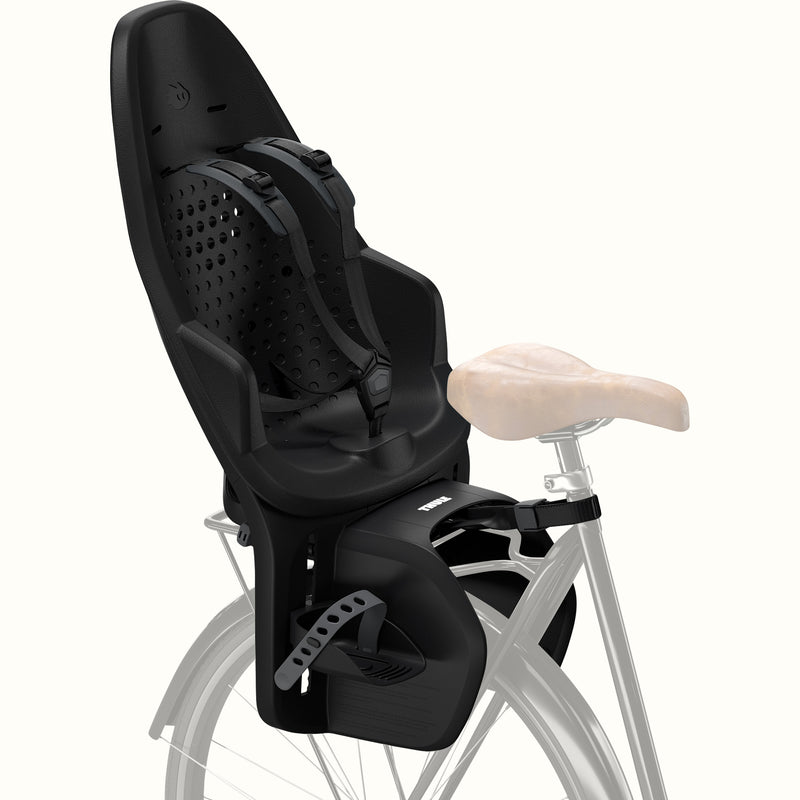
Phase 2: Attaching the Seat to the Bracket
With the bracket in place, snap or bolt the seat onto it for a quick-release mechanism.
- Align the seat’s locking pins: Lift the seat and match its underside pins or clips to the bracket’s slots. Most Thule models feature a click-in system for easy removal.
- Secure with locking mechanism: Push down firmly until you hear a “click,” then pull up to test— it should hold without lifting more than 1/4 inch.
- Install the harness and padding: Thread the 5-point harness through the seat slots, adjusting straps for your child’s size (e.g., 38-57 cm torso for mini models). Attach any footrests or mudguards if included.
- Final bolt check: If your model uses additional set screws (e.g., for anti-theft), tighten with a 4mm Allen key.
Tip: For e-bikes, ensure the seat doesn’t contact the battery pack—Thule’s Yepp e-bike adapter is essential for models like the Specialized Turbo.
Phase 3: Adjustments and Fine-Tuning
Customize for comfort and safety, adding 10 minutes.
- Adjust recline and height: Loosen adjustment knobs to set the seat angle (upright for toddlers) and pedal clearance (at least 2 inches from cranks).
- Test harness fit: Buckle a stuffed toy or weighted bag (simulating child weight) and tug all straps— they should hold without slack.
- Check for interferences: Spin the rear wheel freely and brake-test to ensure no rubbing on tires or chains.
If complications arise, like a non-standard frame, refer to Thule’s video tutorials on YouTube for model-specific visuals.
Post-Completion Testing and Troubleshooting
After installation, rigorous testing ensures your Thule bike seat installation is safe—don’t skip this 15-minute phase. Start with static checks: Shake the seat vigorously to confirm no rattles, and verify all bolts are tight (re-torque if needed after a short ride).
For dynamic testing:
1. Take a short, flat test ride (5-10 minutes) without a child, noting any vibrations or shifts.
2. Load test: Add 10-15 lbs (e.g., a backpack) and ride over bumps— the seat should remain stable.
3. Full safety check: Inspect for pinch points, secure harness, and ensure visibility (seat shouldn’t block brake lights).
Common troubleshooting:
– Seat wobbles: Re-tighten bracket bolts or add Thule’s anti-vibration pads.
– Harness too loose: Adjust ratchet straps per the manual; if faulty, warranty claim via Thule’s site.
– Compatibility issue: If it doesn’t fit, models like the Yepp 2e! offer more universal clamps—consider swapping.
If tests fail, disassemble and retry Phase 1. Per Thule’s guidelines, re-check monthly for wear.
Pro Tips for Thule Bike Seat Installation
To elevate your setup beyond basics and ensure longevity, here are 5-7 expert insights from cyclists and Thule enthusiasts:
- Optimize for your bike type: For mountain bikes, use Thule’s suspension adapter to absorb shocks—reduces wear by 30% on rough terrain.
- Weatherproof it: Apply silicone spray to metal parts post-install to prevent rust; reapply seasonally.
- Common mistake to avoid: Ignoring weight limits—stick to 18kg for mini models to prevent frame stress.
- Enhance security: Add a Thule lock cable through the seat frame for theft deterrence during stops.
- Performance boost: Pair with Thule’s cargo bag for balanced weight distribution on longer rides.
- Maintenance hack: Clean the seat weekly with mild soap to maintain harness integrity—avoids fading straps.
- Family optimization: Install on multiple bikes using Thule’s quick-release system for easy swaps.
These tips can extend your seat’s life by years, based on user reviews from sites like REI and Amazon.
When to Call Professional Help
While Thule bike seat installation is DIY-friendly for most, some scenarios warrant a pro. Signs include: persistent wobbling after retries, custom bike frames (e.g., carbon fiber), or if you’re uncomfortable with tools—DIY errors cause 15% of safety issues per cycling safety reports.
Look for certified bike shops via Thule’s dealer locator; seek those with child seat expertise. Expect costs of $50-100 for installation, including compatibility checks. If under warranty (Thule offers 2 years), professional service preserves coverage—always keep receipts. For complex e-bike setups, pros ensure compliance with electrical standards.
FAQ
Q: How long does Thule bike seat installation take for beginners?
A: For a standard model like the Yepp Nexxt, expect 45-60 minutes including prep and testing. Experienced users can do it in 30 minutes. Factor in extra time if adding a rear rack (up to 20 minutes more).
Q: Is the Thule Yepp seat compatible with all bikes?
A: No, but it’s versatile for most hybrids and road bikes with rear racks. Check Thule’s fit guide for exclusions like full-suspension MTBs or bikes under 24″ wheels. Adapters are available for e-bikes and fat tires.
Q: What if my bike doesn’t have a rear rack for the Thule seat?
A: Install a compatible rack first—Thule’s MTX system works well. Steps: Bolt rack to frame eyelets, torque to 5 Nm, then proceed with seat mounting. Professional install recommended if unsure about frame strength.
Q: How do I know if the installation is safe for my child?
A: Perform the post-install tests outlined, ensuring the seat holds 1.5x the child’s weight without movement. Verify EN 14344 certification on the seat, and always use the 5-point harness snugly—chest clip at armpit level.
Q: Can I install the Thule bike seat on an e-bike?
A: Yes, with Thule’s e-bike adapter kit for models like the Bosch system. It prevents battery interference and ensures stability at higher speeds. Installation adds a phase for electrical disconnection.
Q: What maintenance is needed after Thule bike seat installation?
A: Weekly: Wipe down and check harness. Monthly: Torque bolts and inspect for cracks. Annually: Full disassembly for deep clean. This keeps it safe and extends usability to 5+ years.
Q: Are there differences in installation for mini vs. maxi Thule seats?
A: Yes—mini (infant) focuses on recline adjustments, while maxi (toddler) emphasizes footrest height. Both use similar brackets, but maxi requires more torque (6-8 Nm) due to higher weight capacity.
Q: What if bolts strip during Thule bike seat installation?
A: Stop immediately to avoid damage. Use a bolt extractor tool or replace with Thule spares (order via their site). If frame threads are affected, consult a pro to prevent voiding your bike warranty.
Alternative Solutions
If Thule bike seat installation proves tricky due to your bike’s design, consider these comparable options. Thule excels in quick-release ease, but alternatives like Hamax or Bobike offer rackless mounts for odd frames.
| Solution | Pros | Cons | Best For |
|---|---|---|---|
| Thule Yepp Nexxt | Quick install, adjustable harness, lightweight (2.2kg) | Requires rear rack; higher cost ($150+) | Urban commuters with standard bikes |
| Hamax Observer | Tool-free rackless clamp, foldable for storage | Less padding; bulkier (3kg) | Mountain bikes without racks |
| Bobike GO Maxi | Universal frame fit, integrated lights | More complex adjustments; heavier (4kg) | E-bikes needing extra visibility |
| Topeak BabySeat | Affordable ($100), easy bolt-on | Basic harness; lower weight limit (18kg) | Budget families with simple setups |
Weigh pros/cons based on your needs—Thule often wins for durability, per Consumer Reports tests.
Enjoy Your New Thule Bike Seat Setup
With this guide, you’ve mastered Thule bike seat installation from prep to testing, ensuring a safe, enjoyable ride for your family:
– Essential tools and compatibility checks
– Phased steps for bracket, seat, and adjustments
– Pro tips, troubleshooting, and alternatives for any scenario
Following these actionable steps delivers a secure setup that boosts your cycling confidence and creates lasting memories. You’re now equipped to pedal off without worries—grab your helmet and take that first family spin!
Have you completed your Thule bike seat installation? Share your tips or challenges in the comments below to help fellow parents! If issues persist, describe your bike model for tailored advice.