
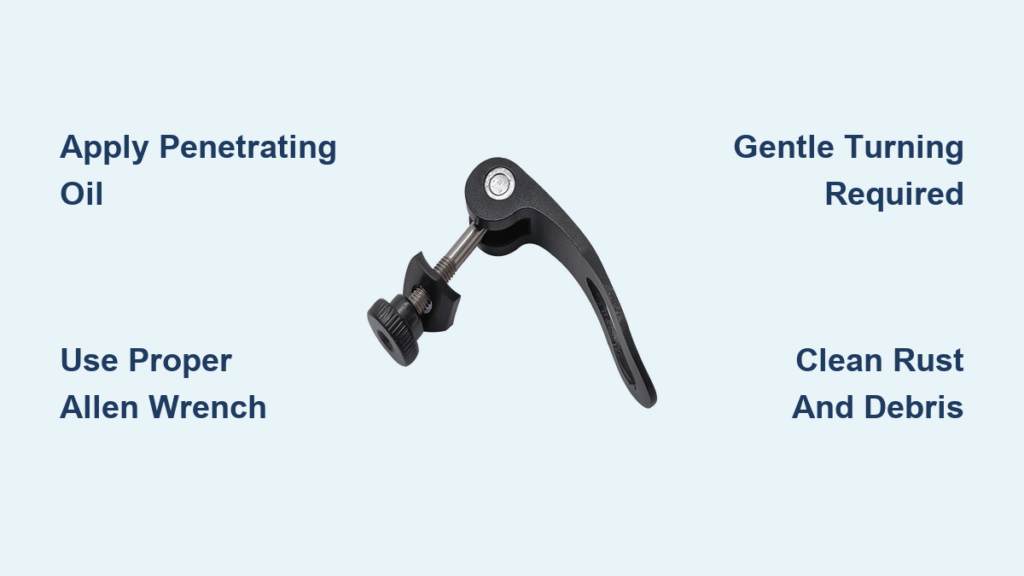
Struggling to loosen your bike seat bolt? It’s a common frustration that can turn a simple adjustment into a major hassle, especially if the bolt is rusted, overtightened, or seized from years of exposure to the elements. Whether you’re raising the seat for a taller rider or just trying to swap it out, a stuck bike seat bolt can leave you sidelined. The good news is there’s a quick fix you can try right now: apply a penetrating oil like WD-40 to the bolt, let it sit for 10-15 minutes, and use a proper Allen wrench to gently work it loose. This often does the trick without much effort.
In this comprehensive guide, we’ll go beyond that initial quick fix to explore the most common causes of a stuck bike seat bolt and provide multiple step-by-step methods, from basic tools to advanced techniques. You’ll learn about the right tools, safety precautions, and prevention tips to keep this from happening again. By the end, you’ll have the confidence to loosen your bike seat bolt like a pro, saving time and avoiding damage to your bike. Let’s get your saddle adjusted and you back on the road.
Common Causes of a Stuck Bike Seat Bolt
Before diving into fixes, it’s helpful to understand why your bike seat bolt won’t budge. Identifying the root cause can prevent unnecessary force that might strip the threads or damage the frame. Here are the most frequent culprits:
Rust and Corrosion
Bikes exposed to rain, sweat, or road salt often develop rust on the seat post bolt. This oxidation creates a tight bond between the metal parts, making it hard to loosen the bike seat bolt. If your bike has been stored outdoors or ridden in wet conditions, this is likely the issue. Corrosion builds up over time, especially on steel components, and can even affect aluminum frames if not maintained.
Overtightening During Installation
Many riders crank down too hard on the seat clamp bolt to prevent wobbling, but this can seize the mechanism. The excessive torque compresses the seat post against the frame, leading to friction that resists loosening. This is common on quick-release or bolted seat posts where the initial setup wasn’t done with a torque wrench.
Dirt and Debris Buildup
Grime, mud, or lubricant residue can accumulate around the bolt head and threads, acting like a glue. Over time, this debris hardens and makes it tough to loosen the bike seat bolt. It’s especially prevalent on mountain bikes or those used in off-road conditions.
Manufacturing Defects or Wear
In rare cases, poor threading from the factory or wear from repeated adjustments can cause the bolt to bind. If the bolt is cross-threaded or the seat post is slightly bent, it exacerbates the problem.
Tools and Materials Needed to Loosen Bike Seat Bolt

Gathering the right tools upfront ensures a smooth process and reduces the risk of stripping the bolt. For most jobs, you’ll need basic items, but advanced methods may require more specialized gear. Here’s a breakdown in table form for clarity:
| Item | Quantity | Specifications |
|---|---|---|
| Allen wrench or hex key set | 1 set | Sizes 4mm-6mm (common for bike seat bolts); get a ball-end set for better access |
| Penetrating oil (e.g., WD-40 or PB Blaster) | 1 can | Aerosol for easy application; non-flammable preferred for safety |
| Adjustable wrench or pliers | 1 | 6-8 inch size for gripping without slipping; rubber-jawed to avoid scratches |
| Bike stand or workbench | 1 | Optional but recommended for stability; use a towel to protect the frame |
| Wire brush or old toothbrush | 1 | For cleaning rust and debris; soft bristles to avoid scratching |
| Anti-seize lubricant | 1 tube | For reassembly; prevents future sticking |
| Torque wrench (optional for advanced) | 1 | 5-10 Nm range; ensures proper tightening post-loosening |
| Safety gloves and eye protection | 1 pair each | Nitrile gloves for grip; glasses to shield from spray |
These tools are affordable and widely available at bike shops or hardware stores. Total cost for basics: under $20 if you don’t own them already.
Preparation Steps and Safety Considerations
Before attempting to loosen your bike seat bolt, proper preparation can save you from injury or bike damage. Start by flipping your bike upside down or securing it in a stand to access the seat post easily—this takes about 2-3 minutes. Clean the area around the bolt with a rag and soapy water to remove surface dirt, then dry it thoroughly.
Safety first: Always wear gloves to protect your hands from sharp edges or chemicals, and eye protection when using penetrating oils, as they can splash. Work in a well-ventilated area to avoid inhaling fumes. If your bike has carbon fiber components, be extra gentle—overtorquing can crack them. Warning: Never use excessive force on a stuck bolt without lubricant, as it could strip the threads, leading to costly repairs. If the bolt is on a high-end frame, consult the manufacturer’s torque specs (usually 4-6 Nm for seat posts).
Park your bike on a stable surface and remove any accessories like lights or bags that might obstruct access. This prep phase should take no more than 5 minutes and sets you up for success.
Step-by-Step Methods to Loosen Bike Seat Bolt
We’ll cover three progressive methods, starting with the simplest for minor sticks and escalating to advanced techniques for severe cases. Each method includes diagnosis, steps, and testing. Aim to spend 10-30 minutes per attempt, and stop if you feel resistance that could cause damage.
Method 1: Basic Lubrication and Gentle Turning (For Light Sticking)
This is the go-to quick fix for most riders and works about 70% of the time without tools beyond basics.
Diagnosing the Issue
Check if the bolt turns slightly but stops—indicating minor corrosion or dirt. If it’s completely immobile, move to the next method.
Fix Steps
- Apply penetrating oil liberally to the bolt head, threads, and surrounding seat post clamp. Let it soak for 10-15 minutes (or longer for rust).
- Insert the correct-size Allen wrench (usually 5mm) into the bolt head, ensuring a snug fit to avoid rounding it off.
- Gently turn counterclockwise while wiggling the seat post up and down to break the seal. Apply steady pressure—don’t yank.
- If it budges, continue turning slowly until loose. Wipe away excess oil.
Testing the Fix
Raise and lower the seat post several times to ensure smooth movement. Reinstall the bolt hand-tight, then torque to 5 Nm if you have a wrench. Test ride for 5 minutes to check for wobble.
Method 2: Heat and Mechanical Assistance (For Moderate Resistance)
If lubrication alone fails, heat expands the metal to break the bond. This method takes 15-20 minutes and is effective for rusted bolts.
Diagnosing the Issue
Inspect for visible rust or if the bolt feels “frozen.” Avoid this on carbon frames, as heat can damage composites.
Fix Steps
- After initial lubrication, use a hairdryer or heat gun on low (around 200°F) to warm the bolt and clamp for 2-3 minutes. Important: Keep heat away from rubber or plastic parts.
- While warm, tap the bolt head lightly with a rubber mallet or wrench handle to loosen debris—3-5 gentle taps.
- Grip the Allen wrench with pliers for extra leverage and turn counterclockwise. Alternate with more oil if needed.
- Once loose, clean the threads with a wire brush dipped in oil.
Testing the Fix
Slide the seat post in and out freely. Apply anti-seize compound to threads before reassembling, then torque properly. Spin the wheels and check seat stability.
Method 3: Impact Tools or Professional-Grade Techniques (For Severe Seizing)

For bolts that won’t yield, use impact for vibration-assisted loosening. This advanced method suits 20-30 minutes and requires caution.
Diagnosing the Issue
If previous methods fail, the bolt may be cross-threaded or heavily corroded. Consider if it’s worth DIY or pro help.
Fix Steps
- Soak with penetrating oil overnight if possible for best results.
- Use an impact driver or socket wrench with an extension if the bolt allows (adapt for Allen head with a hex bit). Strike firmly but controlled—5-10 impacts.
- If no impact tool, wrap a cloth around the wrench handle and tap with a hammer while turning.
- For extreme cases, carefully drill out the bolt (last resort)—use a left-hand drill bit to potentially unscrew it while drilling. Warning: This risks frame damage; only if experienced.
Testing the Fix
Fully remove the bolt and inspect for damage. Replace if stripped. Reinstall with new hardware if needed, torque to specs, and do a full bike check.
If none work, the issue might be frame-related—proceed to the professional help section.
Prevention Tips and Maintenance Advice
To avoid dealing with a stuck bike seat bolt in the future, regular upkeep is key. After each adjustment, apply anti-seize lubricant to the threads and wipe down the post with a dry cloth. Store your bike indoors or under cover to minimize rust. Check and clean the bolt area monthly, especially after wet rides— this takes just 2 minutes.
For long-term maintenance, torque all bolts to manufacturer specs (e.g., 4-6 Nm for most road bikes) using a wrench. If you ride in corrosive environments, consider a stainless steel seat post or protective grease. Following these habits can extend your bike’s life and make adjustments effortless.
Pro Tips for Loosening Bike Seat Bolts
Here are 7 expert tips to make the process smoother and more effective:
- Choose the right oil: PB Blaster penetrates deeper than WD-40 for heavy rust, but test on a small area first to avoid paint damage.
- Avoid overtightening on reassembly: Use the “finger tight plus quarter turn” rule for quick clamps, or a torque wrench for precision—overdoing it causes 80% of future sticks.
- Work in short bursts: Apply oil, wait, then try loosening every 5 minutes to let it penetrate without frustration building.
- Upgrade your tools: Invest in a quality Allen key set with ergonomic handles; cheap ones slip and round bolts easily.
- Check seat post compatibility: Ensure your post diameter matches the frame (27.2mm common for road bikes) to prevent binding.
- Winter storage prep: Before off-season, loosen and grease all bolts, then store upright to avoid pressure on the seat.
- Common mistake to avoid: Don’t use vice grips on the bolt—they mar the head. Always use fitting tools.
These tweaks optimize performance and save headaches down the line.
When to Call in Professional Help
Sometimes, DIY limits are reached, and it’s smarter to seek a bike mechanic. Signs you need pro help include: the bolt is stripped beyond repair, the frame shows cracks from forcing it, or it’s a high-value carbon bike where mistakes are costly. If methods above fail after 30 minutes or you lack tools, stop to avoid worsening damage.
Look for a certified bike shop with good reviews on Google or Yelp—ask if they specialize in your bike type (e.g., MTB vs. road). Expect costs of $20-50 for a simple loosening and adjustment, or $50-100 if replacement parts are needed. Check your bike’s warranty; tampering might void it, so document your attempts. Pros use specialized extractors that make quick work of tough bolts.
FAQ
Q: Why is my bike seat bolt stuck even after applying oil?
A: Oil needs time to penetrate—try soaking for 30 minutes or overnight for severe rust. If it’s still stuck, heat or impact methods may be required, as the corrosion could be deeper than surface level. Always clean debris first for better results.
Q: Can I use household items to loosen a bike seat bolt?
A: Yes, like a screwdriver for leverage or hot water instead of a heat gun, but they’re less effective and riskier. Penetrating oil is best; avoid vinegar, as it can etch aluminum.
Q: What size Allen wrench do I need for most bike seat bolts?
A: Typically 4mm, 5mm, or 6mm—check your bike’s manual or measure the bolt head. A full set covers variations across brands like Trek or Specialized.
Q: Is it safe to ride with a loose bike seat bolt?
A: No— a wobbly seat can cause accidents or uneven pedaling. Tighten it properly after loosening, and test for stability before riding.
Q: How do I know if the seat post is damaged after loosening?
A: Inspect for bends, scratches, or play in the post. If it doesn’t slide smoothly or the frame clamp is deformed, replace the post (costs $20-50) to ensure safety.
Q: What’s the difference between a quick-release and bolted seat post?
A: Quick-release uses a lever for tool-free adjustment but can still stick from dirt; bolted requires an Allen key and is more secure but prone to overtightening issues.
Q: Can I prevent rust on my bike seat bolt?
A: Absolutely—apply anti-seize yearly and clean after wet rides. For coastal or rainy areas, use corrosion-resistant bolts or covers.
Alternative Solutions for Stuck Bike Seat Bolts
If traditional loosening fails or you want a permanent fix, consider these options. For instance, replacing the entire seat post assembly bypasses the issue altogether.
| Solution | Pros | Cons | Best For |
|---|---|---|---|
| Replace with quick-release skewer | Tool-free adjustments; easier for beginners | Less secure for rough terrain; may not fit all frames | Casual road biking; frequent height changes |
| Upgrade to dropper post | Remote-controlled height; no manual loosening needed | Expensive ($100+); requires frame compatibility | Mountain biking; technical trails |
| Use a seat post shim | Fixes slight size mismatches causing binding | Adds weight; temporary fix only | Budget setups; mismatched post diameters |
| Bolt extractor kit | Removes stripped bolts precisely | Requires skill; potential frame risk | Severe damage; DIY enthusiasts with tools |
Compare based on your riding style— a dropper post is ideal for versatility but overkill for commuters.
Enjoy Your Adjusted Bike Seat
With this guide, you’ve got everything to successfully loosen your bike seat bolt and keep your ride comfortable:
- Insights into common causes like rust and overtightening
- Essential tools and three detailed methods from basic to advanced
- Prevention tips and pro advice for long-term ease
Following these steps not only solves your immediate problem but ensures smoother adjustments in the future, enhancing your overall biking experience. Don’t let a stubborn bolt ruin your ride—grab your tools and get started today.
Have you tried loosening a stuck bike seat bolt? Share your tips or challenges in the comments below to help fellow cyclists!


