
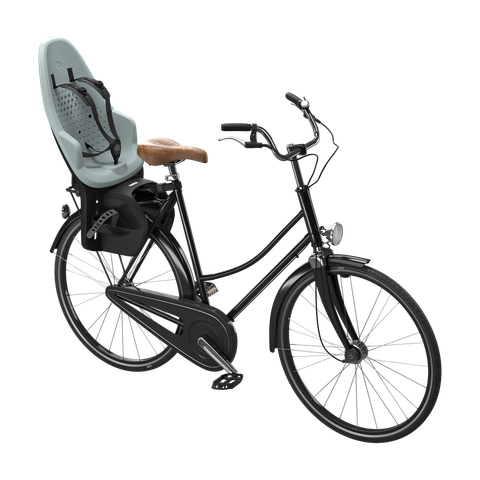
If you’ve been enjoying family rides with your Thule RideAlong bike seat but now need to remove it—maybe for storage, bike maintenance, or switching to a different setup—you’re probably wondering how to do it safely and without damaging your bike. The good news is that removing a Thule RideAlong is a straightforward process that most cyclists can handle in under 30 minutes with the right tools. This guide will walk you through a quick fix to get started, ensuring you avoid common pitfalls like stripping bolts or scratching your frame.
In this comprehensive how-to, we’ll go beyond the basics to cover everything from required tools and safety prep to a detailed step-by-step removal process, plus troubleshooting if things don’t go smoothly. By the end, you’ll have your bike seat off cleanly, ready for reinstallation later or freeing up space on your rear rack. Whether you’re a first-time parent-cyclist or a seasoned rider, these actionable steps will give you the confidence to tackle the job yourself and keep your adventures rolling.
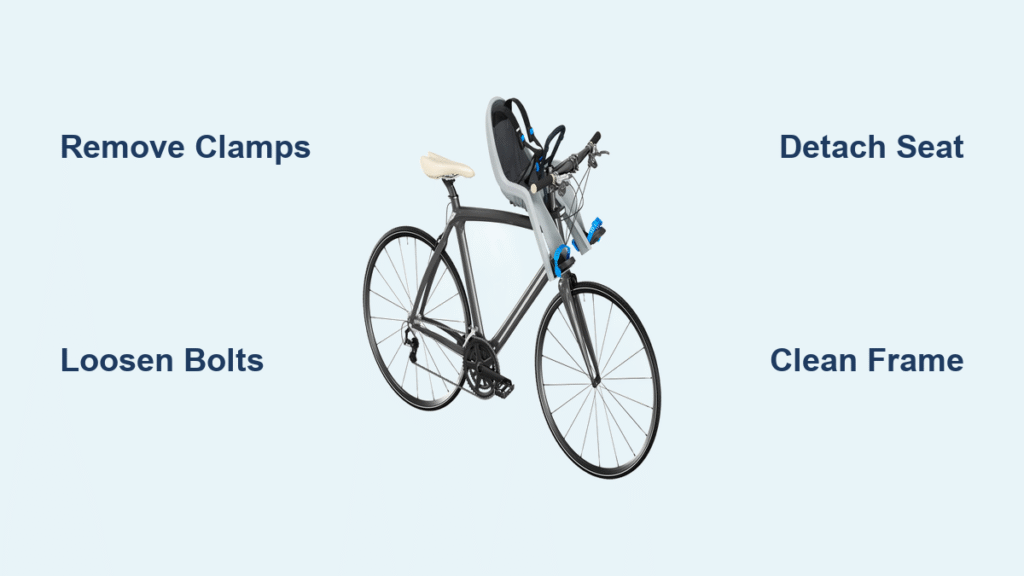
What You’ll Need for Thule RideAlong Bike Seat Removal
Before diving in, gather the right tools and materials to make the process efficient and safe. The Thule RideAlong typically mounts via adjustable clamps to your bike’s rear rack or seat post, so you’ll need basics for loosening hardware. Here’s a handy table of essentials—most are standard bike tools you might already have.
| Item | Quantity | Specifications |
|---|---|---|
| Allen wrench set | 1 set | Sizes 4mm, 5mm, and 6mm (for clamp bolts and seat adjustments) |
| Adjustable wrench or torque wrench | 1 | For nuts and final tightening checks; aim for 5-8 Nm torque if available |
| Screwdriver (flathead or Phillips) | 1 | For any accessory screws, like footrests or harness clips |
| Bike stand or stable surface | 1 | To elevate the bike and prevent tipping during removal |
| Clean cloth or rag | Several | For wiping down parts and protecting your bike’s paint |
| Lubricant (optional) | 1 small can | Bike-safe grease for reassembly; avoid WD-40 as it can attract dirt |
| Safety gloves | 1 pair | To protect hands from pinch points or sharp edges |
These items ensure you’re prepared without overcomplicating things. If your model has integrated lights or fenders (common on some Thule variants), you might need a small pliers for those attachments, but the core kit above covers 90% of cases.
Preparing Your Bike for Thule RideAlong Removal
Safety first—removing the Thule RideAlong bike seat involves working around your bike’s frame and potentially heavy components, so proper preparation prevents accidents or damage. Start by parking your bike on a flat, stable surface like a garage floor or using a bike stand to keep it upright. This avoids wobbling and makes accessing the clamps easier.
Important: Always remove any child or accessories from the seat before starting. Double-check that the bike is off and stable—flip it upside down if needed, but protect the saddle and handlebars with a towel to avoid scratches. Wear safety glasses if you’re dealing with older hardware that might have debris. If your Thule RideAlong has been exposed to rain or mud, give it a quick wipe-down to prevent grime from falling onto your bike during removal. Allow about 10-15 minutes for prep to ensure everything’s secure. Finally, consult your Thule user manual (downloadable from thule.com if lost) for model-specific notes, as slight variations exist between standard and deluxe versions.
Warning: Never force any bolts—if something feels stuck, stop and apply a penetrating lubricant rather than risking a stripped thread, which could lead to costly repairs.
Step-by-Step Thule RideAlong Bike Seat Removal Process

Now for the main event: the detailed removal steps. We’ll break this into logical phases to keep it manageable, using numbered lists for the sequential actions. The entire process typically takes 20-40 minutes, depending on your bike’s setup and how tight the clamps are. Work in a well-lit area and go slowly to avoid mistakes.
Phase 1: Disengage Accessories and Secure the Seat
Before tackling the main mount, remove any add-ons to lighten the load and prevent snags. This phase focuses on the footrests, harness, and any extras.
-
Unbuckle and remove the harness: Loosen the five-point harness by pressing the release buttons on the chest clip and shoulder straps. Fully extend all straps and fold them neatly to one side. This takes about 2 minutes and ensures nothing gets tangled.
-
Detach footrests and pedals (if applicable): Use a 4mm Allen wrench to loosen the bolts securing the footrests to the seat frame. On models with integrated pedals, slide them out after loosening. Set these aside in a labeled bag to avoid losing small parts—reinstallation is easier this way.
-
Remove any lights or fenders: If your Thule RideAlong has mounted accessories, unscrew them using the provided clips or a screwdriver. Gently pull them free without yanking on wires.
Pro Tip: Take photos of the setup before disassembling; this visual reference is invaluable for reinstalling later.
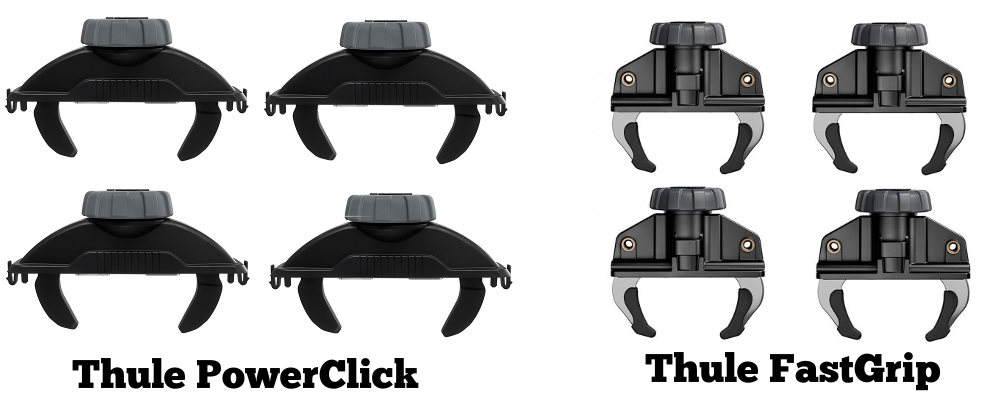
Phase 2: Loosen and Remove the Main Mount Clamps
This is the core of how to remove Thule RideAlong bike seat—focusing on the rack or seat post attachment. The RideAlong uses quick-release style clamps, but they may need tools for stubborn ones.
-
Locate the clamp mechanisms: Identify the two main clamps—one at the seat base connecting to the rear rack, and possibly a secondary one for the seat post if it’s a hybrid mount. Refer to your manual for exact positions.
-
Loosen the rack clamp bolts: Insert a 5mm or 6mm Allen wrench into the clamp bolts (usually two per side). Turn counterclockwise to loosen—apply steady pressure without forcing. If the bike is rack-mounted, support the seat’s weight with one hand to prevent it from dropping suddenly.
-
Release the seat post clamp (if present): For seat-post models, adjust the quick-release lever or loosen the collar nut with an adjustable wrench. Slide the seat upward gently. This step might take 5-10 minutes if corrosion is an issue.
-
Slide off the seat: Once clamps are loose, carefully lift the entire Thule RideAlong unit away from the bike. Wiggle it side-to-side if needed, but avoid prying with tools to prevent frame scratches.
Warning: If the clamps are overtightened (beyond Thule’s recommended 5-7 Nm), they might resist. Apply a bike-safe lubricant and wait 5 minutes before retrying—never use excessive force.
Phase 3: Clean and Inspect Post-Removal
After removal, it’s smart to inspect and clean to maintain longevity.
-
Wipe down the bike’s mounting area: Use a clean cloth to remove any residue from the rack or seat post. Check for scratches and apply touch-up paint if needed.
-
Inspect the seat for wear: Examine the Thule RideAlong’s clamps and frame for damage. Clean the interior padding with a mild soap solution and let it air dry.
-
Store the seat properly: Disassemble loosely if storing long-term, and keep it in a dry place away from direct sunlight to prevent material degradation.
Post-Completion Testing and Troubleshooting
With the Thule RideAlong bike seat removed, test your bike’s balance and functionality. Take a short test ride (without a child) to ensure the rear rack feels stable and there’s no unusual vibration. Check that all bolts on the bike are retightened if you adjusted them during the process.
If issues arise, here’s quick troubleshooting:
– Clamps won’t loosen: The bolts might be seized from weather exposure. Soak with penetrating oil, tap gently with a mallet, and retry after 10 minutes.
– Seat feels stuck mid-removal: Ensure you’ve loosened all bolts—double-check for hidden set screws. If it’s a deluxe model with anti-theft features, disengage those first.
– Bike wobbles after removal: Redistribute weight or add a rack stabilizer. If persistent, the rack itself may need adjustment.
– Parts missing post-removal: Use the Thule parts diagram online to order replacements—common ones like bolts are inexpensive ($5-10).
If these don’t resolve it, variations in bike models (e.g., fat-tire vs. standard) might require model-specific tweaks; consult Thule’s support site for videos.
Pro Tips for Thule RideAlong Bike Seat Removal
To make your experience smoother and avoid common errors, here are 5-7 expert tips from seasoned cyclists and Thule enthusiasts:
– Torque everything properly: Always use a torque wrench for reinstallation to hit Thule’s 5-7 Nm spec—overtightening is a top mistake that leads to stripped threads.
– Work with a partner for heavy lifting: The RideAlong weighs about 10-15 lbs loaded; have someone hold the bike steady if you’re solo.
– Seasonal considerations: Remove the seat before winter storage to prevent rust; apply a protective wax to metal parts.
– Optimize for frequent use: If you remove/reinstall often, invest in Thule’s quick-mount adapters for faster swaps (under $20).
– Avoid common pitfalls: Don’t remove on uneven ground—it’s a recipe for drops and dents. Also, label all screws in bags by phase for easy reassembly.
– Enhance safety: Test the empty mount after removal by applying pressure to simulate weight; this catches loose fittings early.
– Maintenance boost: While removed, inspect the entire bike rack for wear—replace if it’s over 5 years old to ensure future compatibility.
These tips can shave time off future removals and extend your gear’s life.
When to Call Professional Help
While DIY removal is feasible for most, some situations warrant a pro. Signs include: severe corrosion making bolts immovable, frame damage during the process, or if your bike has custom modifications (e.g., aftermarket racks) that complicate things. If you’re uncomfortable with tools or the seat is under warranty, avoid risking voiding it.
Look for a reputable bike shop certified by Thule or a general mechanic with e-bike/child seat experience. Check reviews on sites like Yelp for “Thule installation experts.” Typical costs range from $20-50 for a simple removal, higher ($75+) if repairs are needed. Always ask about warranty implications—Thule covers defects for 2 years, but user damage isn’t included. If in doubt, contact Thule support first for free advice.
FAQ
Q: How long does it take to remove a Thule RideAlong bike seat?
A: For most users, the process takes 20-40 minutes, including prep and cleaning. Beginners might add 10-15 minutes for familiarizing with the clamps. Rushed jobs increase error risk, so take your time.
Q: Can I remove the Thule RideAlong without tools?
A: No, not fully—while quick-release levers help, you’ll need Allen wrenches for the main bolts. Skipping tools can damage the seat or bike.
Q: What if my Thule RideAlong is a deluxe model with extra features?
A: The core steps are the same, but detach extras like the integrated storage or adjustable backrest first using the model’s manual. Videos on Thule’s site show variations.
Q: Is it safe to remove the seat while the bike is upside down?
A: Yes, but protect the saddle and use a stand. This position makes under-bike access easier, but ensure stability to avoid falls.
Q: How do I reinstall the Thule RideAlong after removal?
A: Reverse the steps: Secure clamps to the rack/post, torque to 5-7 Nm, reattach accessories, and test with weight. Full guides are in the manual.
Q: Will removing the seat affect my bike’s warranty?
A: Unlikely, as it’s user-serviceable, but check your bike manufacturer’s terms. Thule encourages safe DIY maintenance.
Q: What if I lose a bolt during removal?
A: Thule bolts are standard M5/M6 sizes; replacements are available on their site for $2-5 each. Always count parts before and after.
Alternative Solutions for Thule RideAlong Removal
If the standard method doesn’t suit your setup (e.g., a non-standard rack), consider these alternatives. They might be quicker for frequent users but could require buying extras.
| Solution | Pros | Cons | Best For |
|---|---|---|---|
| Thule Quick-Mount Kit | Faster release (under 5 minutes); no tools needed for daily swaps | Costs $30-50 extra; not ideal for full disassembly | Commuters removing/reinstalling often |
| Professional Disassembly Service | Handles stuck parts safely; includes cleaning | More expensive ($40+); less DIY control | Rusty or complex installs; warranty concerns |
| Universal Seat Post Adapter Removal | Simpler for post-only mounts; uses basic levers | Less secure for rack models; potential compatibility issues | Basic bikes without full racks |
Compare based on your needs—the official method is best for one-time removals to ensure compatibility.
Get Your Bike Seat-Free and Ready for the Road
Following this guide, you’ve got all the tools and steps to successfully remove your Thule RideAlong bike seat:
– Essential materials and safe preparation
– Phased disassembly from accessories to main clamps
– Post-removal testing and pro tips for longevity
Don’t let a mounted seat hold back your bike maintenance or storage plans—follow these steps, and you’ll have it off cleanly, preserving your gear for future rides. You’re now equipped to handle this with confidence, saving time and money over pro services.
Have you removed your Thule RideAlong before? Share your tips or any hiccups in the comments below to help fellow parents and cyclists! If issues persist, describe your setup for tailored advice.


