
If you’ve noticed your bike seat looking worn out, cracked, or uncomfortable after years of riding, you’re not alone—many cyclists face this frustrating issue that can make every pedal stroke a pain. Reupholstering a bike seat is a fantastic DIY solution to restore comfort, improve aesthetics, and extend its life without breaking the bank. Whether it’s a mountain bike, road bike, or commuter, this process can breathe new life into your ride in just a few hours, saving you from buying a pricey replacement.
In this comprehensive guide, we’ll go beyond the basics to cover everything from gathering materials to detailed step-by-step instructions, plus troubleshooting tips for common hiccups. You’ll learn multiple techniques tailored to different bike seat types, prevention strategies to keep your new upholstery lasting longer, and when to call in pros if needed. By the end, you’ll have the confidence to tackle reupholstering your bike seat like a pro and hit the trails feeling refreshed.
Materials and Tools Needed for Reupholstering a Bike Seat
Before diving in, it’s essential to gather the right supplies. Reupholstering a bike seat requires durable, weather-resistant materials since it’ll face rain, sun, and constant friction. Focus on high-quality vinyl or faux leather for longevity, and ensure everything fits your specific seat model—most standard bike seats are around 10-12 inches long, but check yours for variations.
Here’s a handy table of what you’ll need:
| Item | Quantity | Specifications |
|---|---|---|
| Upholstery fabric (vinyl, leatherette, or marine-grade vinyl) | 1/2 yard | Weatherproof, UV-resistant; thickness 1-2mm for durability |
| Foam padding (high-density) | 1 sheet | 1-2 inches thick; cut to seat size for cushioning |
| Staple gun and staples | 1 gun + 200 staples | Heavy-duty staples (1/4-inch or longer) for secure hold |
| Utility knife or scissors | 1 | Sharp blade for precise cutting |
| Pliers or staple remover | 1 set | For removing old staples without damaging the base |
| Screwdriver or Allen wrench | 1 | To disassemble the seat (sizes vary by bike model) |
| Adhesive spray or contact cement | 1 can | For bonding foam to base; non-toxic and fast-drying |
| Sandpaper (medium grit, 120-150) | 1 sheet | For smoothing the seat base if needed |
| Measuring tape | 1 | For accurate cuts |
| Gloves and safety glasses | 1 pair each | To protect hands and eyes during stapling |
These items should cost around $20-50 total, depending on quality. Source them from hardware stores like Home Depot or online at Amazon. If your bike seat has unique features like gel inserts, you might need specialty foam—always measure your seat first (typically 9×5 inches for the top).
Preparation Steps and Safety Considerations
Proper preparation is key to a smooth reupholstering process and avoids costly mistakes. Start by working in a well-lit, ventilated space like a garage or workshop to handle adhesives safely. Allow 1-2 hours for prep, and plan for the full project to take 2-4 hours total.
Safety First
Warning: Always wear gloves when handling sharp tools or adhesives to prevent cuts or chemical exposure. If using spray adhesive, do so outdoors or with a respirator mask to avoid inhaling fumes. Disconnect your bike’s battery if it’s an e-bike to prevent any electrical issues during seat removal.
Initial Preparation Steps
- Remove the bike seat from the frame: Use a screwdriver or Allen wrench to loosen the clamp under the saddle. Most seats attach via a rail system—twist or unscrew to detach. Place the bike on a stable stand for easy access.
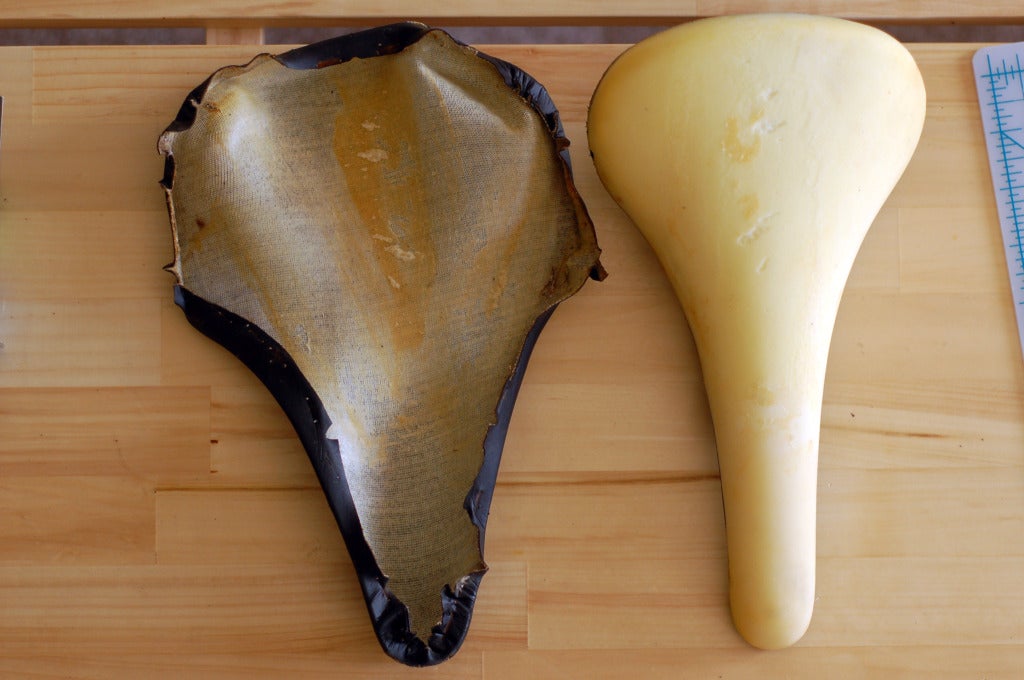
- Disassemble the old upholstery: Flip the seat over and use pliers to pull out old staples. Be gentle to avoid bending the metal base. If the foam is deteriorated, peel it off completely.
- Clean the base: Wipe down the metal or plastic frame with soapy water and let it dry. Sand any rough spots for a smooth surface—this ensures better adhesion.
- Measure and cut new materials: Trace the old foam onto your new high-density sheet and cut with a utility knife. For fabric, add 2-3 inches extra around the edges for stapling.
Address variations: Vintage bikes might have riveted seats, requiring a drill for removal, while carbon fiber seats need extra care to avoid cracks—use padded clamps if clamping the bike.
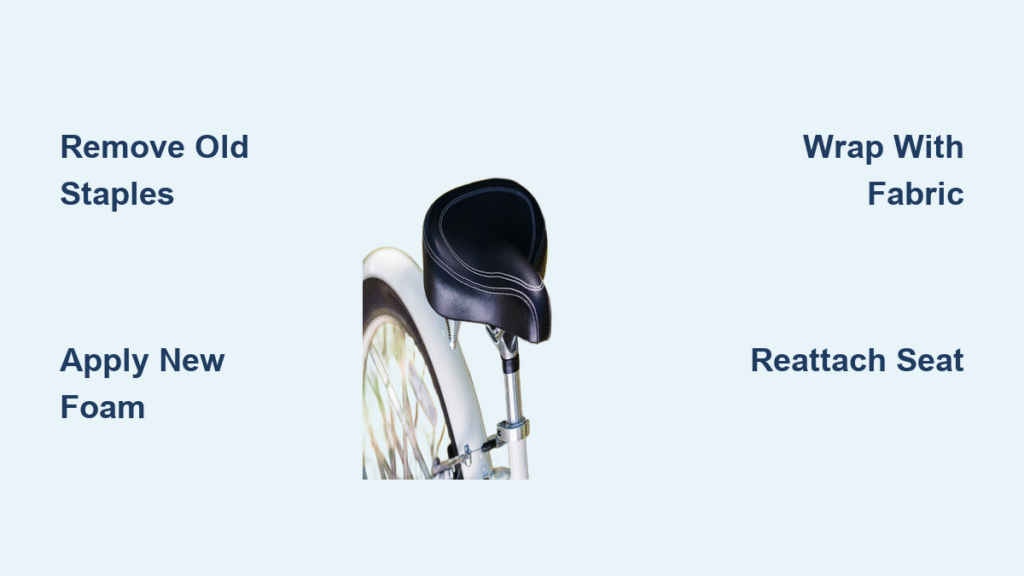
Step-by-Step Reupholstering Process

Reupholstering a bike seat breaks down into logical phases: disassembly (already covered), padding application, fabric covering, and finishing. We’ll use simple techniques suitable for beginners, with options for advanced customizations like adding gel inserts for extra comfort. Follow these in order for best results.
Phase 1: Applying New Foam Padding
This step restores cushioning, which is crucial for long rides. It takes about 30-45 minutes.
- Cut the foam to fit: Lay the foam over the seat base and trim to match, leaving a slight overhang (1/2 inch) on all sides.
- Apply adhesive: Spray contact cement evenly on the base and foam back. Let it get tacky (5 minutes) per product instructions.
- Press and secure: Align the foam carefully and press down firmly, starting from the center to avoid bubbles. Use a roller or your hands to smooth it out.
- Trim excess: Once dry (10-15 minutes), cut away overhang with scissors.
Tip: For a firmer ride, use thinner foam; for plush comfort, layer two sheets. If your seat has a plastic shell, ensure the foam doesn’t bunch up in curves.
Phase 2: Covering with New Upholstery Fabric
Now, wrap it like a gift—tight and even. This phase takes 45-60 minutes and is where precision matters to avoid wrinkles.
- Prepare the fabric: Cut a piece large enough to cover the foam plus 3 inches on each side. Test-fit it over the padded seat.
- Position and staple the front: Drape the fabric over the top, pulling it taut. Staple the front edge first (3-5 staples), then flip the seat and pull from the back, stapling in the middle.
- Work the sides: Pull fabric tight on one side, staple every 1/2 inch, then do the opposite side. Alternate to keep tension even— this prevents puckering.
- Finish the corners: Fold excess fabric like wrapping a package (miter folds) and staple securely. Trim any loose threads.
Important: Use a staple gun on low pressure to avoid piercing through the base. For leatherette, heat it slightly with a hairdryer for better stretch.
Phase 3: Reassembly and Finishing Touches
Wrap up in 20-30 minutes to get back on the road quickly.
- Check for imperfections: Tug on the fabric to ensure it’s smooth; remove and restaple if needed.
- Reattach rails or hardware: If your seat has removable parts, screw them back on using the original hardware.
- Reinforce seams: Apply seam sealer or extra staples along edges for weatherproofing.
- Remount the seat: Slide the rails into the bike’s post and tighten the clamp to your preferred height.
For complications like a split base, use epoxy glue to mend before padding. Test the tension by sitting on it— it should feel firm yet supportive.
Post-Completion Testing and Troubleshooting
Once done, test your reupholstered bike seat immediately to catch issues early. Take a short 5-10 minute ride to check for slippage or discomfort. Adjust height if needed, and inspect staples for loosening after the first outing.
If problems arise:
– Wrinkles or loose fabric: Restaple with more tension; reheat and stretch vinyl if it’s still pliable.
– Foam shifting: Add more adhesive or use double-sided tape for reinforcement.
– Staples popping out: This happens on rough terrain—switch to longer staples or add a fabric underlay.
– Uncomfortable feel: Sand down high spots or add a thin gel pad underneath.
Monitor for the first week; reupholstering typically holds up well if done right, but riding on wet roads? Dry the seat promptly to prevent mold.
Pro Tips for Successful Bike Seat Reupholstering
Go beyond the basics with these expert insights to make your project shine and last longer:
– Choose the right fabric color: Opt for black or neutral tones to hide dirt, but add reflective strips for night visibility.
– Avoid common mistakes: Don’t skimp on foam quality—cheap stuff compresses quickly. Also, never staple through foam; it weakens the structure.
– Optimize for your ride style: Mountain bikers should use thicker, puncture-resistant vinyl; road cyclists can go for sleeker, breathable mesh underlays.
– Maintenance hacks: Clean with mild soap monthly and apply leather conditioner quarterly to prevent cracking.
– Customization ideas: Embed LED lights or personal embroidery during wrapping for a unique touch.
– Time-saving trick: Pre-cut templates from cardboard based on your old seat for repeat projects on multiple bikes.
– Eco-friendly option: Use recycled vinyl or natural cork fabric to make your reupholstering sustainable.
These tips can extend your seat’s life by 2-3 years, turning a simple fix into a pro-level upgrade.
When to Seek Professional Help
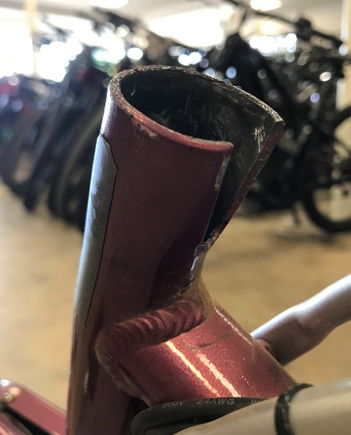
While DIY reupholstering a bike seat is empowering, some situations call for experts. Signs include: a severely damaged base (e.g., bent metal from a crash), exotic materials like carbon fiber that require specialized tools, or if you’re short on time and want a custom design.
Look for a reputable bike shop or upholstery specialist with experience in cycling gear—check reviews on Yelp or BikeForums.net for providers offering “saddle reupholstery services.” Expect costs of $50-150, depending on materials and complexity (e.g., $75 for a basic vinyl job). Factor in warranties: Pros often guarantee 1-year coverage against defects, unlike DIY where it’s on you.
If your bike is under warranty, consult the manufacturer first—tampering might void it, but many (like Trek or Specialized) approve simple reupholstering.
FAQ
Q: How long does reupholstering a bike seat take for beginners?
A: For first-timers, expect 2-4 hours total, including prep and drying time. Experienced folks can do it in under 2 hours. Break it into sessions if needed, as adhesive needs 10-15 minutes to set between steps.
Q: Can I reupholster any type of bike seat?
A: Most standard seats (road, hybrid, mountain) are straightforward, but suspension or Brooks leather saddles may need model-specific adjustments. Avoid gel-filled seats unless you’re comfortable disassembling internals—opt for pros there.
Q: What if I don’t have a staple gun?
A: Use heavy-duty thread and a sewing awl for a stitched alternative, though it’s less durable for outdoor use. Or, borrow one from a friend; it’s a worthwhile investment for multiple projects.
Q: Is reupholstering a bike seat cheaper than buying new?
A: Absolutely—DIY costs $20-50 versus $50-200 for a new seat. It also lets you customize for better fit, making it a smart long-term save.
Q: How do I handle a bike seat with a plastic shell?
A: Sand the shell lightly for adhesion, then proceed as usual. Use clips to hold fabric in place while stapling to avoid slipping on smooth surfaces.
Q: What fabric is best for wet climates?
A: Marine-grade vinyl or Gore-Tex equivalents resist water and mildew. Avoid cotton, as it absorbs moisture and degrades quickly.
Q: Can kids’ bike seats be reupholstered the same way?
A: Yes, but use softer foam and brighter fabrics for visibility. Scale down materials proportionally—the process is identical but faster for smaller seats.
Alternative Solutions to Reupholstering
If full reupholstering feels overwhelming, consider these options when a quick refresh won’t cut it:
| Solution | Pros | Cons | Best For |
|---|---|---|---|
| Seat Cover (Slip-On) | Easy install (5 minutes); removable for washing; affordable ($10-20) | Less durable; may shift during rides; no padding upgrade | Temporary fixes or casual riders |
| Professional Saddle Replacement | Custom fit; high-quality materials; warranty included | Expensive ($100+); downtime for shipping | High-end bikes or frequent commuters |
| Foam-Only Refresh | Improves comfort without fabric change; quick (30 minutes) | Doesn’t fix aesthetic issues; old cover may tear | Budget-conscious users with intact upholstery |
| DIY Paint Job | Revives color cheaply ($5); no disassembly | Not weatherproof; fades fast; no comfort boost | Cosmetic updates on metal/plastic bases |
Compare based on your needs—a cover is great for testing before committing to reupholstering.
Enjoy Your Revived Bike Seat
With this guide, you’ve got all the tools and steps to successfully reupholster your bike seat and get back to smooth, comfortable rides:
– Essential materials and safe prep work
– Detailed phases from padding to finishing
– Testing tips and pro-level advice
Following these instructions ensures a professional result that boosts your bike’s performance and your riding enjoyment. Don’t wait—grab your supplies and transform that saggy seat today for endless adventures ahead.
Have you reupholstered a bike seat before? Share your tips or challenges in the comments below to inspire other cyclists! If this helped, bookmark it for your next project.


