
If you’ve been pedaling away on your ProForm exercise bike and suddenly feel discomfort in your knees, back, or hips, it might be time for a ProForm bike seat adjustment. This common issue can turn your workouts from enjoyable to painful, but the good news is that a simple seat tweak can provide quick relief and improve your overall performance. Whether you’re dealing with a model like the ProForm Tour de France or the Carbon T10, adjusting the seat height and position is a straightforward fix that takes just 10-15 minutes and can prevent injuries like strains or imbalances.
In this comprehensive guide, we’ll go beyond the basics to cover everything you need to know about ProForm bike seat adjustment. You’ll learn the tools required, step-by-step instructions tailored to different ProForm models, safety tips to avoid mishaps, and advanced troubleshooting for stubborn issues. By the end, you’ll have the confidence to customize your bike for optimal comfort and efficiency, ensuring every ride feels like it was made just for you.
Why Proper Seat Adjustment Matters for Your ProForm Bike
Before diving into the how-to, it’s essential to understand why getting your ProForm bike seat adjustment right can transform your workout experience. An improperly adjusted seat can lead to poor posture, reduced power output, and even long-term musculoskeletal problems. According to fitness experts from the American Council on Exercise (ACE), the ideal seat height should allow for a slight bend in your knee at the bottom of the pedal stroke—typically around 25-35 degrees—to maximize efficiency and minimize joint stress.
For ProForm bikes, which often feature adjustable seats on upright or recumbent models, correct positioning also enhances biomechanics. A seat that’s too low forces your hips to rock side-to-side, straining your lower back, while one that’s too high can cause your knees to hyperextend, leading to pain. Proper adjustment not only boosts comfort but can increase your pedaling cadence by up to 10-15%, making your sessions more effective. We’ll cover how to identify if your current setup needs tweaking, so you can spot issues early.
Tools and Materials Needed for ProForm Bike Seat Adjustment

Adjusting the seat on your ProForm bike doesn’t require a full toolkit, but having the right items on hand ensures a smooth process. Most ProForm models, like the ProForm Studio Bike Pro or the iFit-enabled hybrids, use simple mechanisms such as quick-release levers or bolted posts, so you can often complete the adjustment with household tools.
Here’s a breakdown of what you’ll need:
| Item | Quantity | Specifications |
|---|---|---|
| Allen wrench set | 1 set | Sizes 4mm to 6mm (common for ProForm seat clamps; check your model’s manual for exact size) |
| Adjustable wrench or socket set | 1 | For loosening bolts on older models; 13-15mm heads recommended |
| Measuring tape or ruler | 1 | For precise height measurements (at least 12 inches long) |
| Bike stand or sturdy stool | 1 | Optional, for stability while working; helps if you’re adjusting a recumbent model |
| Lubricant spray (e.g., WD-40) | 1 can | Silicone-based to prevent rust on adjustment mechanisms |
| Owner’s manual | 1 | Download from ProForm’s website if lost; specific to your model for diagrams |
Important: Always unplug your ProForm bike from the power source before starting any adjustments to avoid accidental activation of electronic features. This simple step can prevent injuries from moving parts.
Preparation Steps and Safety Considerations
Proper preparation is key to a successful ProForm bike seat adjustment, especially since these bikes can weigh 50-100 pounds and involve moving parts. Start by placing your bike on a flat, stable surface like a garage floor or workout mat to avoid tipping. If your model has pedals attached, remove them temporarily using the Allen wrench to access the seat post more easily—this takes about 2-3 minutes and reduces wobble during adjustments.
Safety first: Wear gloves to protect your hands from sharp edges on the seat post, and ensure the area is well-lit. For recumbent ProForm bikes like the Comfort Series, adjust in a seated position to mimic real use, but never lean on the bike while loosening bolts, as it could cause it to shift unexpectedly. Warning: If your bike is under warranty, note that DIY adjustments typically don’t void it, but excessive force could damage components—refer to ProForm’s support site for model-specific guidelines.
Assess your current fit by sitting on the bike and pedaling slowly (without resistance). Check for signs like knee pain, hip rocking, or forward lean. Measure your inseam (from floor to crotch) beforehand; a general rule is seat height equals inseam multiplied by 0.883 for road-like positioning on upright ProForm models. This prep phase should take 5-10 minutes and sets you up for accurate adjustments.
Step-by-Step ProForm Bike Seat Adjustment Process
Now, let’s get to the core of this guide: the detailed ProForm bike seat adjustment process. We’ll break it into phases for clarity, adapting slightly for upright (e.g., ProForm Tour de France CBC) versus recumbent models (e.g., ProForm 935E). These steps are based on ProForm’s official assembly instructions and user feedback from fitness forums. Expect the full process to take 15-30 minutes, depending on your model’s complexity.
Phase 1: Accessing and Loosening the Seat Mechanism
Begin by locating the seat adjustment points. On most ProForm upright bikes, the seat post slides into a vertical tube with a quick-release lever or clamp. For recumbents, the seat often slides horizontally on rails.
-
Locate the adjustment lever: Flip the quick-release lever (if present) to the open position—it’s usually on the side of the seat post frame. If your model uses bolts (common on budget ProForm hybrids), insert the appropriate Allen wrench into the clamp bolts.
-
Loosen the mechanism: Turn the bolts counterclockwise 2-3 full turns to create slack, or fully open the lever. Apply a light spray of lubricant if it’s stiff—this prevents stripping. Pro Tip: For models like the ProForm Carbon Hiit H10, check for a pop-pin that needs to be pulled out first.
-
Remove the seat if needed: Gently lift the seat post out of the frame. Wipe down the post and tube with a clean cloth to remove dust, which can cause binding.
This phase ensures safe access and should take about 5 minutes. If the post doesn’t budge, don’t force it—apply more lubricant and wait 2 minutes.
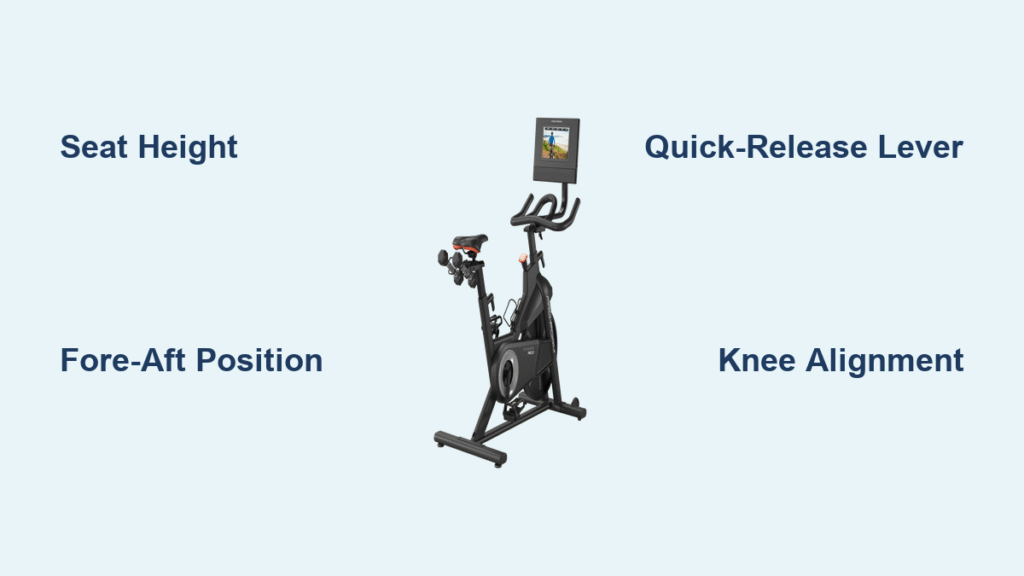
Phase 2: Adjusting Seat Height and Fore-Aft Position
Height is the most critical aspect of ProForm bike seat adjustment, as it affects your leg extension. Fore-aft (how far forward or back the seat is) fine-tunes knee alignment.
Adjusting Height for Upright Models
-
Measure your ideal height: Stand on the pedals with your heel on the pedal at its lowest point—your leg should be straight. Alternatively, use the inseam formula mentioned earlier.
-
Slide the post: Insert the post back into the frame and raise or lower it to match your measurement. Mark the post with tape for reference.
-
Secure it: Close the quick-release lever firmly or tighten bolts clockwise to 10-15 Nm (use a torque wrench if available; otherwise, snug but not overtight). Test by shaking the seat—it shouldn’t wobble.
For recumbent models, height adjustment is less common, but if adjustable, follow similar steps on the seatback.
Adjusting Fore-Aft Position
-
Sit and check knee alignment: Mount the bike, place the ball of your foot on the pedal, and pedal slowly. Your forward knee should form a 30-degree angle from vertical when the crank is at 3 o’clock.
-
Loosen the seat sliders: Use the wrench to loosen the bolts under the seat (usually 2-4 bolts). Slide the seat forward or back by 1-2 cm increments.
-
Tighten and recheck: Secure the bolts and pedal again. Repeat until your knee tracks over the pedal spindle without inward collapse.
This phase typically takes 10 minutes. Variations: On iFit-enabled ProForm bikes, some seats have digital presets—use the console to auto-adjust if available, but manual verification is still recommended.
Phase 3: Fine-Tuning Tilt and Handlebar Alignment
While not always part of seat adjustment, tilting the seat slightly (1-2 degrees nose-up or down) can enhance comfort, especially for longer rides.
-
Access tilt knobs: Look for adjustment knobs or bolts at the seat base. Loosen them counterclockwise.
-
Tilt as needed: For most users, a level seat works best, but if you feel pressure on your sit bones, tilt nose-down slightly.
-
Realign with handlebars: Ensure the seat-to-handlebar distance is about one arm’s length for upright models to prevent reaching strain.
Tighten everything and give it a shake test. This final tweak takes 5 minutes and completes the adjustment.
Post-Completion Testing and Troubleshooting

After your ProForm bike seat adjustment, test the setup with a 10-minute low-resistance ride. Monitor for pain-free pedaling: Your hips shouldn’t rock, and you should feel power through your quads without knee lockout. Use a mirror or record a video to check form.
If issues persist:
– Seat wobbles: Retighten bolts or replace worn clamps (ProForm parts available online for $10-20).
– Post slips: Clean and lubricate; if damaged, contact ProForm support for a replacement post.
– Uneven feel on recumbents: Adjust the backrest angle simultaneously.
– Electronic models glitch: Reset the console by unplugging for 30 seconds.
Common complications include rusty mechanisms on older bikes—address with lubricant—or model-specific quirks, like the ProForm 290 SPX’s hidden clamps. If adjustments don’t resolve discomfort after two attempts, it might indicate a frame issue.
Pro Tips for Optimal ProForm Bike Seat Adjustment
To elevate your ProForm bike seat adjustment from good to great, consider these expert insights drawn from cycling coaches and ProForm user communities:
– Personalize for your body type: Taller riders (over 6 feet) may need extended posts; shorter users benefit from fore-aft tweaks to avoid cramping.
– Incorporate flexibility: Adjust seasonally—if you’re in workout clothes versus cycling shorts, reposition slightly for padding differences.
– Avoid over-tightening: Bolts should be firm but not stripped; overtightening can crack aluminum frames.
– Track changes digitally: Use the iFit app (if your model supports it) to log adjustments and correlate with workout data for ongoing optimization.
– Combine with pedal adjustments: Ensure cleats or straps are snug to complement seat changes.
– Common mistake to avoid: Ignoring saddle type—ProForm’s gel seats may need less height than hard ones to account for compression.
– Maintenance rec: Check adjustments monthly or after moving the bike, as vibrations can loosen them.
These tips can extend your bike’s usability and prevent wear, saving you from costly repairs.
When to Seek Professional Help for ProForm Bike Adjustments
While most ProForm bike seat adjustment tasks are DIY-friendly, some signs warrant professional intervention. If the seat post is bent, the frame is damaged from a fall, or electronic auto-adjust features malfunction (e.g., on Smart Stride models), don’t risk further issues—contact a certified technician.
Look for service providers through ProForm’s authorized network (find via their website) or local bike shops experienced with exercise equipment. They should have ProForm-specific training and tools like torque calibrators. Expect costs of $50-150 for a full tune-up, depending on location and complexity. Warranty-wise, adjustments under the standard 1-3 year coverage are fine if you follow guidelines, but modifications like custom seats may void it—always check your manual.
FAQ
Q: How do I know if my ProForm bike seat is too high or too low?
A: A seat that’s too high causes your hips to rock side-to-side and your knees to hyperextend at the bottom of the pedal stroke. If it’s too low, you’ll feel excessive quad strain and can’t fully extend your legs. Test by pedaling: Aim for a 25-35 degree knee bend at the lowest point. For ProForm models, this ensures efficient power transfer without injury.
Q: Can I adjust the seat on a recumbent ProForm bike the same way as an upright one?
A: Not exactly—recumbents focus more on fore-aft and recline adjustments rather than height. Slide the seat on rails for leg extension, ensuring a 90-110 degree hip angle. Consult your model’s manual, as mechanisms differ; it usually takes under 10 minutes with basic tools.
Q: What if my ProForm bike’s quick-release lever is broken?
A: Replace it with a ProForm-compatible part (around $15 online). In the meantime, use an Allen wrench to manually loosen the clamp bolts. If it’s a warranty issue, reach out to ProForm support for a free swap.
Q: How often should I perform a ProForm bike seat adjustment?
A: Check monthly or after 50-100 hours of use, especially if you notice discomfort or after bike transport. For heavy users, bi-weekly tweaks keep everything aligned as your fitness evolves.
Q: Does seat adjustment affect the bike’s warranty?
A: Standard adjustments don’t, but extreme modifications (e.g., drilling new holes) might. ProForm encourages user adjustments for fit—review your warranty terms or call their helpline at 1-888-533-1333 for confirmation.
Q: Are there apps to help with ProForm bike seat adjustment?
A: Yes, the iFit app integrates with compatible models for guided adjustments via video tutorials. Third-party apps like BikeFit use your measurements for calculations, but always verify manually.
Q: What if adjustment doesn’t fix my knee pain?
A: It could be pedal position or resistance settings. Consult a physical therapist for biomechanical assessment, or try swapping to ProForm’s optional ergonomic seats.
Alternative Solutions for ProForm Bike Seat Comfort
If standard ProForm bike seat adjustment doesn’t fully resolve your issues, consider these alternatives. They might suit users with specific needs, like chronic back pain.
| Solution | Pros | Cons | Best For |
|---|---|---|---|
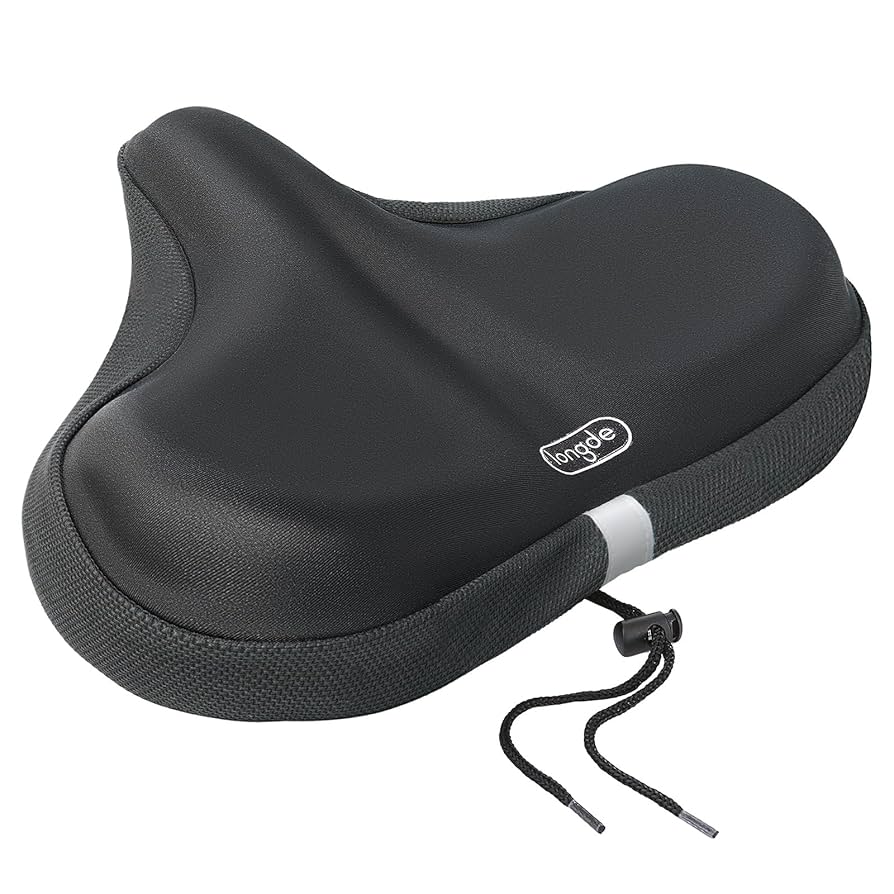
| Aftermarket gel seat cover | Adds cushioning without tools; quick install (under 5 minutes) | May shift during rides; not ideal for intense HIIT | Beginners or those with sensitive sit bones |
| Professional bike fit service | Customized to your body metrics; includes video analysis | Costs $100-200; requires scheduling | Serious athletes or persistent pain sufferers |
| Upgrading to a ProForm-compatible saddle (e.g., Selle Italia) | Better ergonomics and breathability; long-term comfort | $50-150 price; installation time (10 minutes) | Long-ride enthusiasts wanting premium feel |
| Recumbent conversion kit (for upright models) | Shifts weight to back; easier adjustments | Not for all ProForm frames; $200+ investment | Users with lower back issues preferring support |
Compare based on your workout style—start with a cover for a low-commitment test.
Enjoy Your Optimized ProForm Bike Rides
With this guide, you’ve mastered ProForm bike seat adjustment and are ready to pedal pain-free:
– Essential tools and prep for safe starts
– Detailed phases for height, position, and tilt
– Testing methods and pro tips for longevity
– Alternatives and when to call in experts
Following these steps will not only boost your comfort but also enhance workout efficiency, helping you hit those fitness goals faster. Take action today—adjust your seat, hop on, and feel the difference in your very next ride.
Have you adjusted your ProForm bike seat successfully? Share your tips or challenges in the comments below to help fellow riders!


