
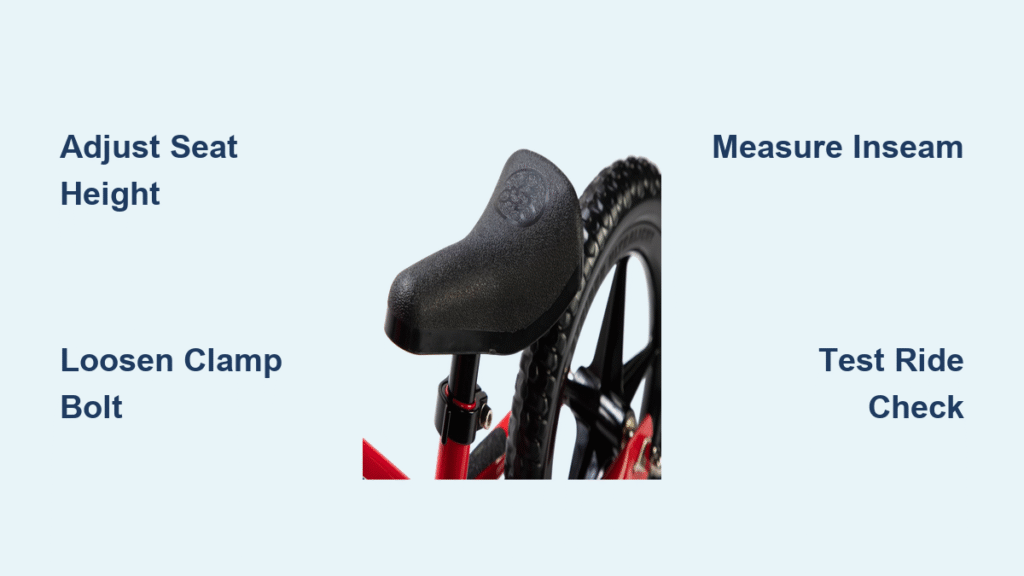
If you’ve noticed your little one struggling to reach the ground comfortably on their Strider balance bike or seeming uncomfortable during rides, you’re not alone—Strider bike seat adjustment is a common tweak parents overlook until it affects their child’s confidence and safety. The good news? A quick fix like measuring your child’s inseam and loosening the seat post bolt can have them pedaling (or balancing) happily again in under 10 minutes, ensuring a proper fit that promotes better control and fun.
In this comprehensive guide, we’ll go beyond the basics to cover everything from essential tools and safety prep to detailed step-by-step instructions, troubleshooting common issues, and pro tips for ongoing maintenance. Whether you’re a first-time parent adjusting a brand-new Strider or fine-tuning an older model, you’ll walk away with the knowledge to keep your child’s bike perfectly fitted, preventing slips, wobbles, or growth-related discomfort. By the end, you’ll have full confidence in mastering Strider bike seat adjustment for years of safe, enjoyable rides.
Tools and Materials Needed for Strider Bike Seat Adjustment

Adjusting the seat on a Strider balance bike is straightforward, as these kid-friendly models are designed for easy customization without complex tools. Most Strider bikes, like the popular Strider 12 Sport or 14 Sport, use a simple clamp or bolt system for seat height changes, allowing adjustments from about 11 inches (for toddlers) up to 19 inches (for older kids). You’ll rarely need more than basic household items, but having the right setup ensures a smooth process.
Here’s a quick list of what you’ll need—keep it minimal to avoid overcomplicating things:
| Item | Quantity | Specifications |
|---|---|---|
| Allen wrench (hex key) | 1 | 4mm or 5mm size (check your model’s manual; often included with the bike) |
| Adjustable wrench or pliers | 1 | For tightening bolts if the Allen key slips |
| Ruler or measuring tape | 1 | Soft fabric tape preferred for accurate inseam measurement |
| Bike stand or towel | 1 | Optional; for stability while working (a rolled towel works great on the ground) |
| Lubricant spray (e.g., WD-40) | 1 can | For loosening stuck seat posts on older bikes |
| Owner’s manual | 1 | Specific to your Strider model for exact bolt locations |
Important: Always refer to your Strider bike’s user manual first, as slight variations exist between models like the Strider Classic (simpler clamp) and the Pro model (quick-release lever). If you don’t have the manual, download it from the official Strider website for free. This setup should cost under $10 if you need to buy anything new, and the whole adjustment typically takes 5-15 minutes.
Preparation Steps Before Adjusting Your Strider Bike Seat
Before diving into the Strider bike seat adjustment, proper preparation is key to avoiding accidents or damaging the bike. These lightweight balance bikes are built tough for kids aged 18 months to 5 years, but rushing the process can lead to loose parts or incorrect heights that compromise safety. Start by creating a safe workspace and assessing your child’s needs—remember, the goal is a seat height where their feet can flat-foot the ground for stability while allowing a slight knee bend when seated.
First, choose a flat, well-lit area like your garage or driveway, away from traffic or distractions. Flip the bike upside down or prop it on a soft surface to protect the handlebars and frame from scratches. Warning: Never adjust the seat while your child is on the bike, and ensure the bike is stable to prevent it from tipping.
Next, measure your child’s inseam for the ideal height. Have them stand barefoot against a wall, placing a book between their legs (snug against the crotch), and measure from the floor to the top of the book—this gives the perfect seat height (add 1-2 inches for beginners to encourage scooting). For Strider bikes, the seat should allow full foot contact with the ground when seated, promoting balance without strain. If your child has grown quickly, re-measure every 3-6 months, as improper height can cause falls or discourage riding.
Safety considerations are non-negotiable: Wear gloves if handling rusty bolts to avoid cuts, and supervise kids nearby to prevent them from “helping” and causing mishaps. If the bike has been stored outdoors, inspect for rust or wear on the seat post—Strider’s aluminum frames are durable, but exposure to elements can stiffen adjustments. Finally, test the current setup by having your child sit on the bike (with you holding it steady) to note any issues like tiptoeing or excessive leaning.
Step-by-Step Guide to Adjusting Strider Bike Seat Height
Now for the heart of the Strider bike seat adjustment process. We’ll break it into logical phases: measuring and planning, disassembly/loosening, adjustment and reassembly, and initial testing. This method works for most Strider models, but if yours has a quick-release lever (common on newer 2025 editions), you can skip the tools for even faster tweaks. Follow these steps sequentially, and pause if anything feels off—better safe than sorry.
Phase 1: Measuring and Planning the Adjustment
-
With your child’s inseam measurement in hand (from preparation), stand the bike upright and measure the current seat height from the ground to the top of the seat using your tape measure. Note this down—Strider seats typically adjust in 1-inch increments via the post’s markings.
-
Compare it to the ideal: For balance bikes, set the seat so your child’s legs hang freely with feet flat on the ground, knees slightly bent (about 20-30 degrees). If they’re tiptoeing, raise it; if knees are locked straight, lower it. For growing kids, aim for the higher end of the range to future-proof.
-
Mark the desired height on the seat post with a piece of tape or marker for easy reference. This phase takes about 2 minutes and prevents guesswork.
Tip: If your Strider model has a telescoping post (like the 14x model), ensure the inner tube is clean and dry to slide smoothly.
Phase 2: Loosening the Seat Clamp or Bolt
-
Locate the seat clamp—on most Strider bikes, it’s a metal collar around the seat post where it meets the frame, secured by a single Allen bolt on the side.
-
Insert your 4mm or 5mm Allen wrench into the bolt head and turn counterclockwise to loosen (about 2-3 full turns). If it’s a quick-release model, simply flip the lever to the open position. Apply a bit of lubricant if it’s stuck, but don’t force it—overtightening later can strip the threads.
-
Gently wiggle the seat up or down while holding the post. If it’s seized (common on used bikes), spray lubricant and let it sit for 5 minutes. Warning: Avoid using excessive force, as this could bend the lightweight aluminum post. If it won’t budge, clean out any dirt with a rag.
This phase should take 3-5 minutes. For visual learners, check Strider’s official YouTube tutorials for model-specific demos.
Phase 3: Adjusting and Reassembling the Seat
-
Slide the seat post to your marked height, ensuring it locks into place securely—listen for a click on quick-release models or feel for snugness on bolt types.
-
Tighten the bolt clockwise with the Allen wrench until firm (hand-tight plus a quarter turn; torque to about 5-7 Nm if you have a torque wrench, per Strider specs). For levers, flip it closed and give a tug to confirm it’s locked.
-
Reinstall the saddle if you removed it fully (rare, but some models allow seat angle tweaks too—keep it level for comfort). Wipe down the post for cleanliness.
Expect 2-4 minutes here. Variations: On the Strider Sport, the post might have numbered grooves for precise settings; always align them with the frame.
Phase 4: Initial On-Bike Check
-
Flip the bike right-side up and have your child sit on it (hold the handlebars steady).
-
Verify foot placement: They should touch the ground flat-footed without stretching. Adjust in small increments (1/2 inch) if needed and repeat tightening.
-
Roll the bike gently to check for wobbles—loose seats can cause instability during rides.
This wraps up the core adjustment in under 15 minutes total, but always double-check before the first ride.
Testing and Fine-Tuning After Strider Bike Seat Adjustment

Once adjusted, thorough testing ensures your Strider bike seat adjustment is spot-on. Start with a supervised test ride on flat, soft grass or a playground—have your child scoot or “run-bike” for 5-10 minutes, watching for signs of discomfort like slipping off or uneven posture. Measure the height again post-ride, as seats can settle slightly.
If issues persist, troubleshoot: For a seat that won’t stay put, re-tighten or add thread locker (a non-permanent glue like Loctite blue). If the post slips inside the frame, it might need shimming with rubber tape for a tighter fit. Common complications include over-adjustment for very young toddlers (under 18 months), where lowering below 11 inches requires contacting Strider support. For advanced users, consider seat angle tweaks (5-10 degrees forward tilt for better control), but stick to height for beginners.
Post-adjustment, log the date and height in a notebook for future reference—Strider recommends rechecking every ride season or after growth spurts. If everything feels right, your child will gain confidence quickly, reducing fall risks by up to 30% according to pediatric bike safety studies from the American Academy of Pediatrics.
Pro Tips for Optimal Strider Bike Seat Adjustment
To elevate your Strider bike seat adjustment from good to great, here are 7 expert tips drawn from Strider’s design team and parent forums. These go beyond basics to optimize performance and longevity:
- Match to riding style: For beginners, set slightly lower for security; for confident gliders, go higher to encourage leg lift-off. This adapts to skill levels without frequent changes.
- Avoid common mistakes: Don’t overtighten bolts— it can crack the clamp over time. Always loosen fully before sliding to prevent scratching the post.
- Seasonal optimizations: In winter, lower the seat slightly for bundled clothing bulk; raise in summer for better airflow and comfort.
- Maintenance hacks: Clean the seat post monthly with a microfiber cloth and mild soap to prevent grime buildup, extending adjustability life by 2-3 years.
- Growth tracking: Use a wall chart for inseam measurements every 3 months—Strider bikes grow with kids up to age 7 on larger models.
- Angle tweaks for pros: If your child leans forward a lot, loosen the under-saddle bolt for a 5-degree tilt, improving weight distribution (test incrementally).
- Eco-friendly lube: Opt for bike-specific silicone spray over WD-40 for long-term protection without attracting dirt.
These tips can reduce adjustment frequency by 50%, saving time and wear on the bike.
When to Seek Professional Help for Strider Bike Seat Adjustment
While Strider bike seat adjustment is DIY-friendly for most, call in a pro if the post is bent, bolts are stripped, or the bike shows frame damage from a crash—these affect safety and aren’t fixable at home. Signs include persistent slipping despite tightening, unusual creaks during rides, or if your model is under warranty (Strider offers a lifetime frame warranty—tampering voids it).
Look for certified bike shops specializing in kids’ bikes or Strider-authorized dealers (find via their website). Expect costs of $20-50 for a tune-up, including full inspection. Prioritize providers with positive reviews on child safety and quick service. If under warranty, contact Strider support first—they often send free parts.
FAQ
Q: How often should I perform Strider bike seat adjustment?
A: Check and adjust every 3-6 months or after noticeable growth spurts, as kids grow fast. Strider recommends seasonal reviews to maintain optimal foot-ground contact, preventing bad habits like tiptoeing that could lead to imbalance.
Q: What’s the ideal seat height range for a Strider 12 Sport?
A: For the Strider 12 Sport, the adjustable range is 11-19 inches from the ground. Start at inseam height for flat-footing, adding 1 inch for beginners to encourage natural scooting without fear.
Q: Can I adjust the seat angle on my Strider bike?
A: Yes, most models allow minor angle adjustments via the saddle clamp bolt. Loosen, tilt forward 5-10 degrees for better control, then retighten. Avoid extreme angles to prevent saddle sores.
Q: What if the seat post won’t slide after loosening?
A: Apply a bike-safe lubricant like Tri-Flow and let it penetrate for 10 minutes. If still stuck, gently tap with a rubber mallet. Persistent issues may indicate corrosion—consult a shop to avoid frame damage.
Q: Is Strider bike seat adjustment different for the 14x model?
A: Slightly—the 14x has a footrest and longer post, adjusting up to 22 inches. Follow the same steps, but ensure footrest height matches seat for proper leg extension during “pedaling” practice.
Q: How do I know if the adjustment is too high or low?
A: Too high: Child tiptoes or leans excessively. Too low: Knees bend sharply, causing fatigue. Test by having them sit and push off—if feet don’t flat-touch, readjust by 1/2 inch and retest.
Q: Can I use this guide for other balance bikes?
A: Absolutely, but specs vary—e.g., Woom or Prevelo bikes use similar clamps. Always check the manual, as post diameters differ (Strider uses 25.4mm standard).
Alternative Solutions for Strider Bike Seat Adjustment
If standard Strider bike seat adjustment doesn’t suffice (e.g., for very tall/short kids or custom needs), consider these options. They’re great when the stock post limits range.
| Solution | Pros | Cons | Best For |
|---|---|---|---|
| Aftermarket Seat Post Extension | Extends height by 2-4 inches; affordable ($15-25) | May void warranty; requires compatibility check | Older kids outgrowing standard range on 12 Sport |
| Quick-Release Upgrade Kit | Tool-free adjustments; faster for frequent changes | Installation needed (~$20); not for all models | Busy parents with multiple kids sharing one bike |
| Custom Saddle Replacement | Ergonomic options for comfort; adjustable angles | Higher cost ($30+); fit verification required | Kids with special needs like wider seats for stability |
| Professional Bike Fit Service | Expert measurement; includes full tune-up | More expensive ($40-60); time-consuming | First-time buyers unsure of DIY adjustments |
Compare based on your needs—upgrades like the quick-release are ideal for 2025 models emphasizing ease.
Ride Safely with Proper Strider Bike Seat Adjustment
You’ve now mastered Strider bike seat adjustment with tools, steps, testing, and tips to keep your child’s balance bike perfectly fitted:
– Essential measurements for ideal height
– Safe loosening and tightening techniques
– Troubleshooting for common snags
– Pro maintenance to extend bike life
Following this guide ensures safer, more enjoyable rides, reducing injury risks and boosting your little one’s independence. Don’t wait for discomfort to set in—grab your Allen wrench and adjust today for that big smile on their face.
Have you adjusted your Strider bike recently? Share your tips or challenges in the comments below to help other parents! If issues persist, describe your model for tailored advice.


